
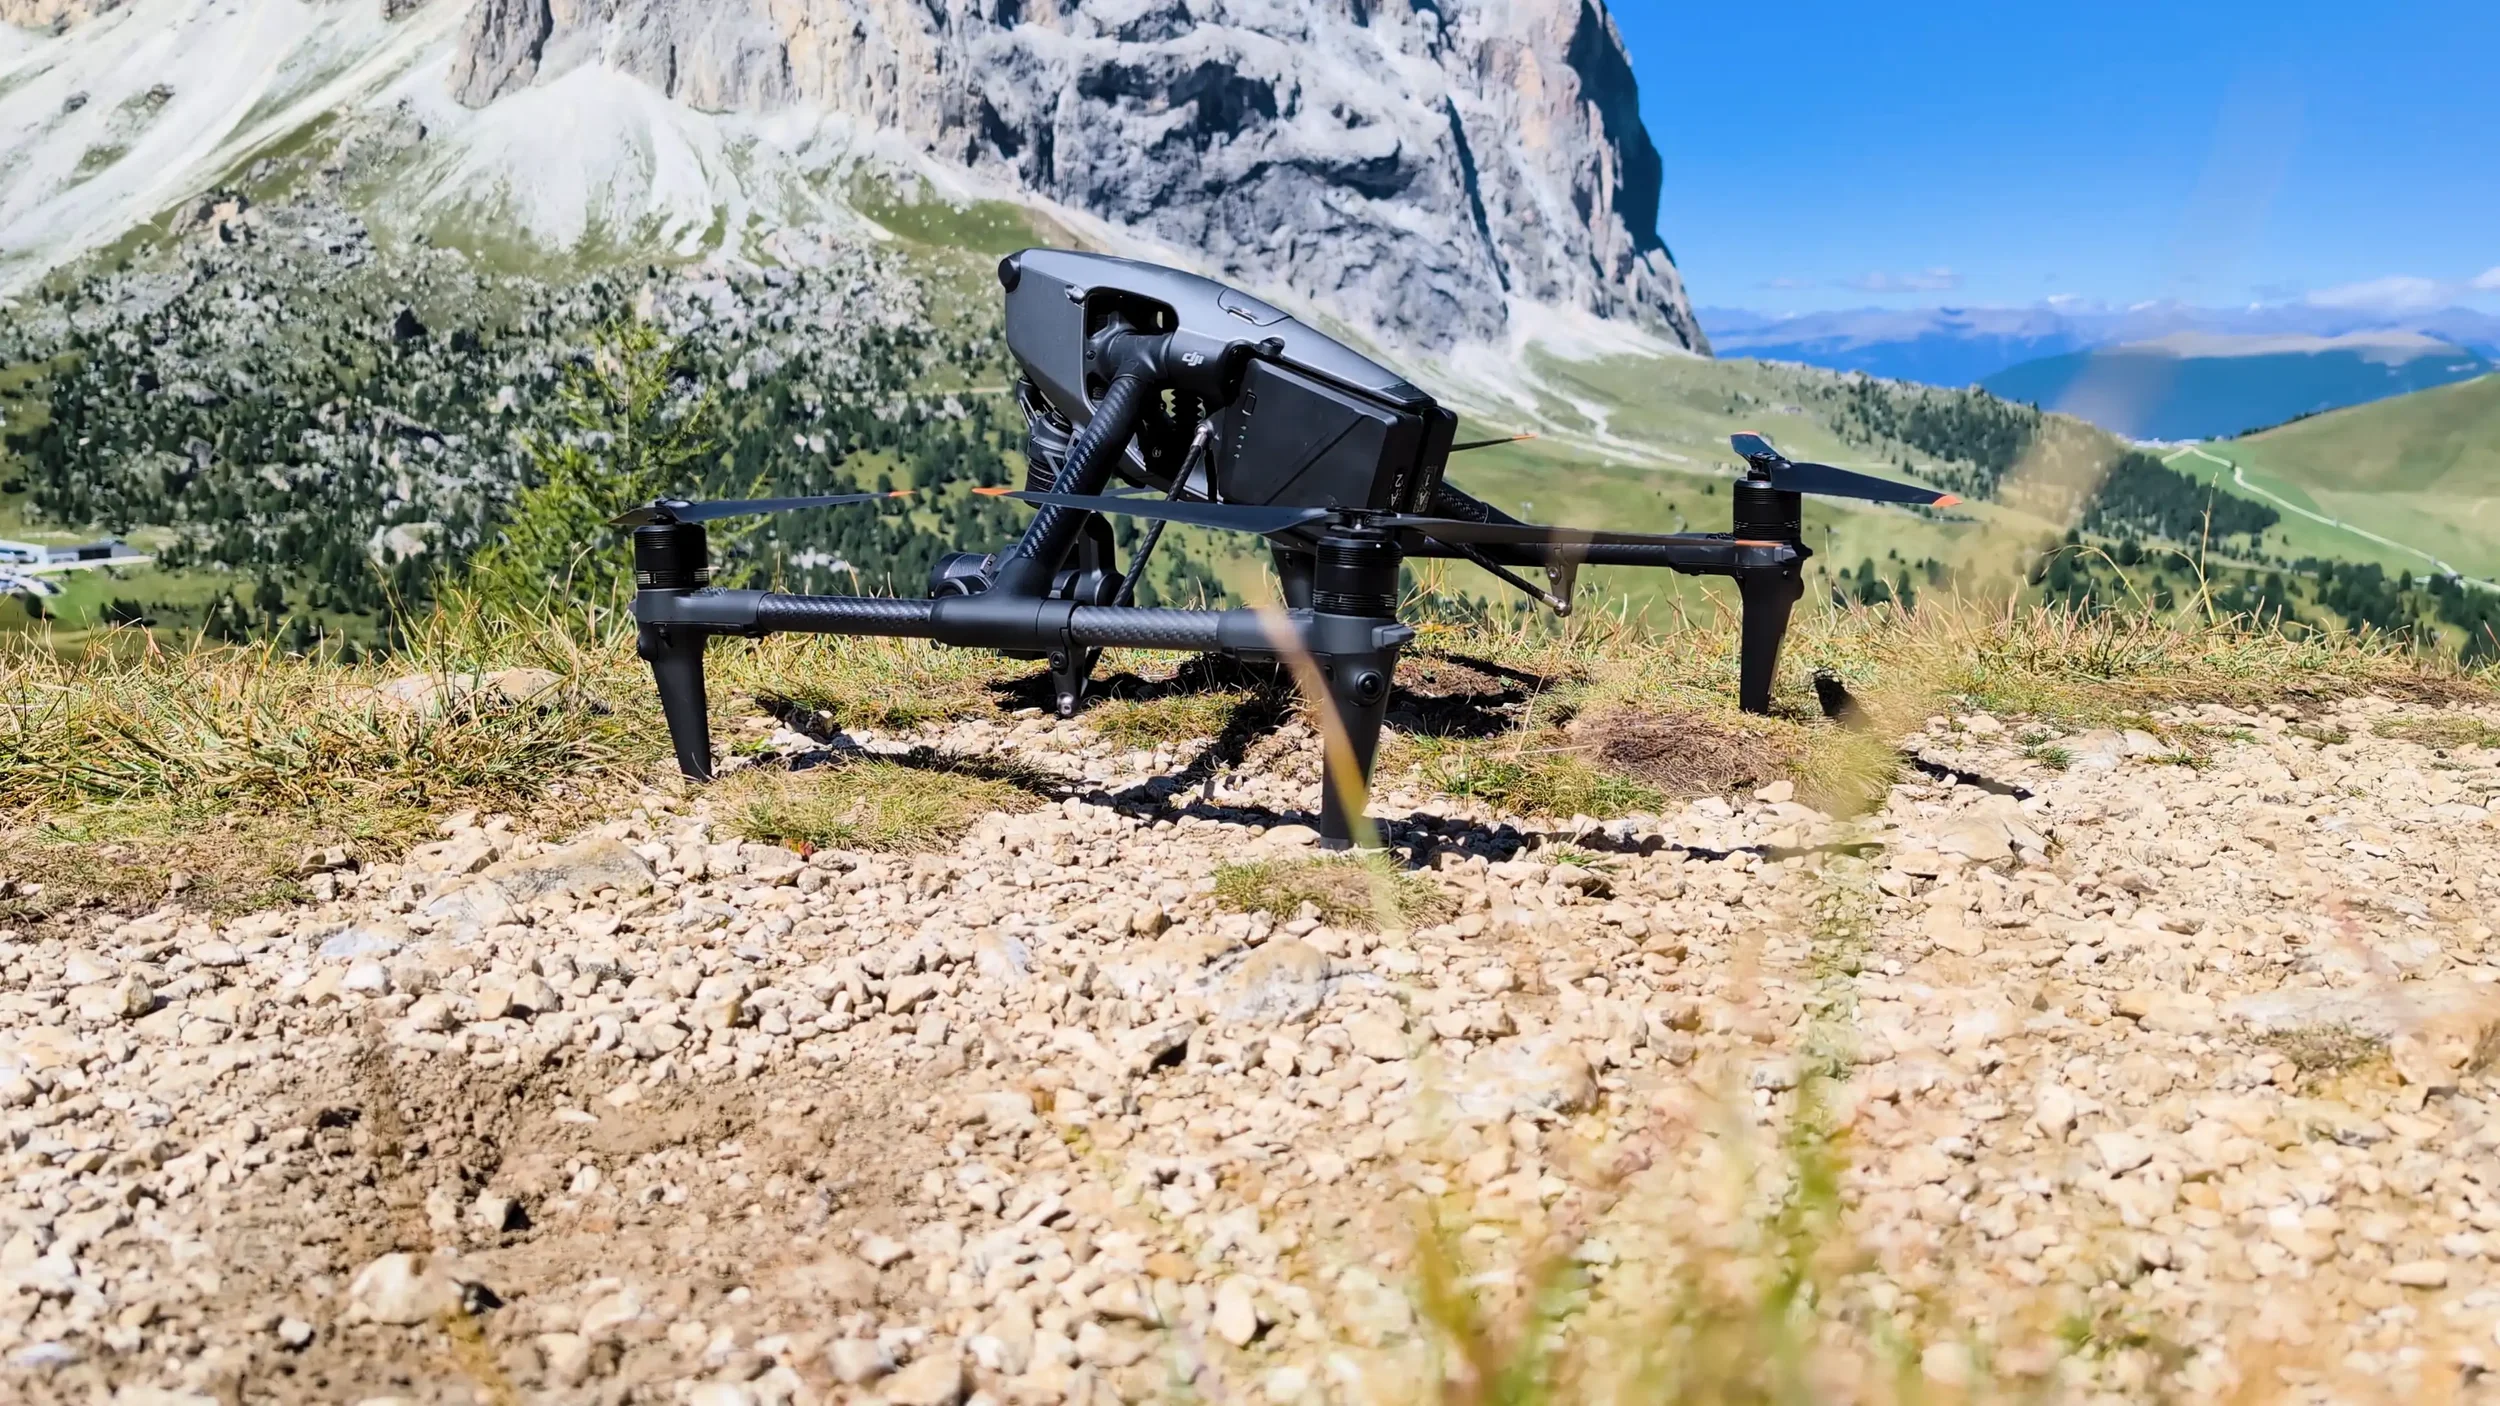
CASE STUDY
AERIAL Photogrammetry
Capturing at Mountain Scale
Large geological formations are among the most difficult natural elements to capture. Their scale demands aerial coverage, while steep terrain, accessibility, unstable weather, wind and limited flight time leave little room for mucking about.
In late 2025, we travelled to the Italian Dolomites to test whether a full-frame aerial workflow could produce the coverage and detail required for high-end environment production.
Contents of this study:
01 — Getting Into the Mountains
Equipment, batteries and logistics
02 — It’s Not All About the Pixels
Camera performance and caveats
03 — When Scale Becomes Scary
Flight planning and coverage
04 — Working Under Constraints
Regulations, weather and limited time
05 — Recovering an Imperfect Dataset
Reconstruction and repair
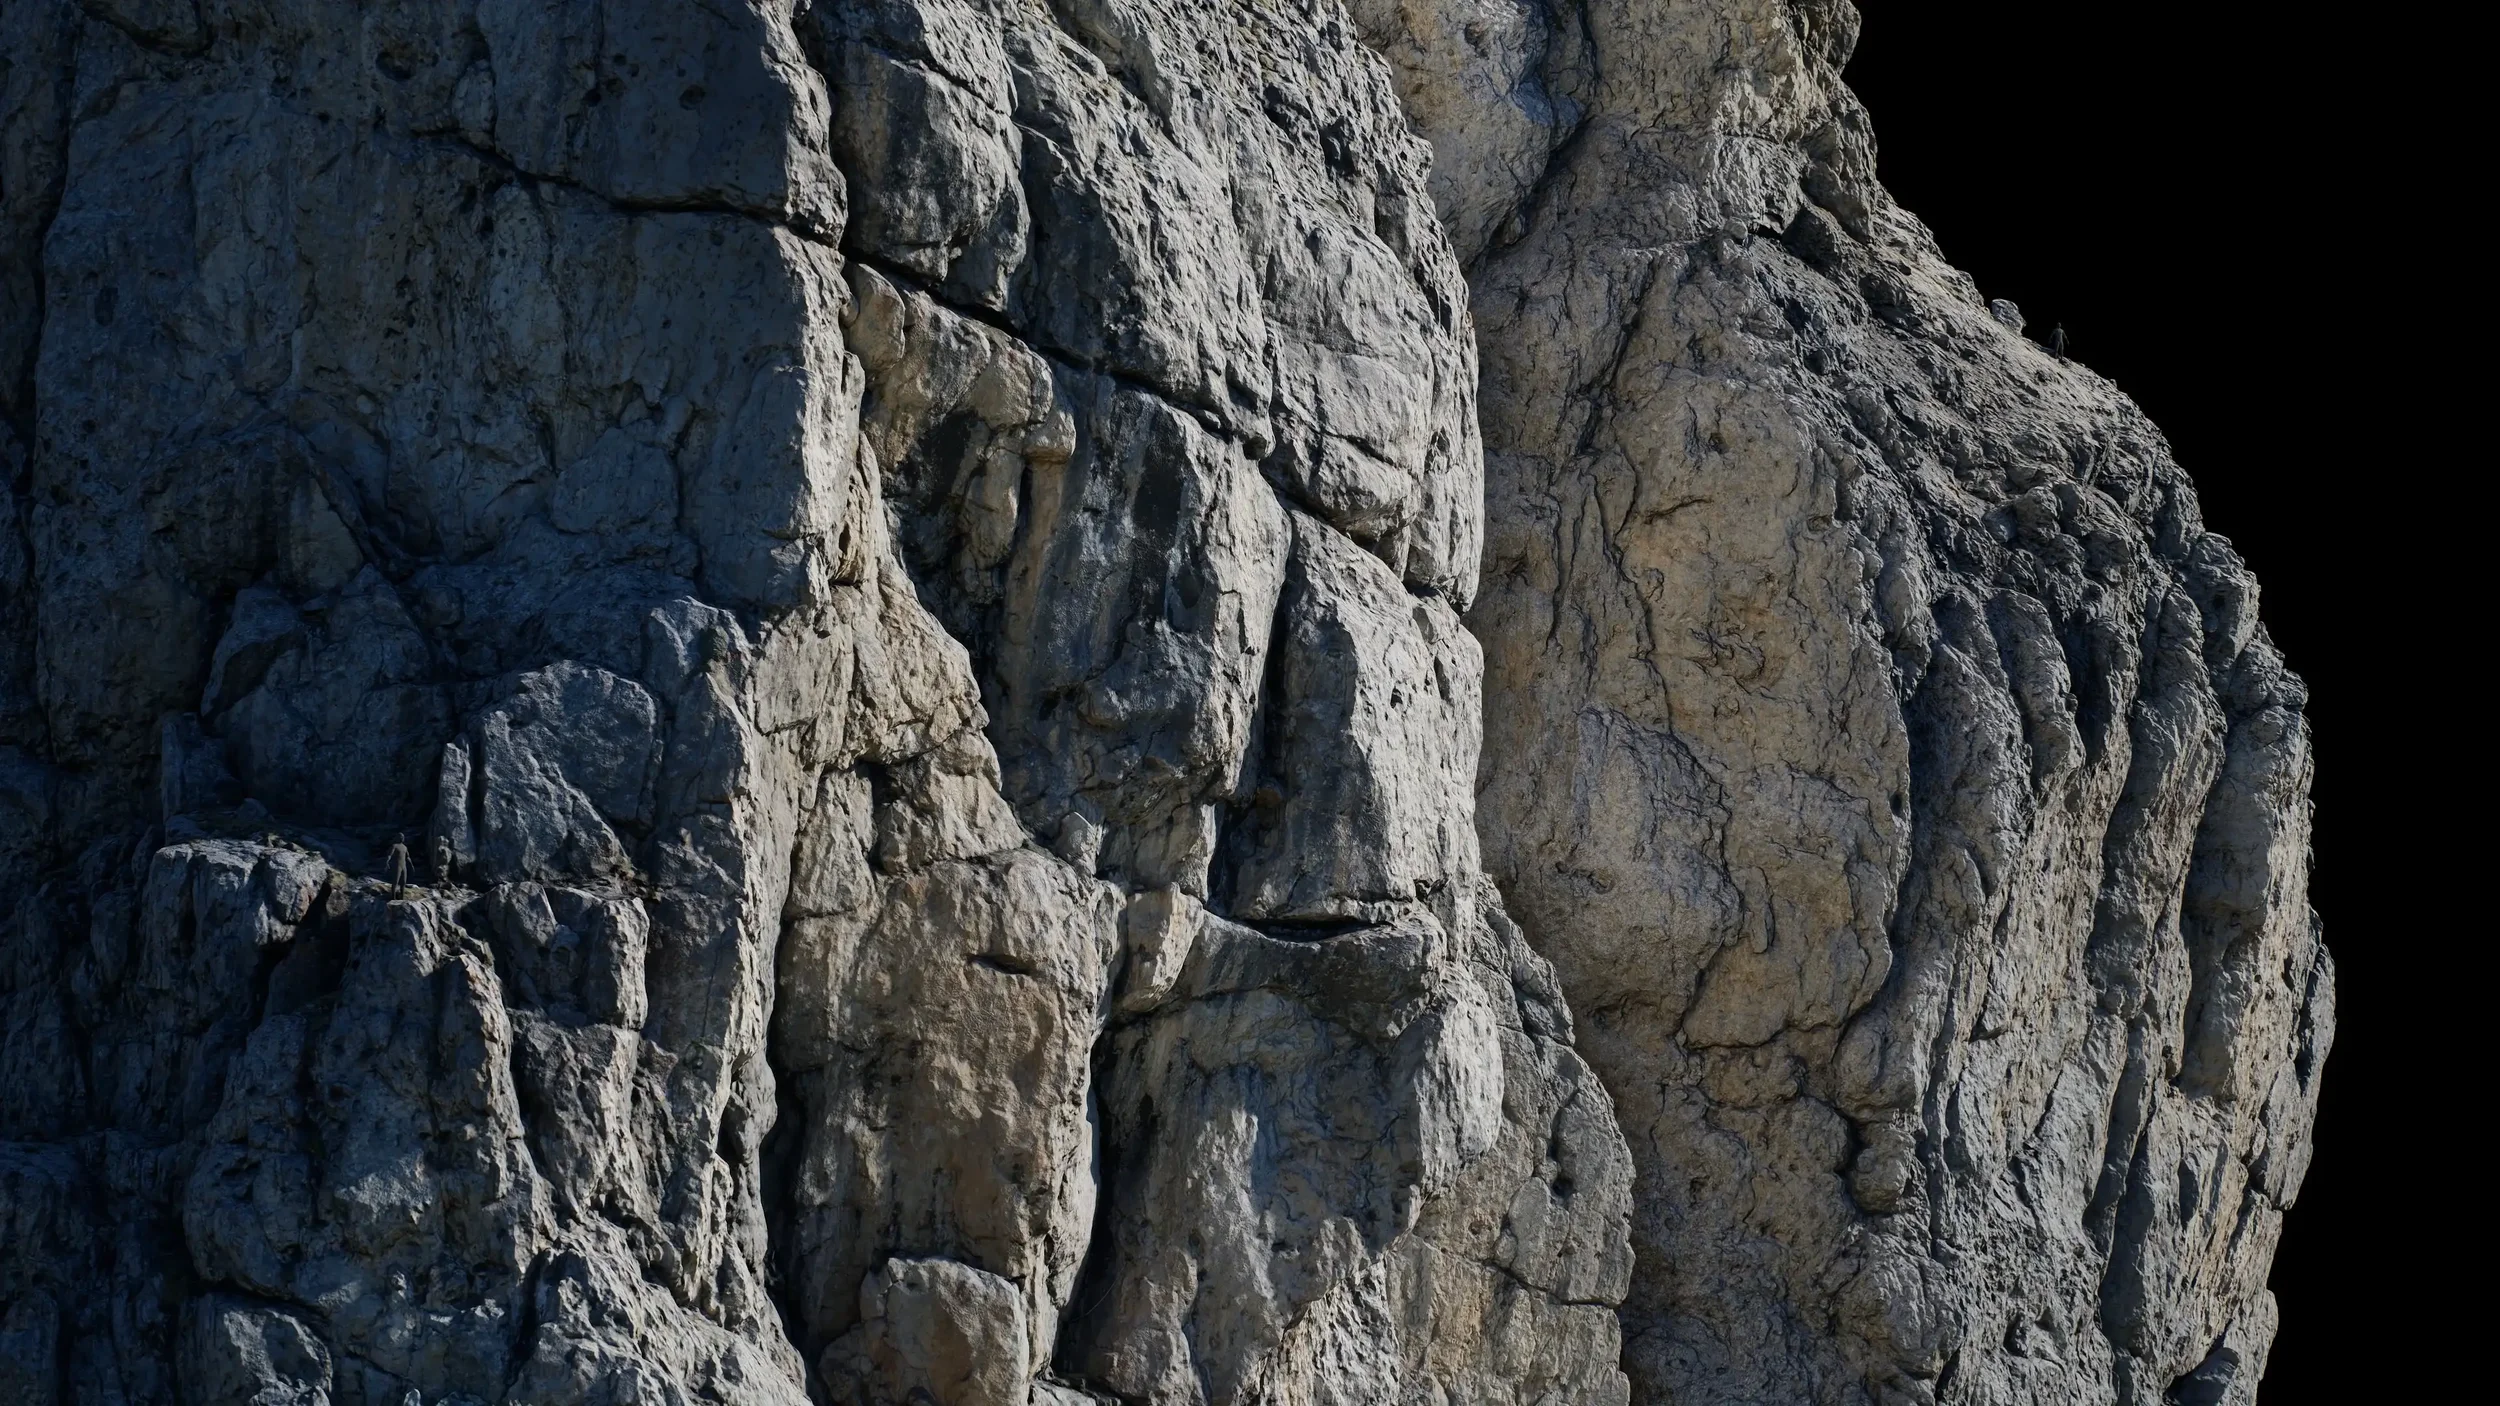
Rendered in Unreal Engine 5
The Result
Getting into the Mountains
One of the greatest challenges had little to do with flying. The size and weight of the equipment—combined with the verticality of the locations—led to moments of absolute exhaustion, and a few amusing ones.
01
Suffering from your own ambition
The core equipment included:
Two DJI Power 1000 stations — ~27 kg
DJI Inspire 3 and case — ~15 kg
Laptop, batteries and additional equipment — ~10 kg
That meant carrying more than 50 kg of equipment before accounting for the trolley, cables and other supplies.
Fortunately, we anticipated this and brought a hiking trolley, which made accessing the more remote locations considerably more manageable.
More batteries, please
Why would we bring 2× 1024wh power stations?
~15 min. flight time for every pair of batteries used at 2500m altitude
Massive objects → massive coverage → lots of time spent in the air
Remote, hard to get to locations and unstable weather → use time wisely
Use laptop to verify coverage on the spot → plugged in for faster alignment
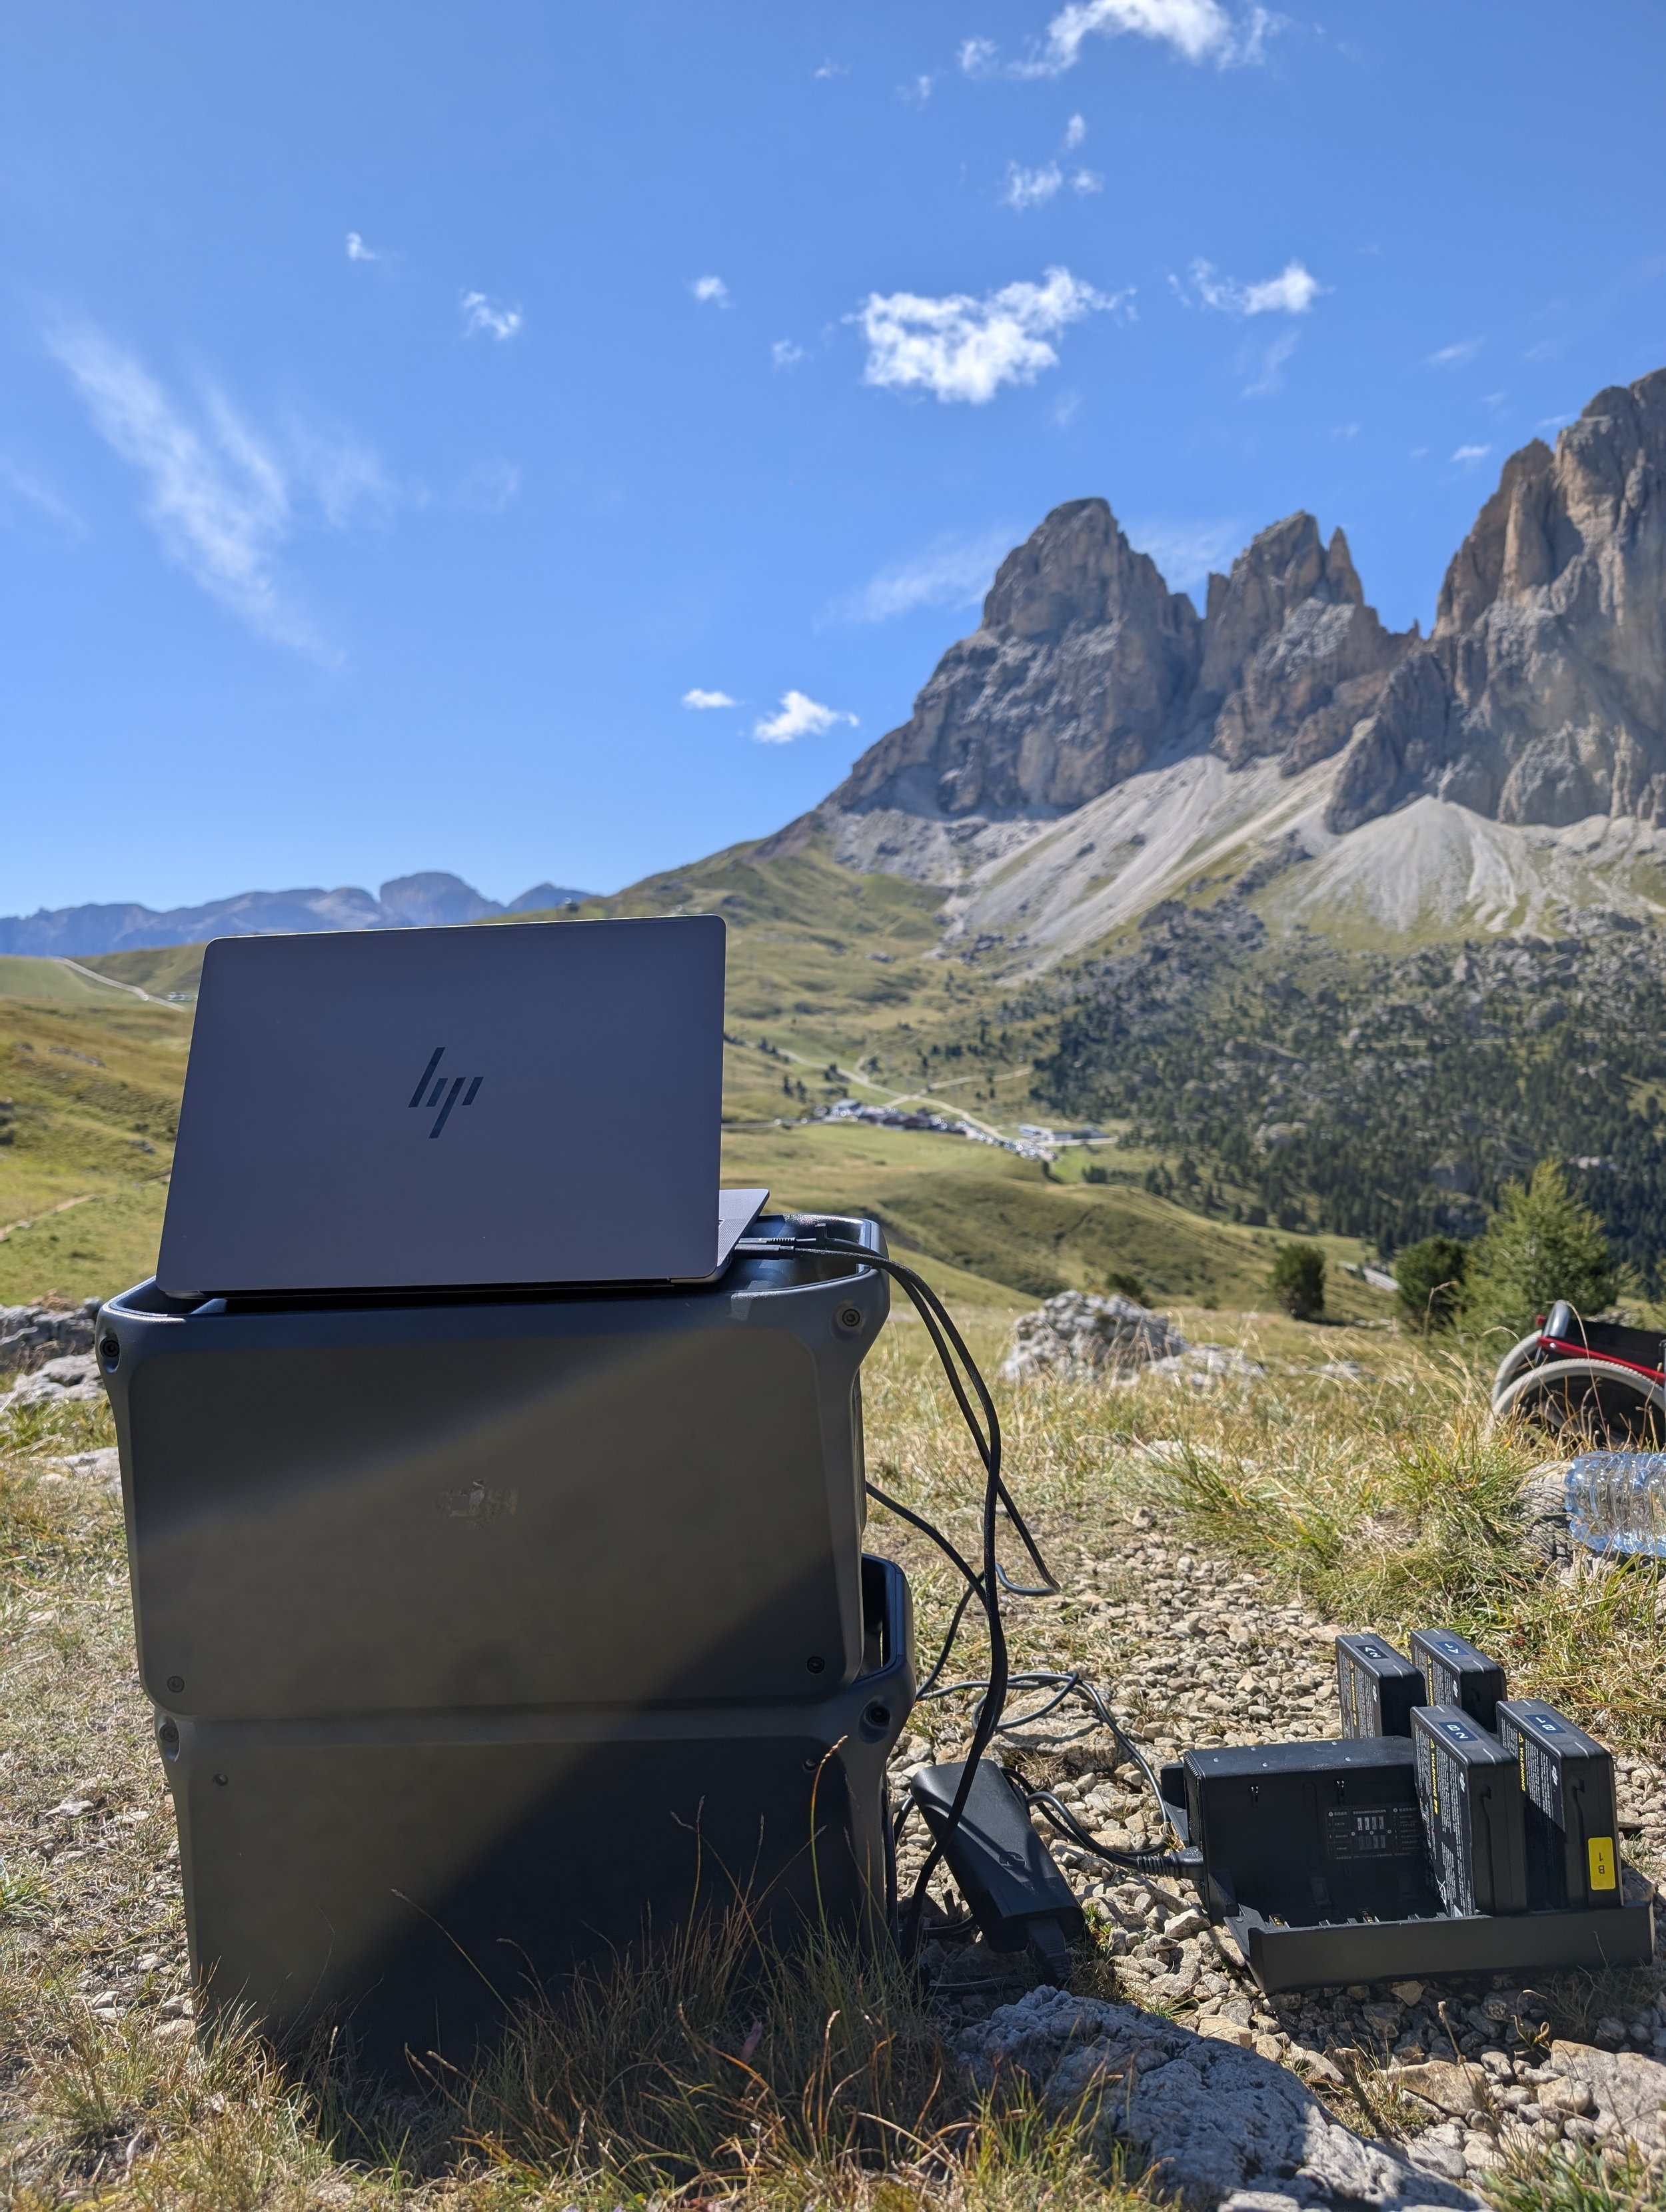
In practical terms
The Inspire 3 is an exceptional capture platform, but operating it in remote terrain carries a significant logistical challenges. Short flight times require continuous battery rotation, while the aircraft, cases, charging equipment and computing hardware make the complete system difficult to transport.
While driving to the Dolomites made the setup manageable, travelling by air would have been considerably more complicated.
It's not all about the pixels
Great camera, but there is an issue
With a full-frame 45mpx sensor, you get about 125% more pixels per image compared to the typical 20mpx you will find on consumer drones. The lenses are also noticeable sharper, giving you a significant bump in image quality.
There is also the benefit of having interchangeable lenses, meaning that you can chose an appropriate focal length depending on the subject.
The rolling shutter
This problem is not unique to the Inspire 3.
Pretty much every consumer drone—with the exception of some DJI Enterprise drones—have a rolling shutter. When wind pushes the drone as you hit the trigger, the movement that happens during the time it takes the camera to capture the image leads to the top being slightly offset compared to the bottom part of the image.
In simpler terms: wind + rolling shutter = distorted image = alignment issues
A potential solution?
Metashape has a hidden “rolling shutter compensation” feature that attempts to counter the distortion in your images. This feature can work surprisingly well, and has saved several captures from being throwaways.

Tools / Camera Calibration
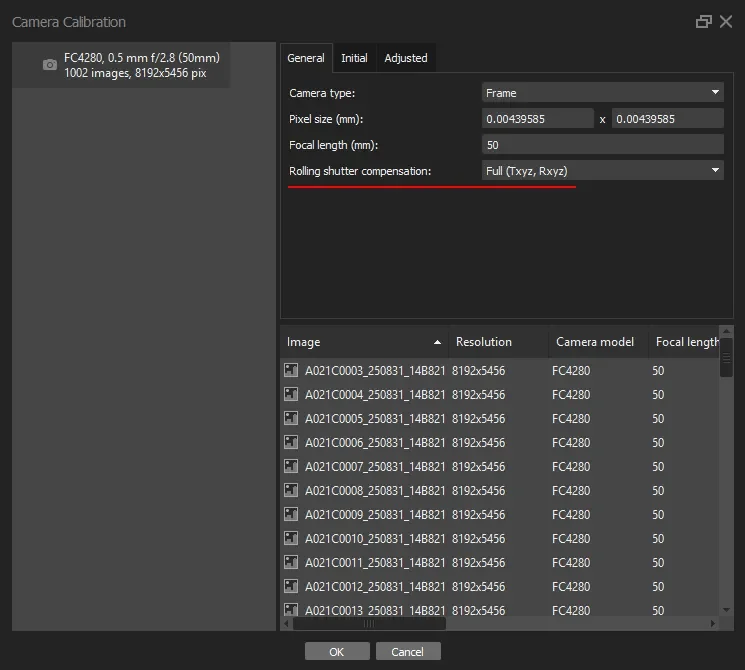
The confusing part for beginners is that this is not a visible issue. You can have perfect coverage and sharp images, yet have major alignment issues.
Rolling Shutter Compensation: Enabled / Disabled
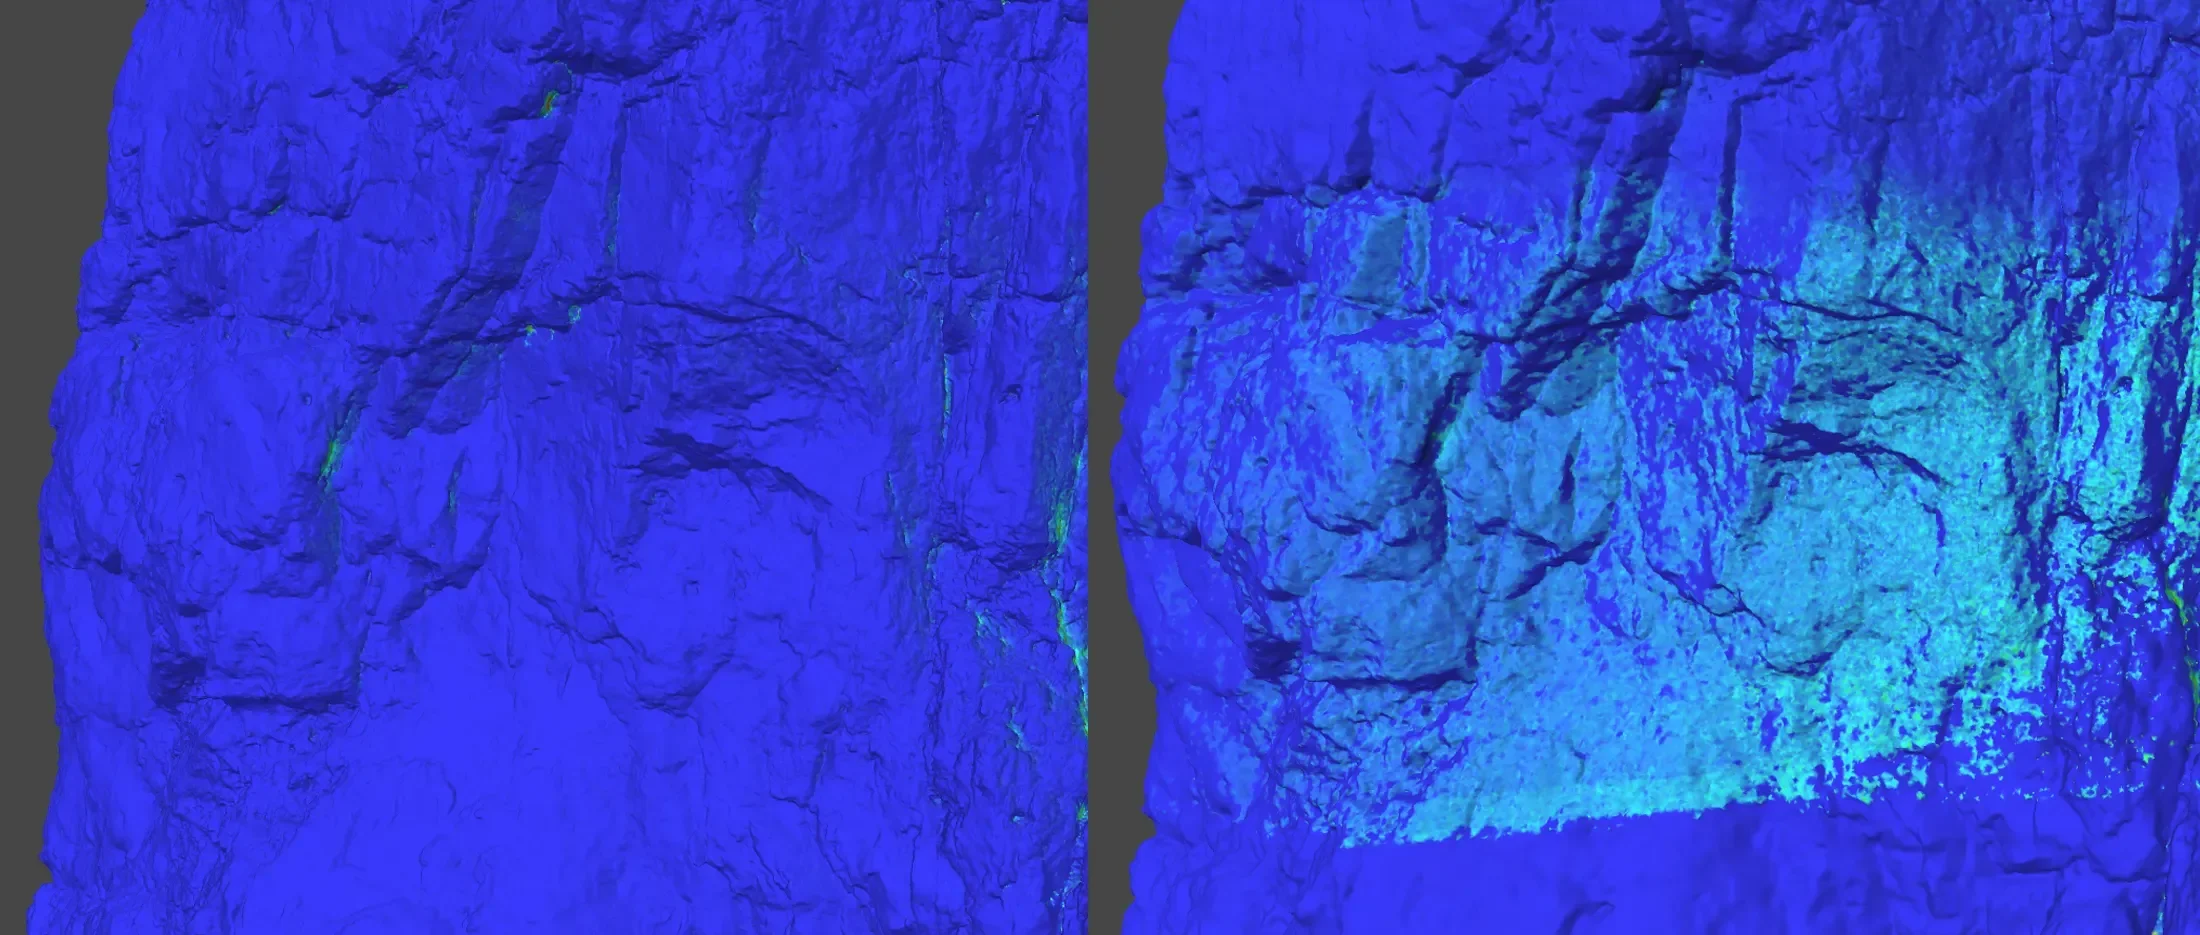
The more blue, the better the alignment. This is far from the worst we have experienced.
02
03
When scale becomes scary
Where’s the drone?
Even an Inspire 3 quickly becomes a tiny silhouette against a mountain. The video shows the best-case scenario, with the drone visible against the sky.
Against a similarly toned rock face, ensuring visual line of sight becomes considerably more difficult.
Coverage
The most challenging part was knowing if we had sufficient subject coverage. Three parts of the workflow proved particularly useful:
Waypoints
The recorded flight path
On-site alignment
We used reusable waypoints to resume after battery changes, the flight-path map to track horizontal passes, and recorded altitudes to monitor our vertical progression.
For complex formations, quick on-site alignment also helped reveal gaps while there was still an opportunity to capture them.
The reality
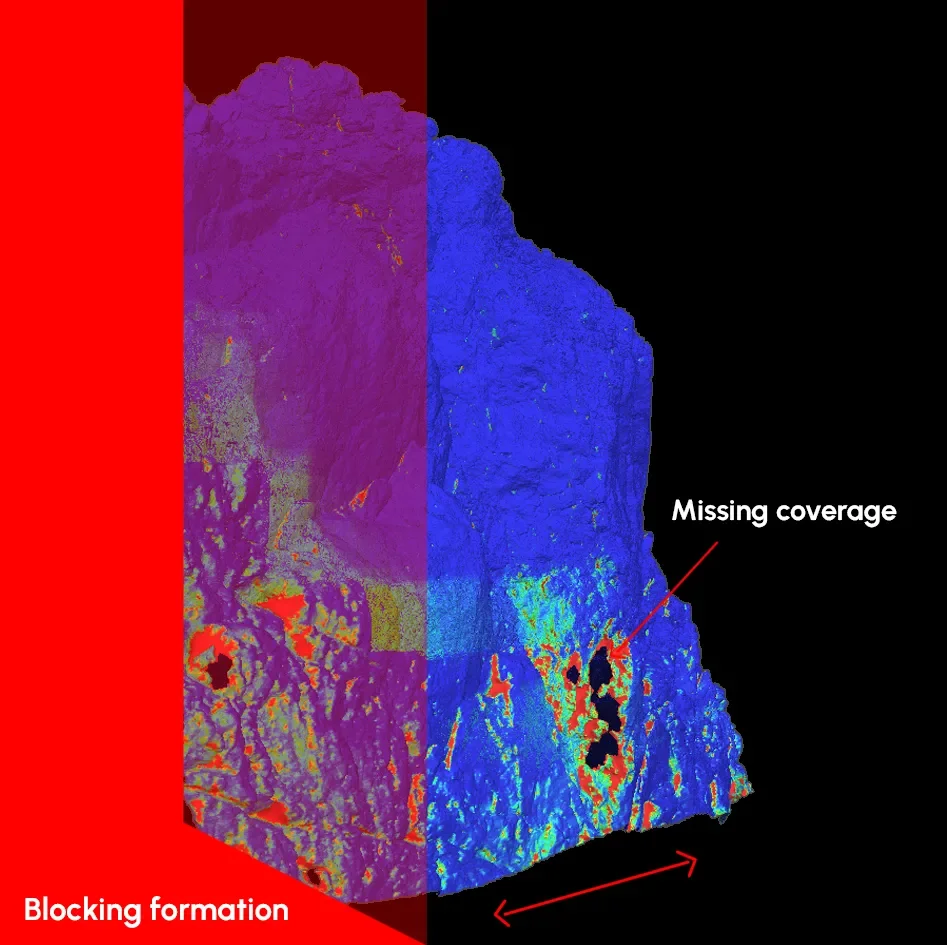
One of the most important lessons was that exhaustive coverage is not always physically achievable. Deep cracks, cavities, and parts concealed by neighbouring formations can remain inaccessible without repeatedly relocating our base—and some angles simply cannot be captured safely or legally.
The goal therefore became deliberate coverage: maximizing reliable data across the important parts of the subject, identifying unavoidable gaps early and planning how those areas would be resolved during reconstruction.
Working under constraints
Where can you even legally fly?
Given the size of the Inspire 3, combined with strict drone regulations made it a big challenging to find locations with the right combination of factors:
Somewhat accessible by car, due to the size/weight of the equipment
Has nice looking formations
Has nice looking formations that are possible to get decent coverage on
Won’t get us into legal trouble
The motivation-killing map
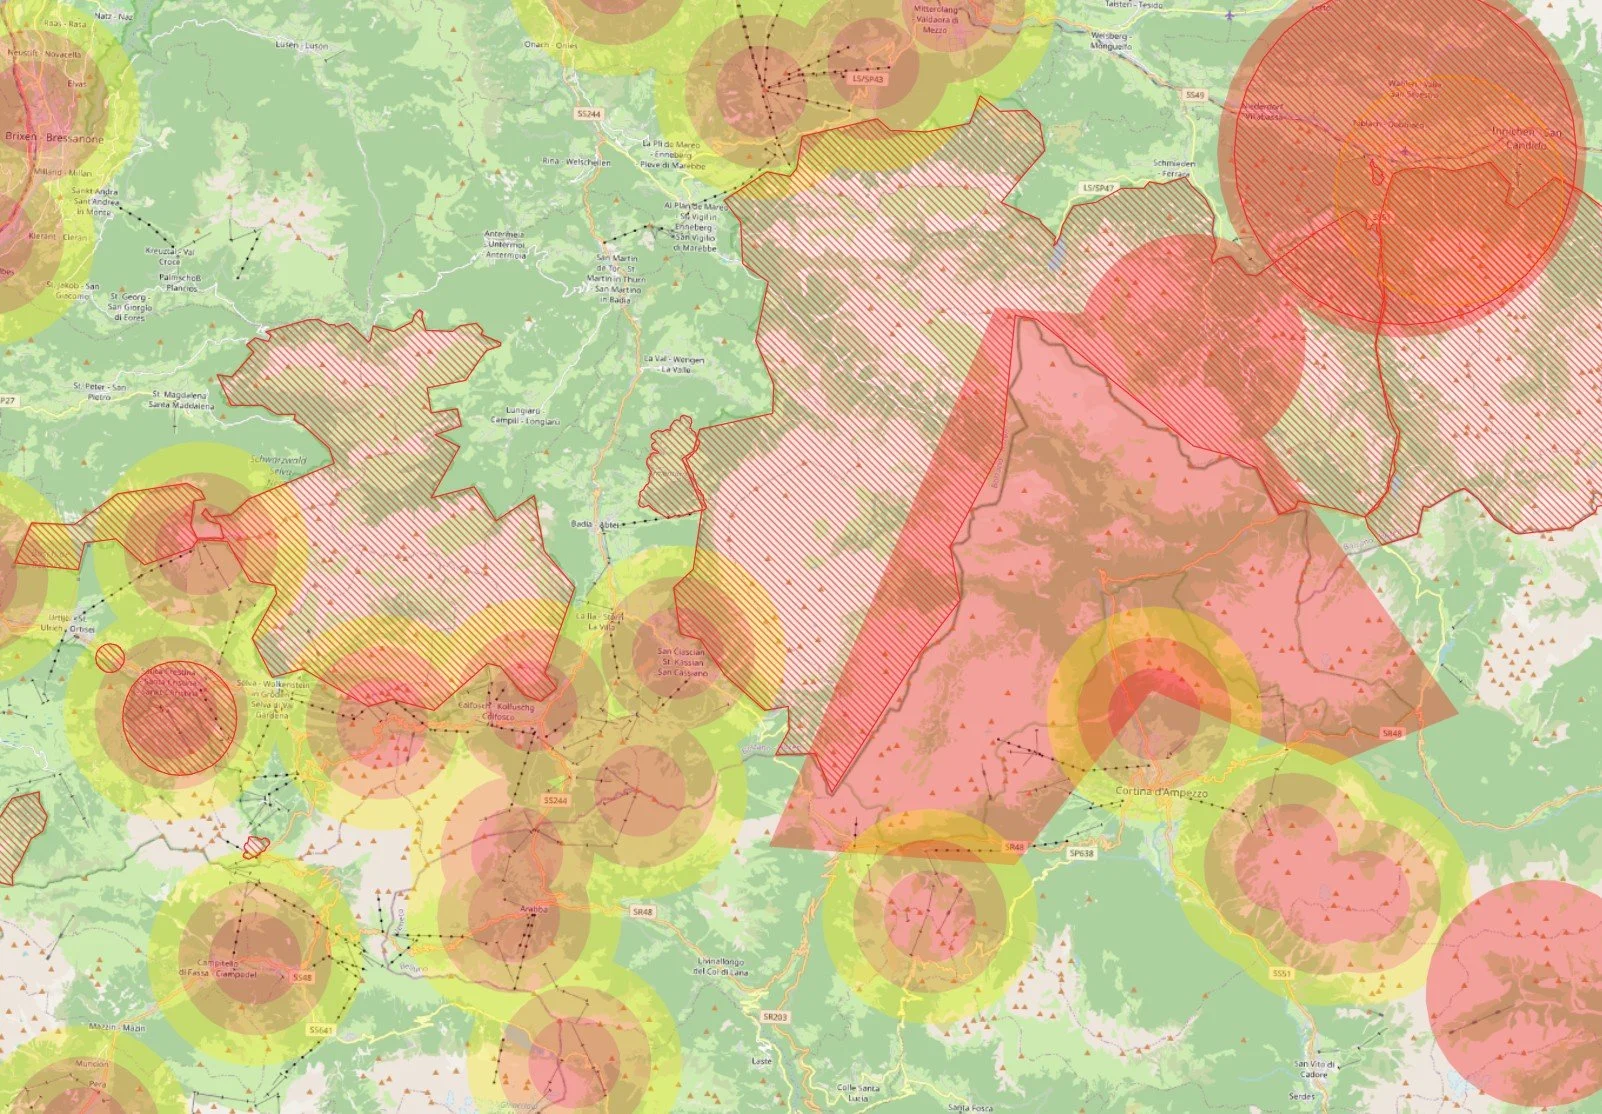
A lot of research went into figuring out where to go to get what we wanted. Unfortunately, restrictions were aplenty.
Below is a map of the area we went to. It looks manageable, until you realize the red spots coincide almost perfectly with the ideal locations we wanted to visit…
Weather challenges at high altitude
When doing aerial photogrammetry—especially at high altitude—there are two main things to watch out for:
Clouds
Wind
Rain
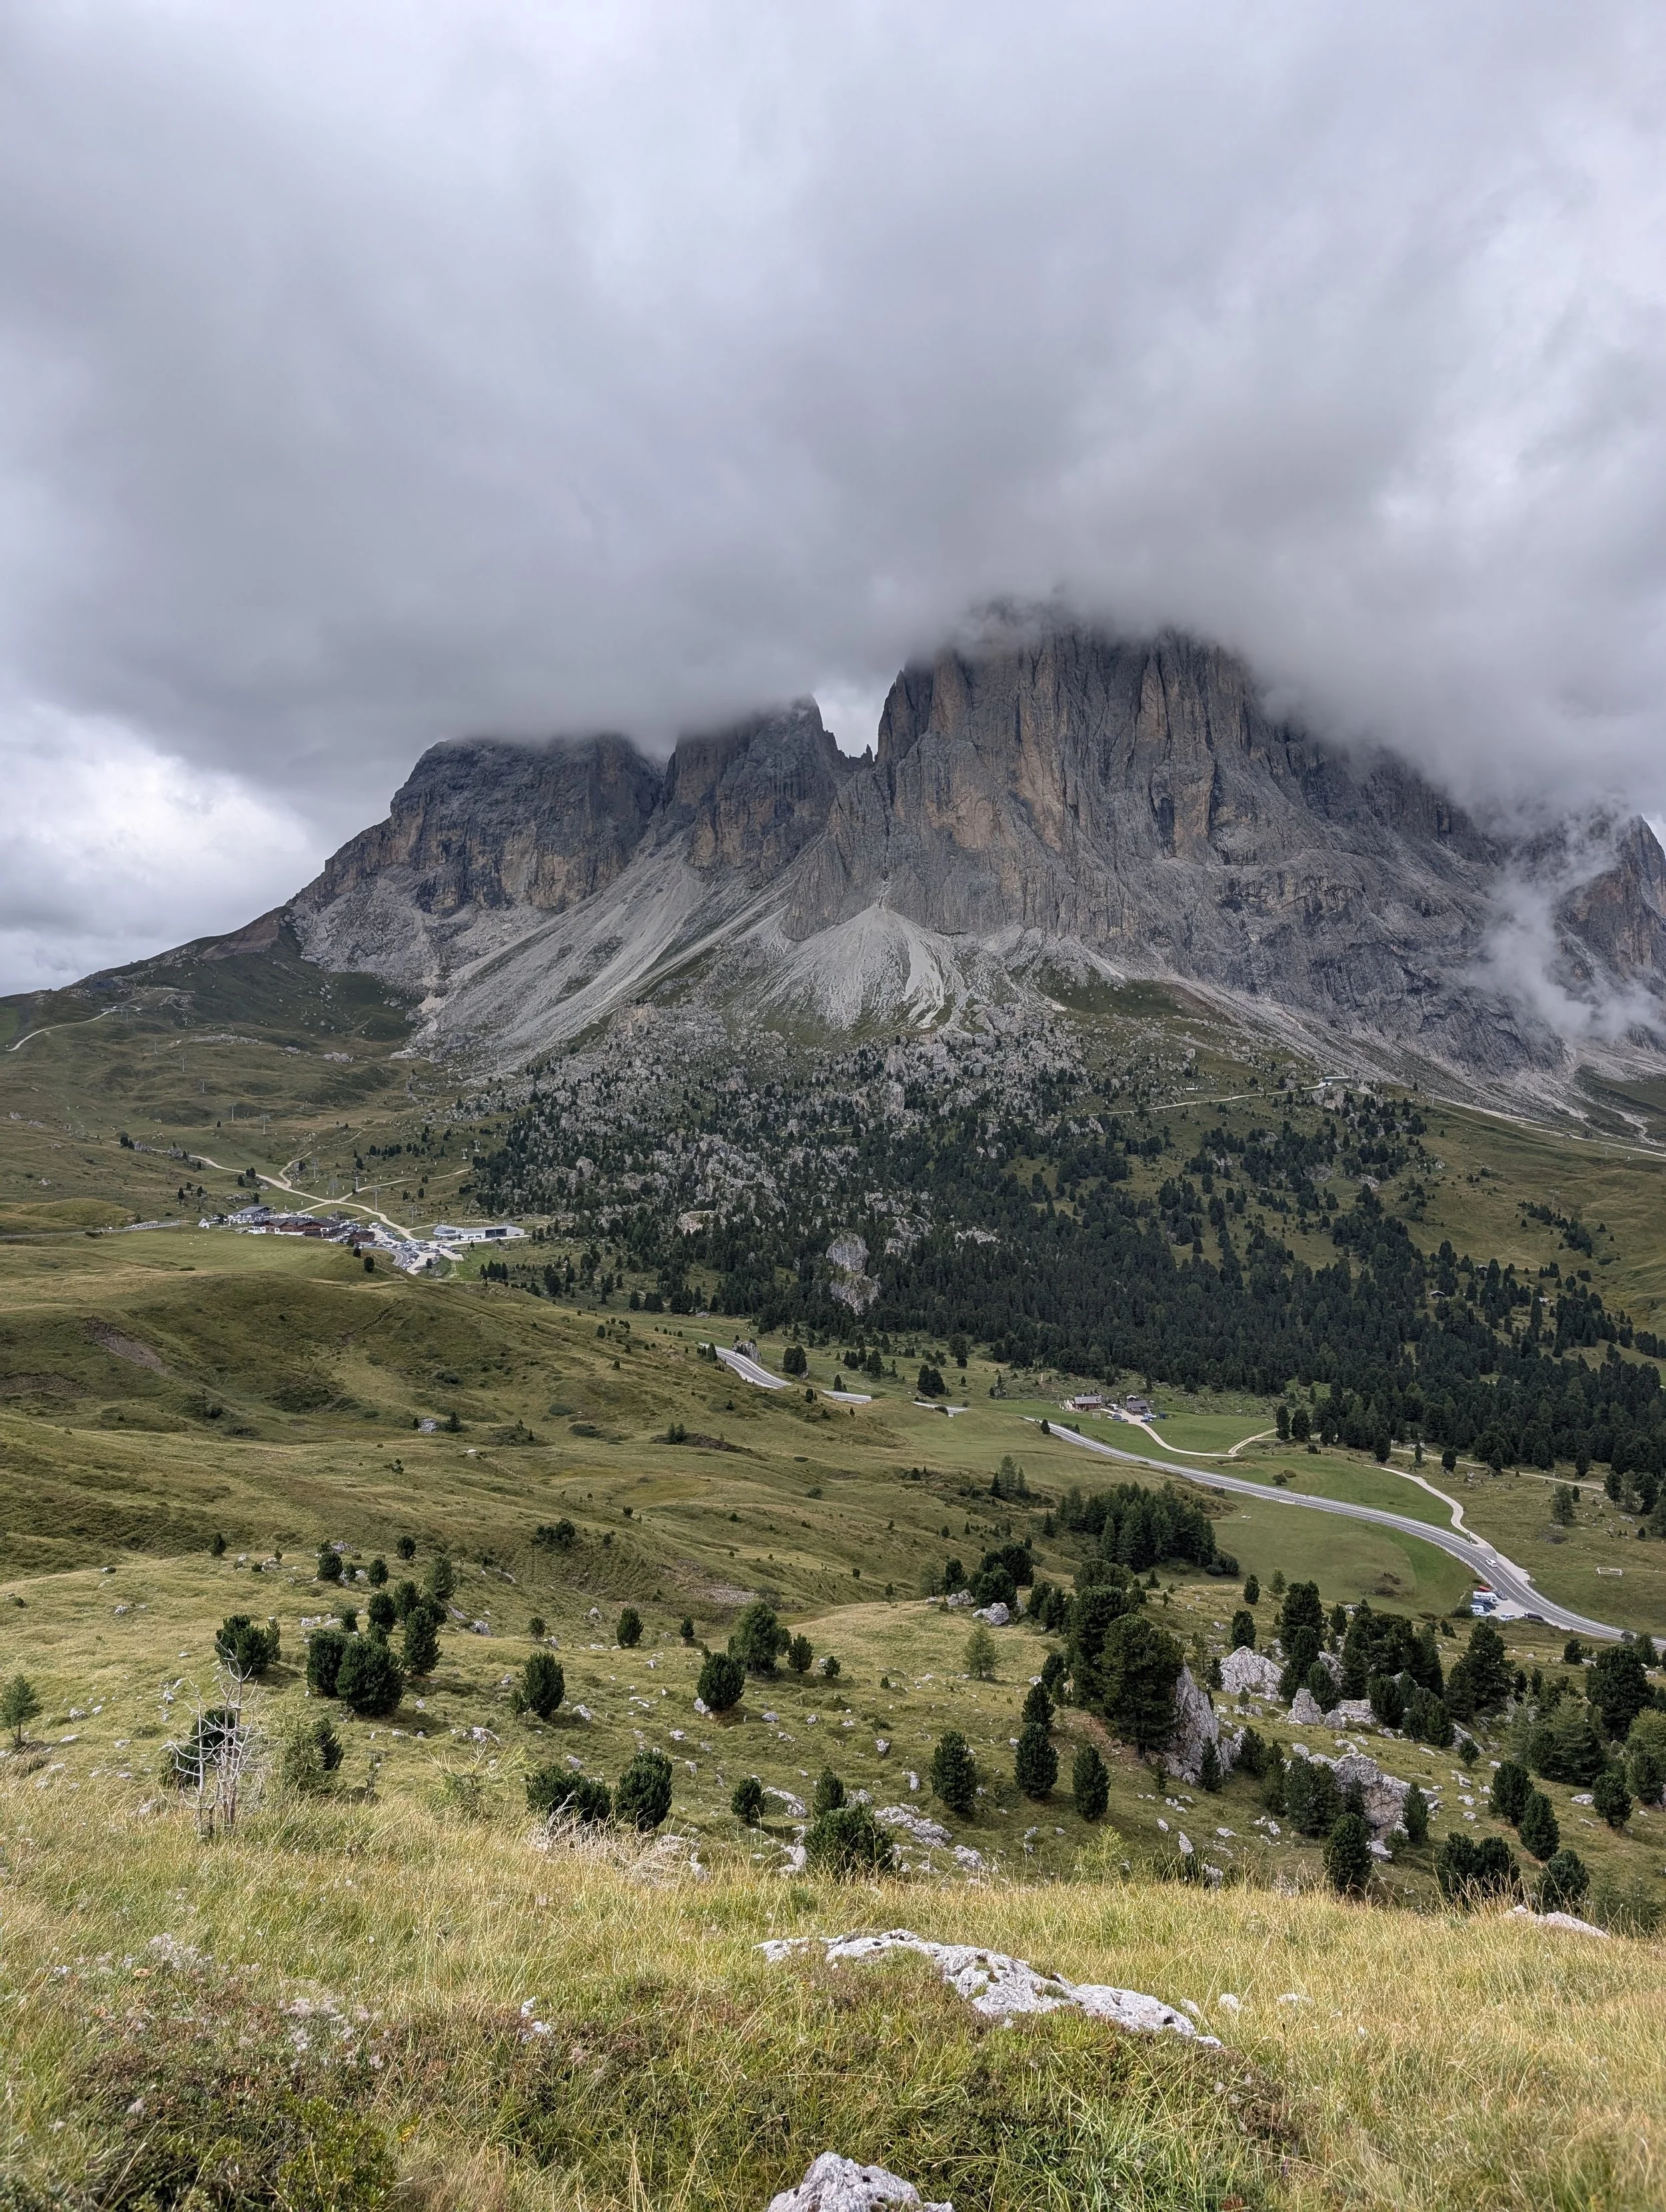
While normally we love clouds when they block the sun, they are now starting to block the subject.
Unlike handheld photogrammetry, you won’t have a flash. This means you are forced to deal with whatever lighting conditions the universe throws your way on the day. We will touch on de-lighting below.
Wind is also a real issue given the drone has a rolling shutter. Even when employing the rolling shutter compensation fix, it cannot always fix everything, and too much wind/distortion can lead to unfixable captures.
04
Recovering imperfect datasets
Pre-processing RAW images
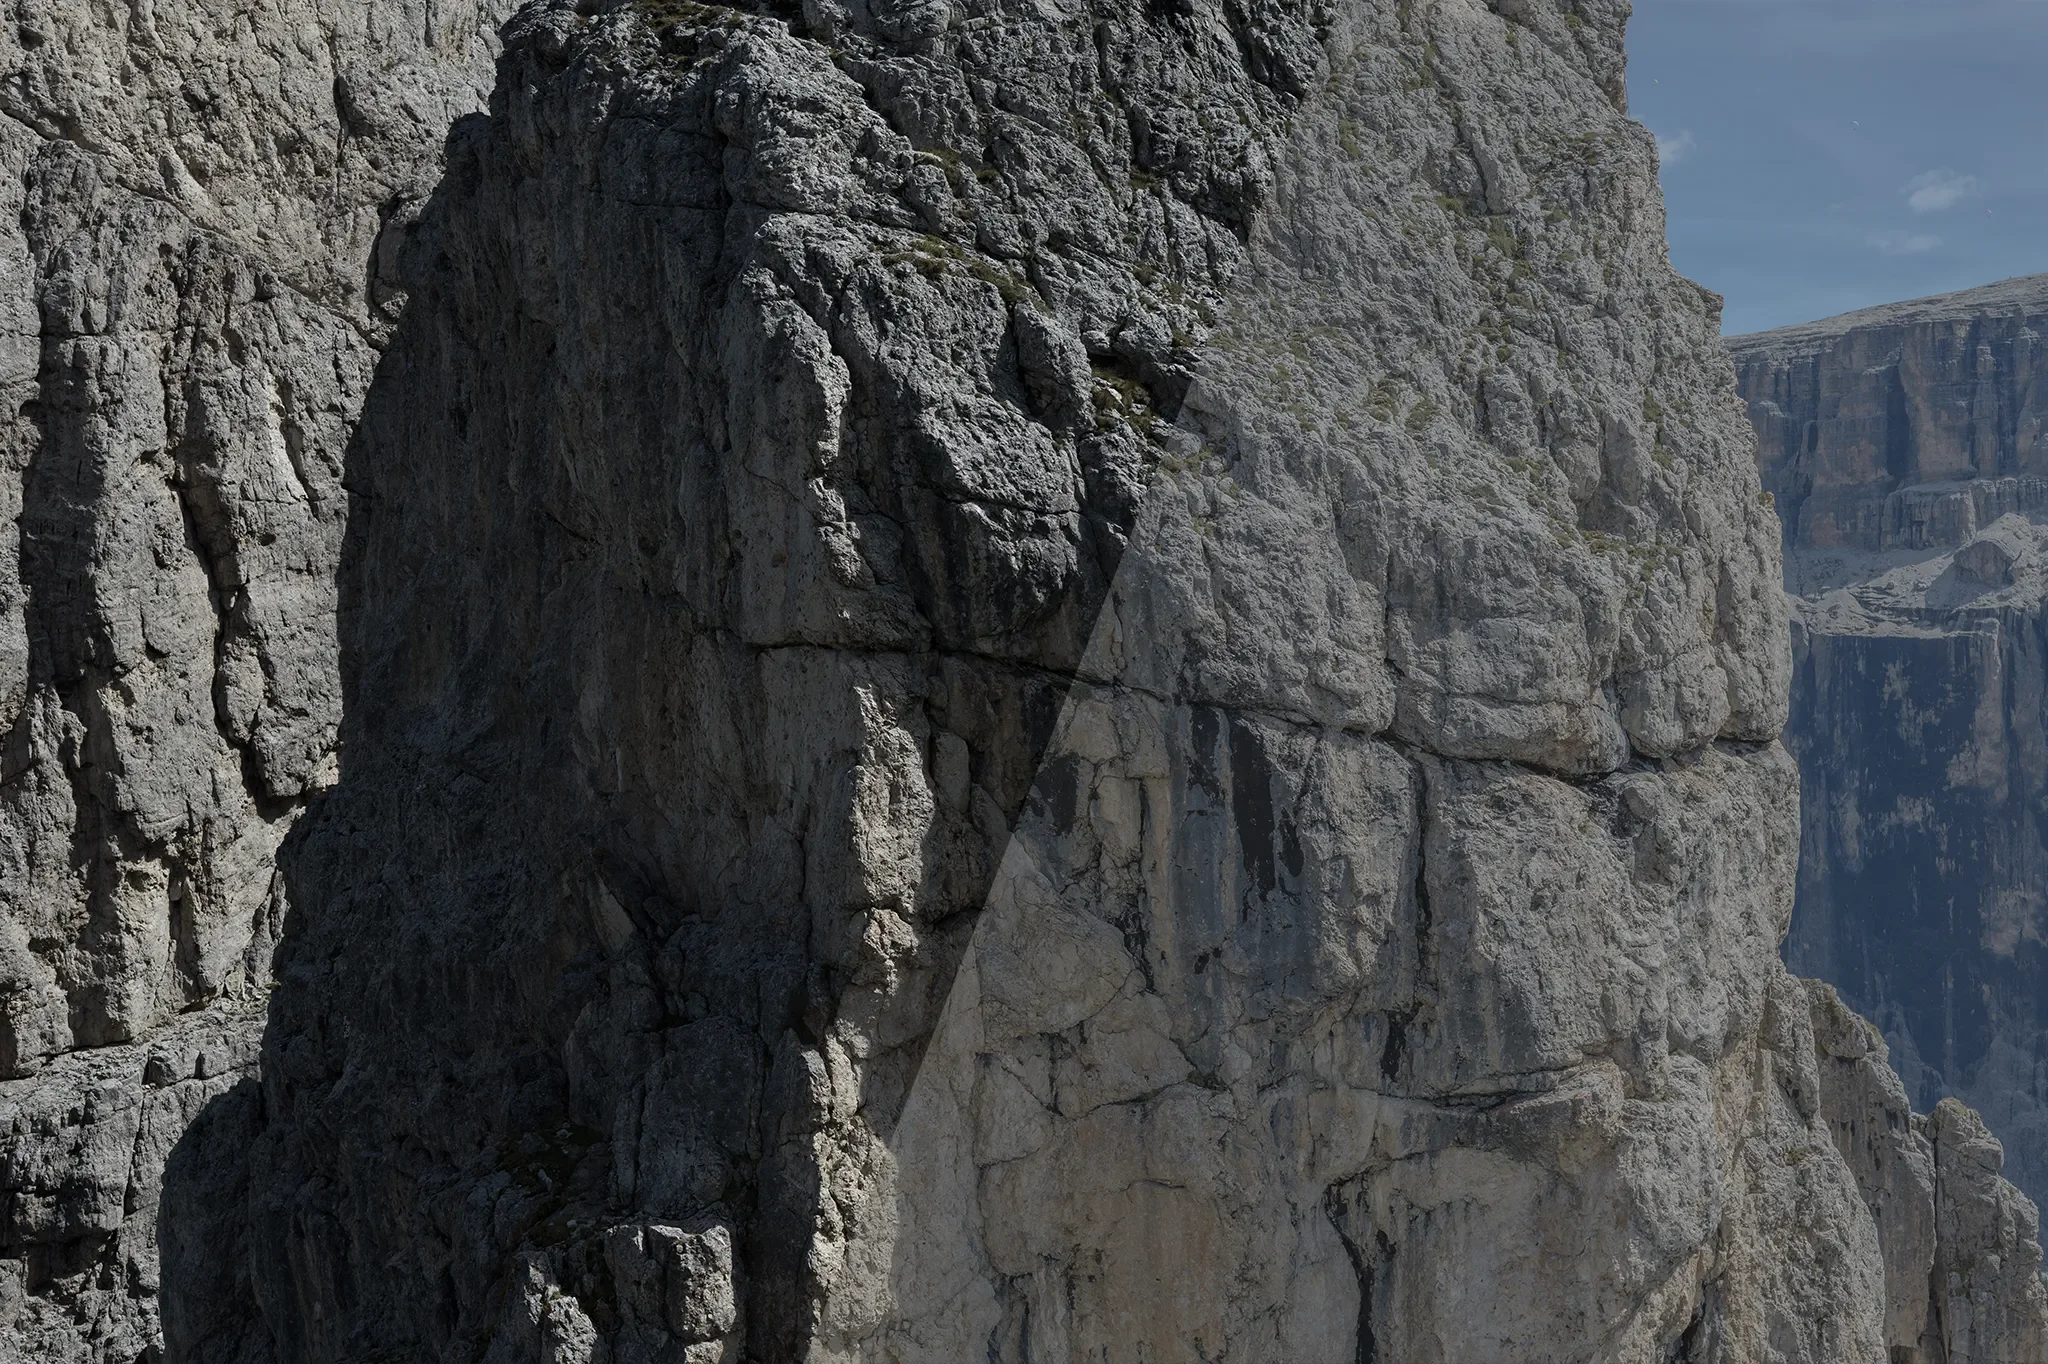
Strong sunlight can create extreme differences between illuminated and shadowed surfaces. During RAW photo development, we recover as much highlight and shadow information as possible and reduce the overall contrast before exporting the images for reconstruction.
This does not removed baked-in lighting, but it does give us more room to equalize and de-light the texture later in the workflow.
Original / Flattened
De-Lighting
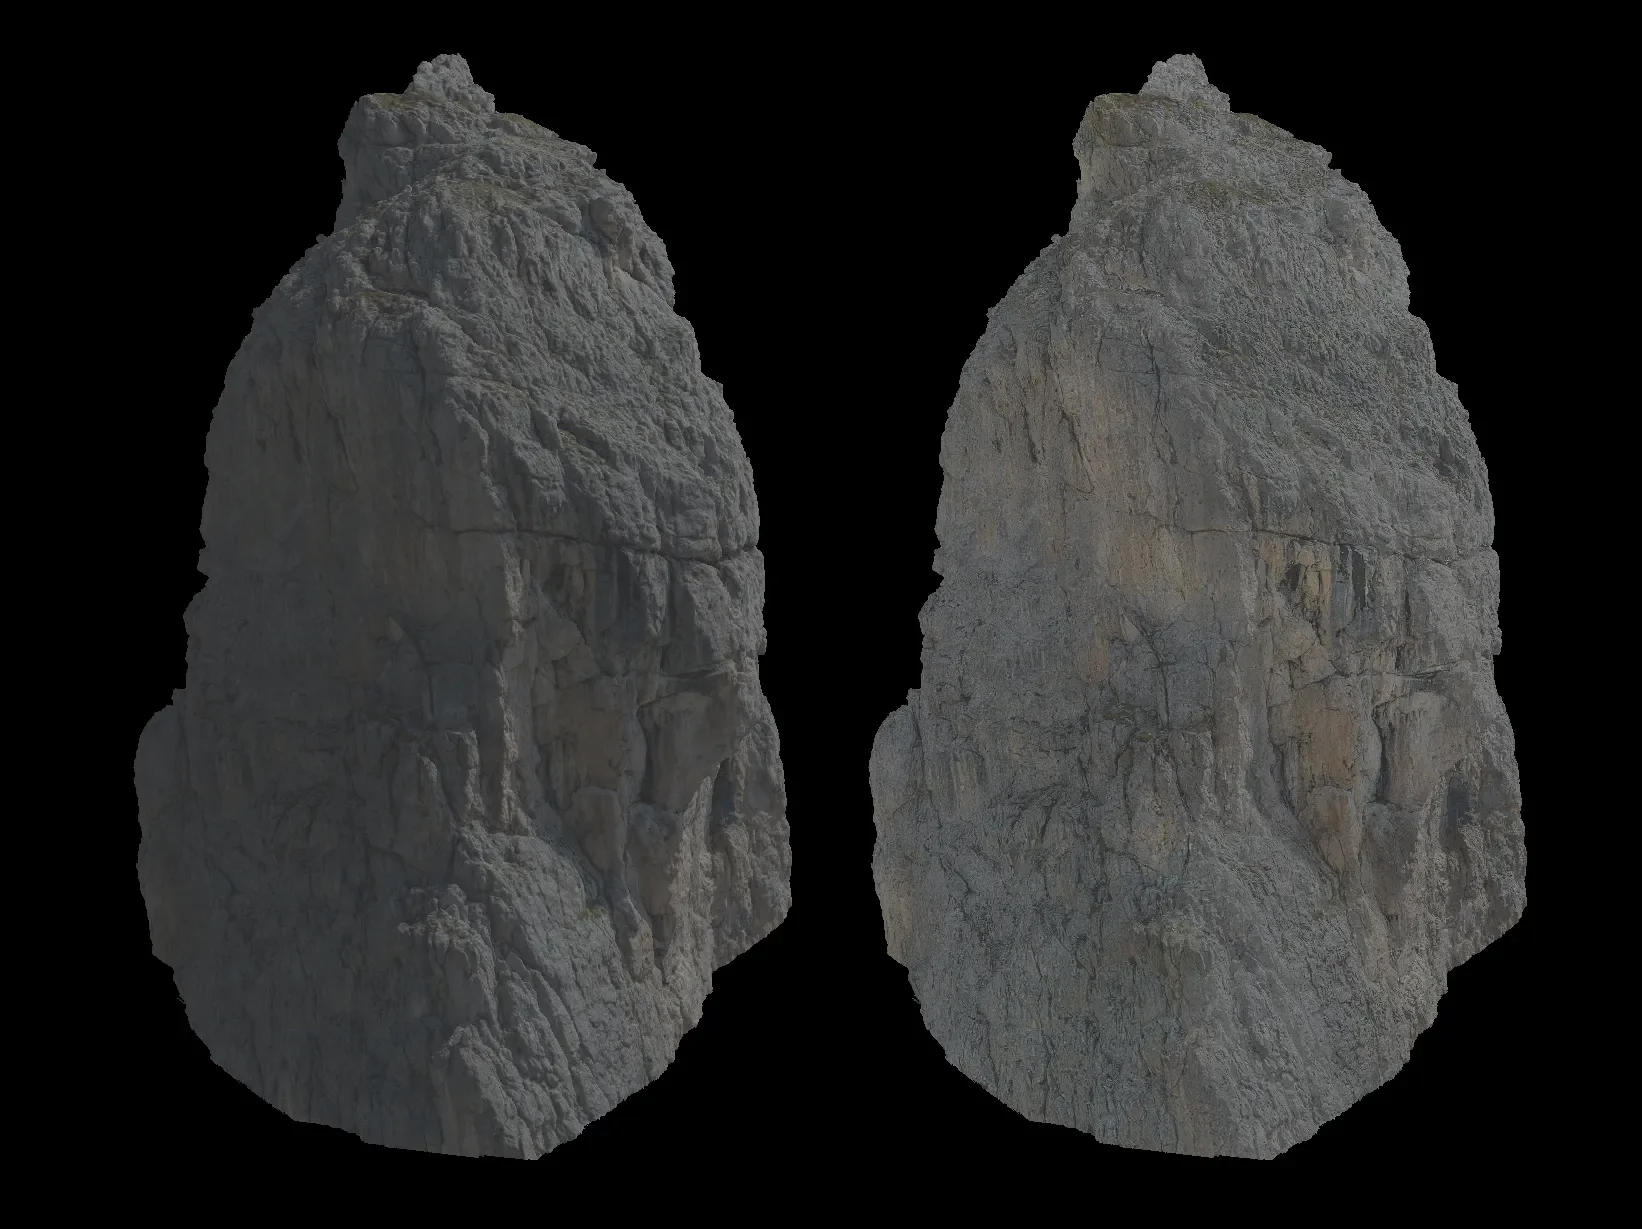
For ground-based photogrammetry we use flash and cross-polarization to suppress reflections and capture more neutral surface color. Neither is practical with drones, so textures often require significant de-lighting in post.
Based on our experience, Agisoft De-Lighter provided the ideal starting point when the source texture contained pronounced contrast between illuminated and shadowed regions.
The tool flattens the contrast while preserving much of the original surface colors. However, it does not remove all baked-in lighting, so an additional pass is still required before the texture can be treated as a neutral albedo.
Original → Initial de-lighting pass
05
Patching up holes and missing textures
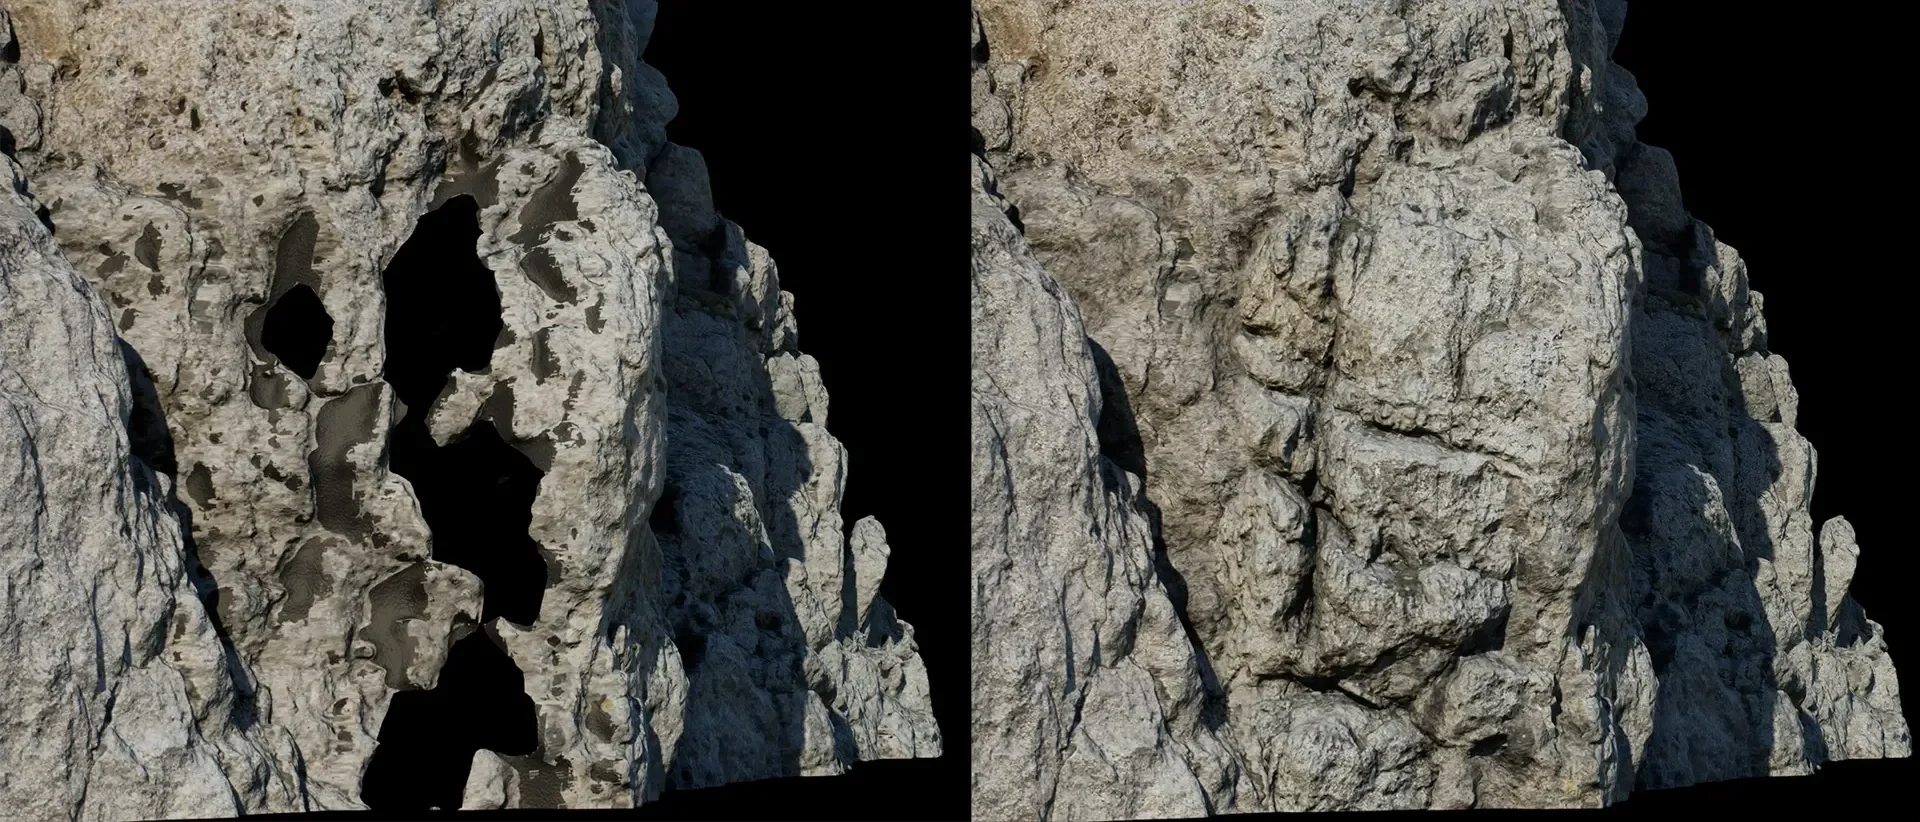
In areas with a significant lack of coverage, the reconstruction can contain large gaps—particularly around areas concealed by neighbouring formations.
Automated hole capping can close the mesh, but rarely produces believable structure at this scale. We rebuild the missing volume using the surrounding geometry as reference, then carefully blend the transitions.
Original → Refined
Texture soft-spots
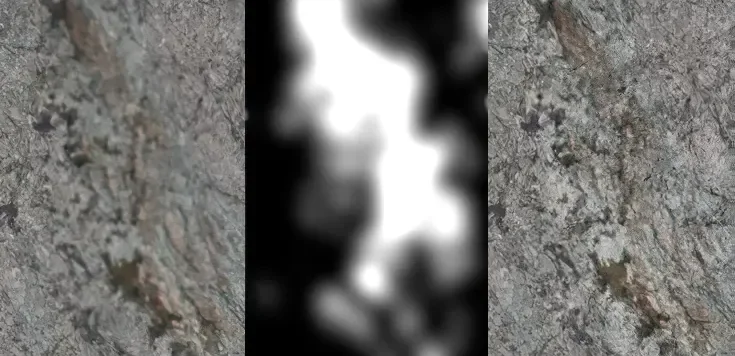
Even a strong dataset can contain soft texture regions, typically caused by insufficient coverage or out-of-focus parts of source images being selected during texturing.
The difficult part is reliably identifying those areas across a large texture. We developed a semi-automated approach that detects regions with unusually low local variation and converts them into a working blur mask.
Original → Generated mask → Final
06
Was it worth it?
Yes—but not without significant caveats.
The Inspire 3 delivered the image quality we needed to capture formations at this scale. The resulting assets ultimately justified the additional complexity, but that quality came with a considerable cost: limited flight time, continuous battery rotation, heavy supporting equipment and a system that was difficult to move through remote terrain.
The greater lesson was that camera quality is only one part of a successful aerial capture. Access, coverage, weather and the ability to verify data while still on location often had a greater effect on the final result. Even the best camera cannot reconstruct a surface it was never able to see.
We would use the system again when the subject and production requirements justify it. For lighter or more remote expeditions, however, a smaller platform will offer a better overall balance.
Ultimately, the success of the experiment was not that it produced a perfect dataset, rather that the imperfect data could still be transformed into detailed, production-ready assets.
Planning a project involving large-scale captures? Let's have a chat!
+357 996 25 761 — 09-21 | GMT+2