
BUILDING FOLIAGE-HEAVY FORESTS — PART 03
Scan pre-processing and alignment
Preparing imperfect field captures for reconstruction.
Foliage-heavy environments rely on more than foliage alone. Trunks, deadwood, rocks, ground elements and other scanned assets all need to pass through a reliable processing pipeline before they can be integrated into the environment.
While being thorough with your shot-taking when scanning is step one, processing is where the magic happen, and trouble begins.
Building textures
Mosaic vs Natural blending
Meshing
Metashape’s decimation algorithm is as solid as anything we have tried, and quick. If the asset does not contain any major topology related issues, we tend to simply decimate the highpoly source to a suitable level.
Retopology
This refers to any mesh you bring out of Metashape for further refinement. If your highpoly source has some minor surface defects like tunnelling and overlapping, this will show up on your MS-decimated lowpoly.
It could make sense to export it and do some VDB operations or similar.
Main thing to keep in mind then is that in most cases you have an open object, which doesn’t play well with VDBs.
In the end it’s an extra step that ideally should be avoided.
Houdini’s Remesh to Grid node has thought about this.
Maximizing detail, minimizing data
The ideal tri-count will vary depending on use case, project specifications and performance budgets. Defining an exact budget is not always easy, so we must go from being specific to being flexible, then the question becomes:
How low can we go to still hold up without tessellation/displacement
While not going so low as to not be able to cleanly recover the details
The entire point behind this methodology is to maximize the amount of recoverable data through runtime solutions such as Nanite Tessellation, while keeping a “lightweight” foundation.
Too much geometry has some nasty side effects in the production pipeline:
It slows down asset production
It has negative effects on the auto UV process
It increases scene memory usage
It creates a lot more data on disk
By identifying the ideal middle ground, we can leave room for post-bake optimization while maintaining a clean, high-quality base mesh.
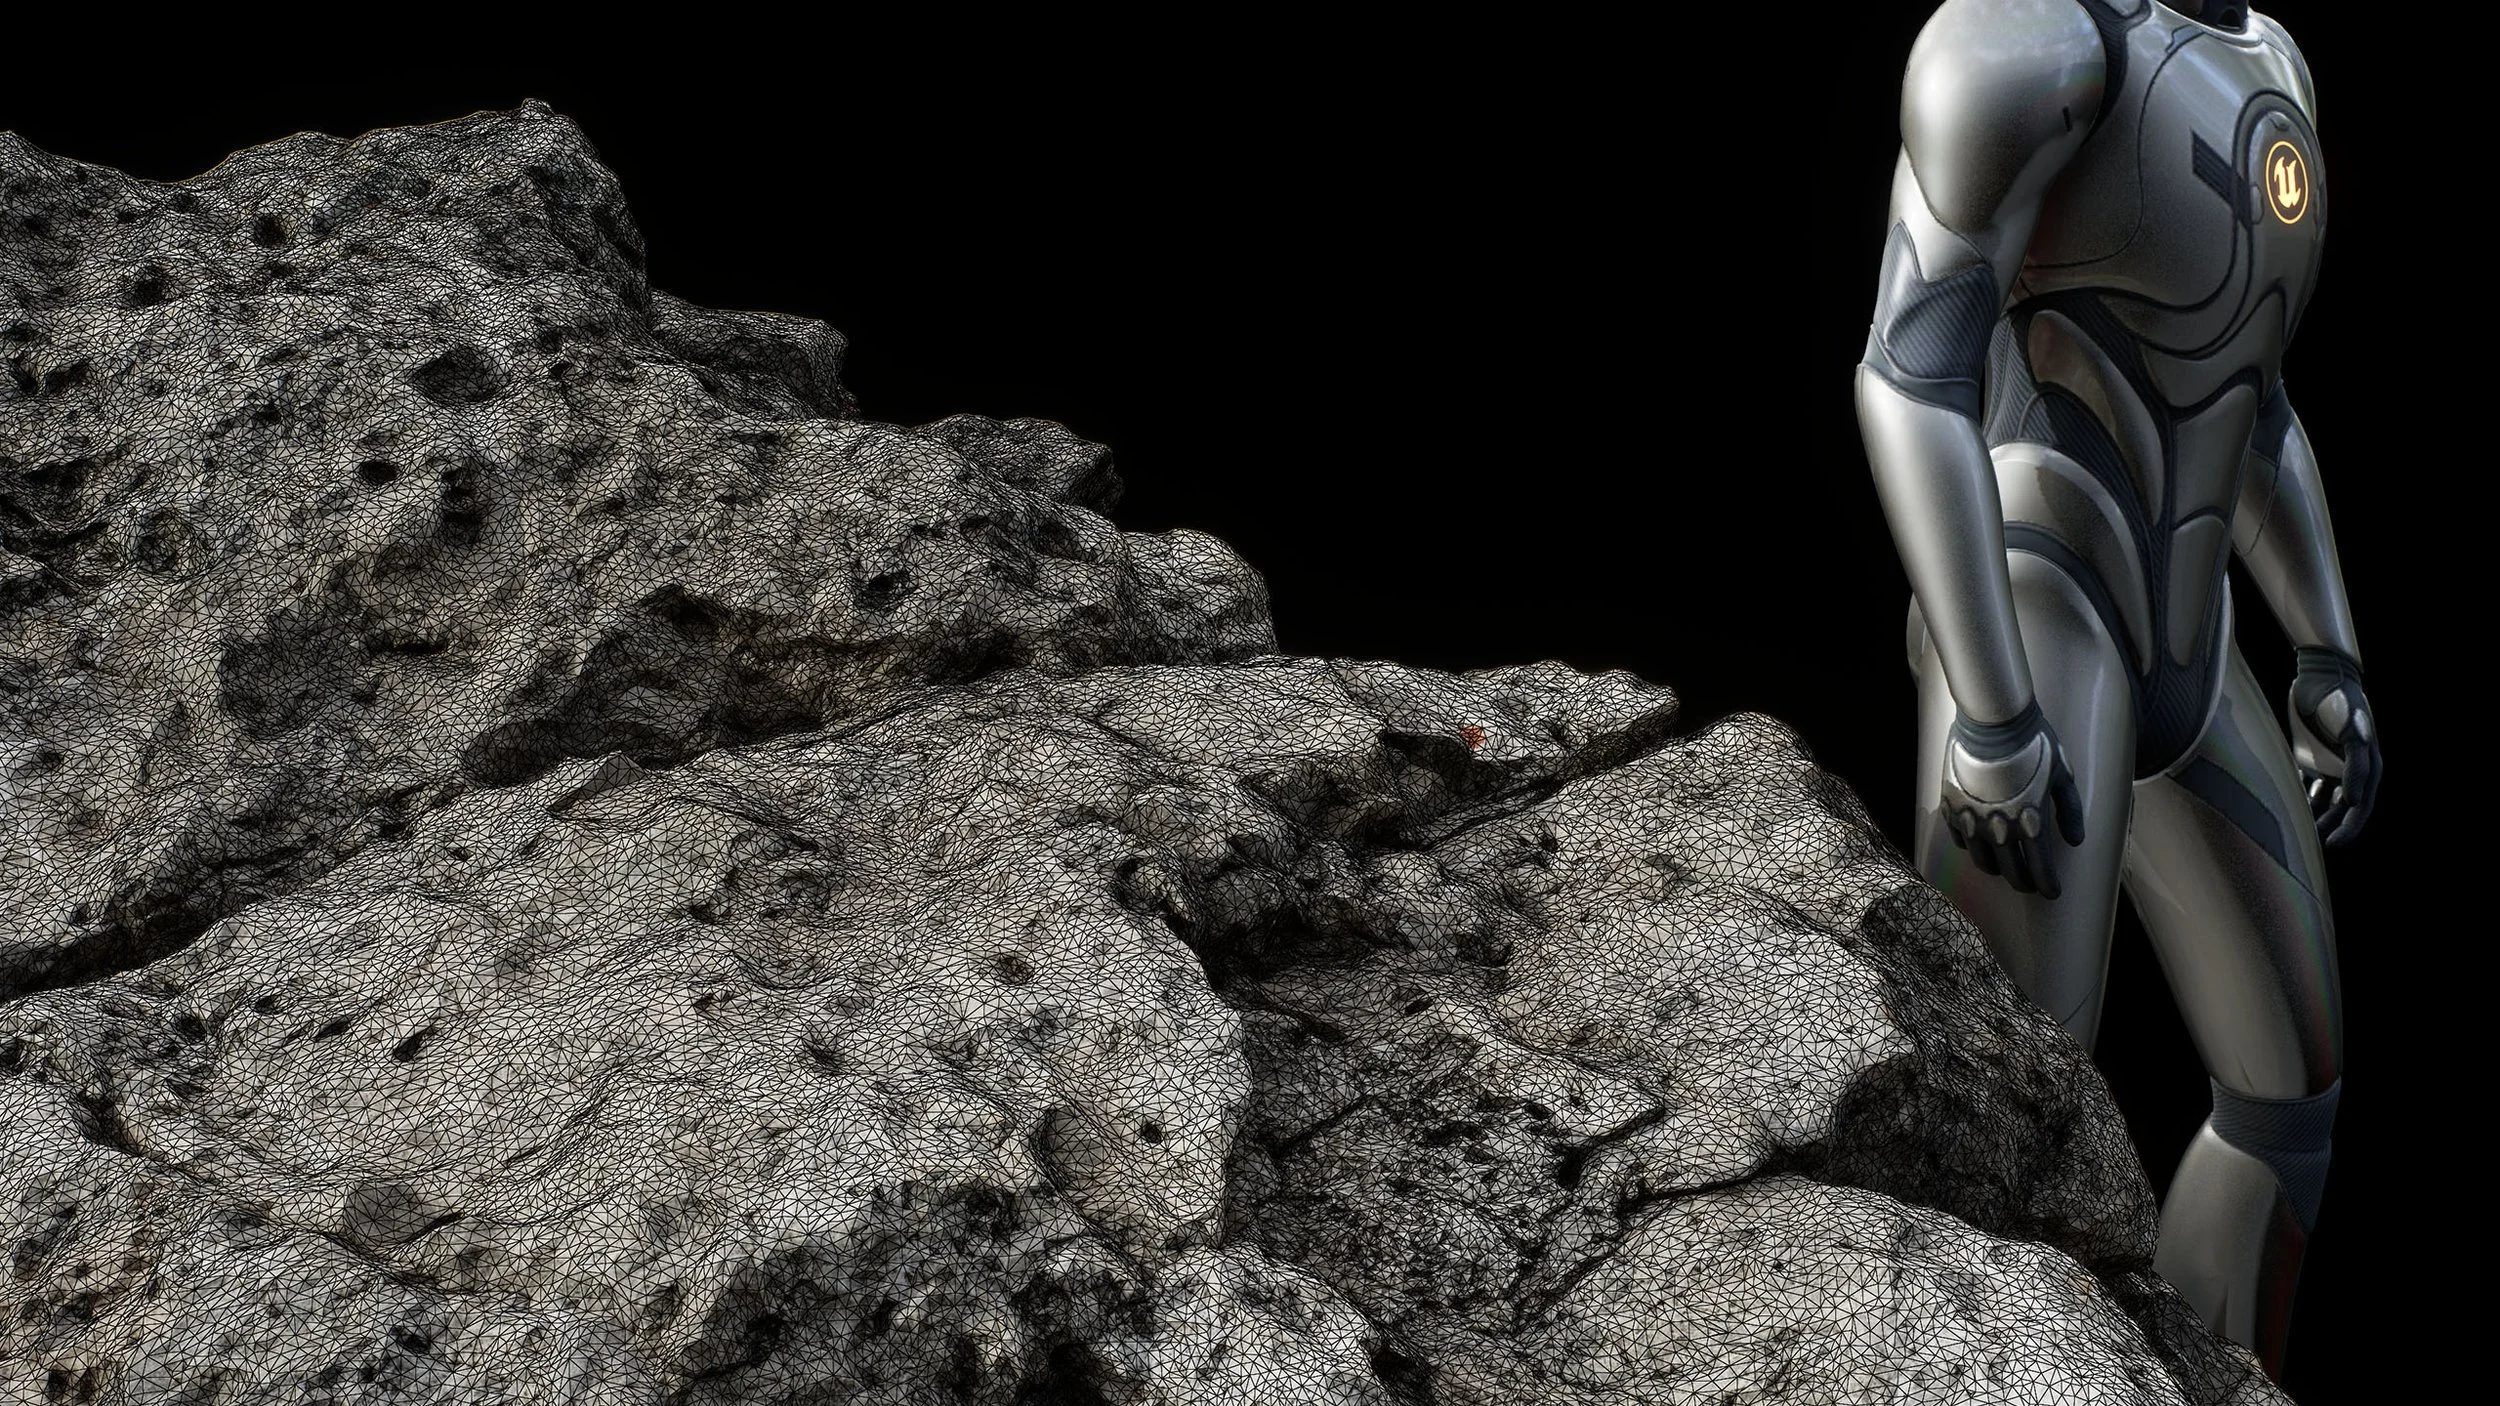
Post-bake decimation
There’s always a bunch of room to decimate the render mesh after it’s completed. A 90% reduction is possible without too many issues, although close up detail/silhouette will suffer.
That said, if you care about close up detail—and/or need to turn these into typical “lowpoly” game assets—simply removing triangles won’t be enough.
Surface detail & definition is driven by the combination of Normal map and mesh. If you remove one without compensating with the other, quality will degrade.
Re-baking without source
If you find yourself in a situation where you need to do significant tri-optimization on assets, returning back to the scan source to create a new lowpoly and re-bake can be a headache.
Technically, we already have most of the information, it’s just split disproportionally across mesh and normal map.
We might dive deeper into this separately as there are several ways to approach this.
Deleting floating geometry
This is done in two steps, once on your highpoly scan as part of the clean-up process, and after having created your decimated lowpoly as this process tends to create some floaters.
Tools → Model → Clean Model → Criterion: Connected component size
Image-processing
With a proper cross-polarized camera setup and good, consistent shot-taking, there is generally little that needs to be done to the RAW images.
However, because it is always better to do adjustments in RAW, some common tweaks include:
ColorChecker calibration — good practice to keep the albedo’ consistent as lighting changes throughout the day
Vignette — if you use a single ring flash the edges of the image may be darker than the centre
Exposure/highlights — sometimes lighting changes and you don’t calibrate the camera. Adjust any overly dark, bright or clipped images.
Vignette removal, before/after.
Things you shouldn’t do:
Use any lens distortion correction
AI upscale/denoise—This will all mess with your alignment accuracy
Brightness variance
It can be hard to avoid some exposure variation throughout a large, complex scan. There are ways to get around this properly, but it involves engineering making it out of reach for most.
Major offenders that require you to adjust exposure by one or more stops are better off done manually on the raw image, as the only thing we can realistically get from automatic approaches is an improvement in the average image consistency.
Calibrate in Metashape
Metashape can attempt to auto-calibrate the white balance. It equalizes your images to some extent, but it won’t fix any major differences.
We found the best results using Tie points as source data, as using the model tended created dark gradients and completely breaks some images.
Try both and see how it works for you.
Software
Metashape
Our primary photogrammetry engine has been Metashape for quite some time.
Why we rely on it:
It’s straight forward
Handles the variance of imperfect, real-world datasets exceptionally well
Helped reduce throwaway scans to nearly zero
Includes rolling-shutter compensation, which can be a literal scan-saver when capturing with drones in rough conditions
Trade-offs:
It is not a one-click solution
Processing times are higher and includes some tedious clean-up tasks
More automation options would significantly reduce the time spent
While some other software might process faster, give a more detailed output and have solid toolset, one core issue we found is it’s comparatively unreliable alignment.
Reliability, predictability and consistency is king for any production pipeline.
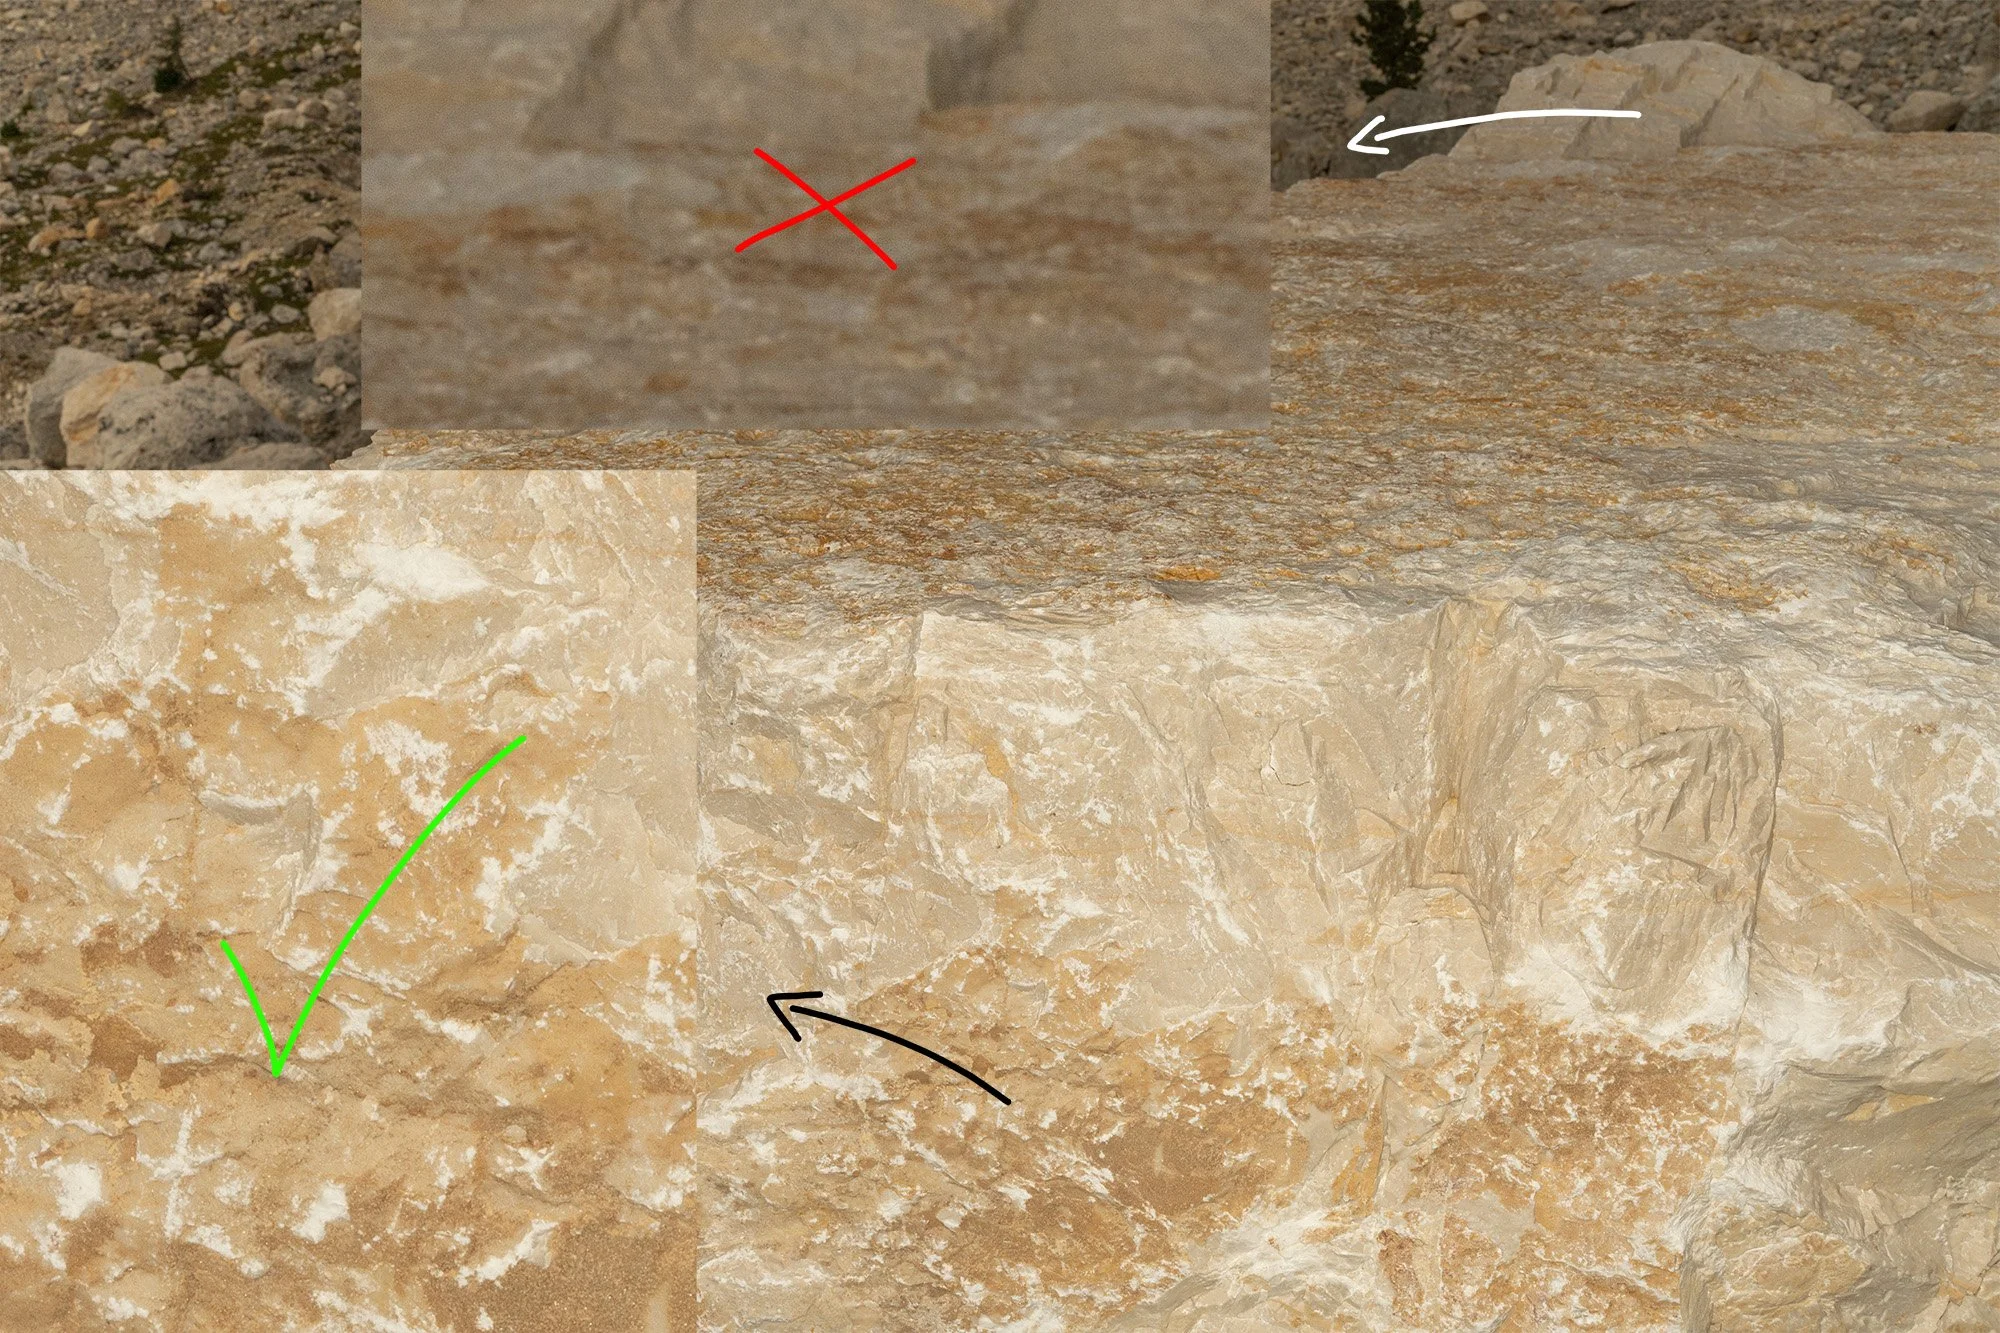
There is a new texture blending method called Natural which aims to preserve more detail resulting in a sharper albedo.
It has some issues:
It’s incredibly slow compared to Mosaic
It creates badly distorted texture data at certain angles
The sharpening, while nice in some places is overdone in others
For nearly all intents and purposes, Mosaic blending will work just fine.
While Natural is clearly sharper, this sharpness can be achieved—with more control—using external upscaling tools such as Topaz Gigapixel
Maxing out resolution
When building your Albedo (Diffuse map) on your source scan, pay attention to the resolution you are building at and the amount of pages. At this stage, the goal is to achieve max resolution, at this will be reprojected onto your lowpoly later.
We tend to bake Albedo at 16K using 1-4 pages, then bake it down to a single 16k.
More pages = more textures = more potential resolution
Speeding up texture building
The texture blending stage relies on GPU to resolve quickly, and can require a lot of VRAM. If it runs out, it will switch to using CPU to complete the blending process, taking ~10x longer.
On a 4090 with 24gb, the limit is about 100mil tris. Knowing this, we can simply create a decimated version of the highpoly and bake the albedo with it as source.
Be careful not to decimate so much that you start messing with the shapes. You still have to bake the other texture maps using the original highpoly and too much of a difference could introduce texture alignment inaccuracies.
Save up to several hours in processing time using a lighter mesh to bake Albedo/Occlusion. Ultra high detail is only needed to capture Normal/Height.
Focus masks
Depth of field can be an issue for texturing building, and is practically impossible to avoid in some shots
Usually, this is not a major issue, but in some cases—especially when maxing out the potential resolution of a scan—it can be noticeable.
A focus mask aims to exclude the out-of-focus parts of an image during texture building.
Don’t enable hole filling
Closing holes
Improving Alignment
Align at a lower quality
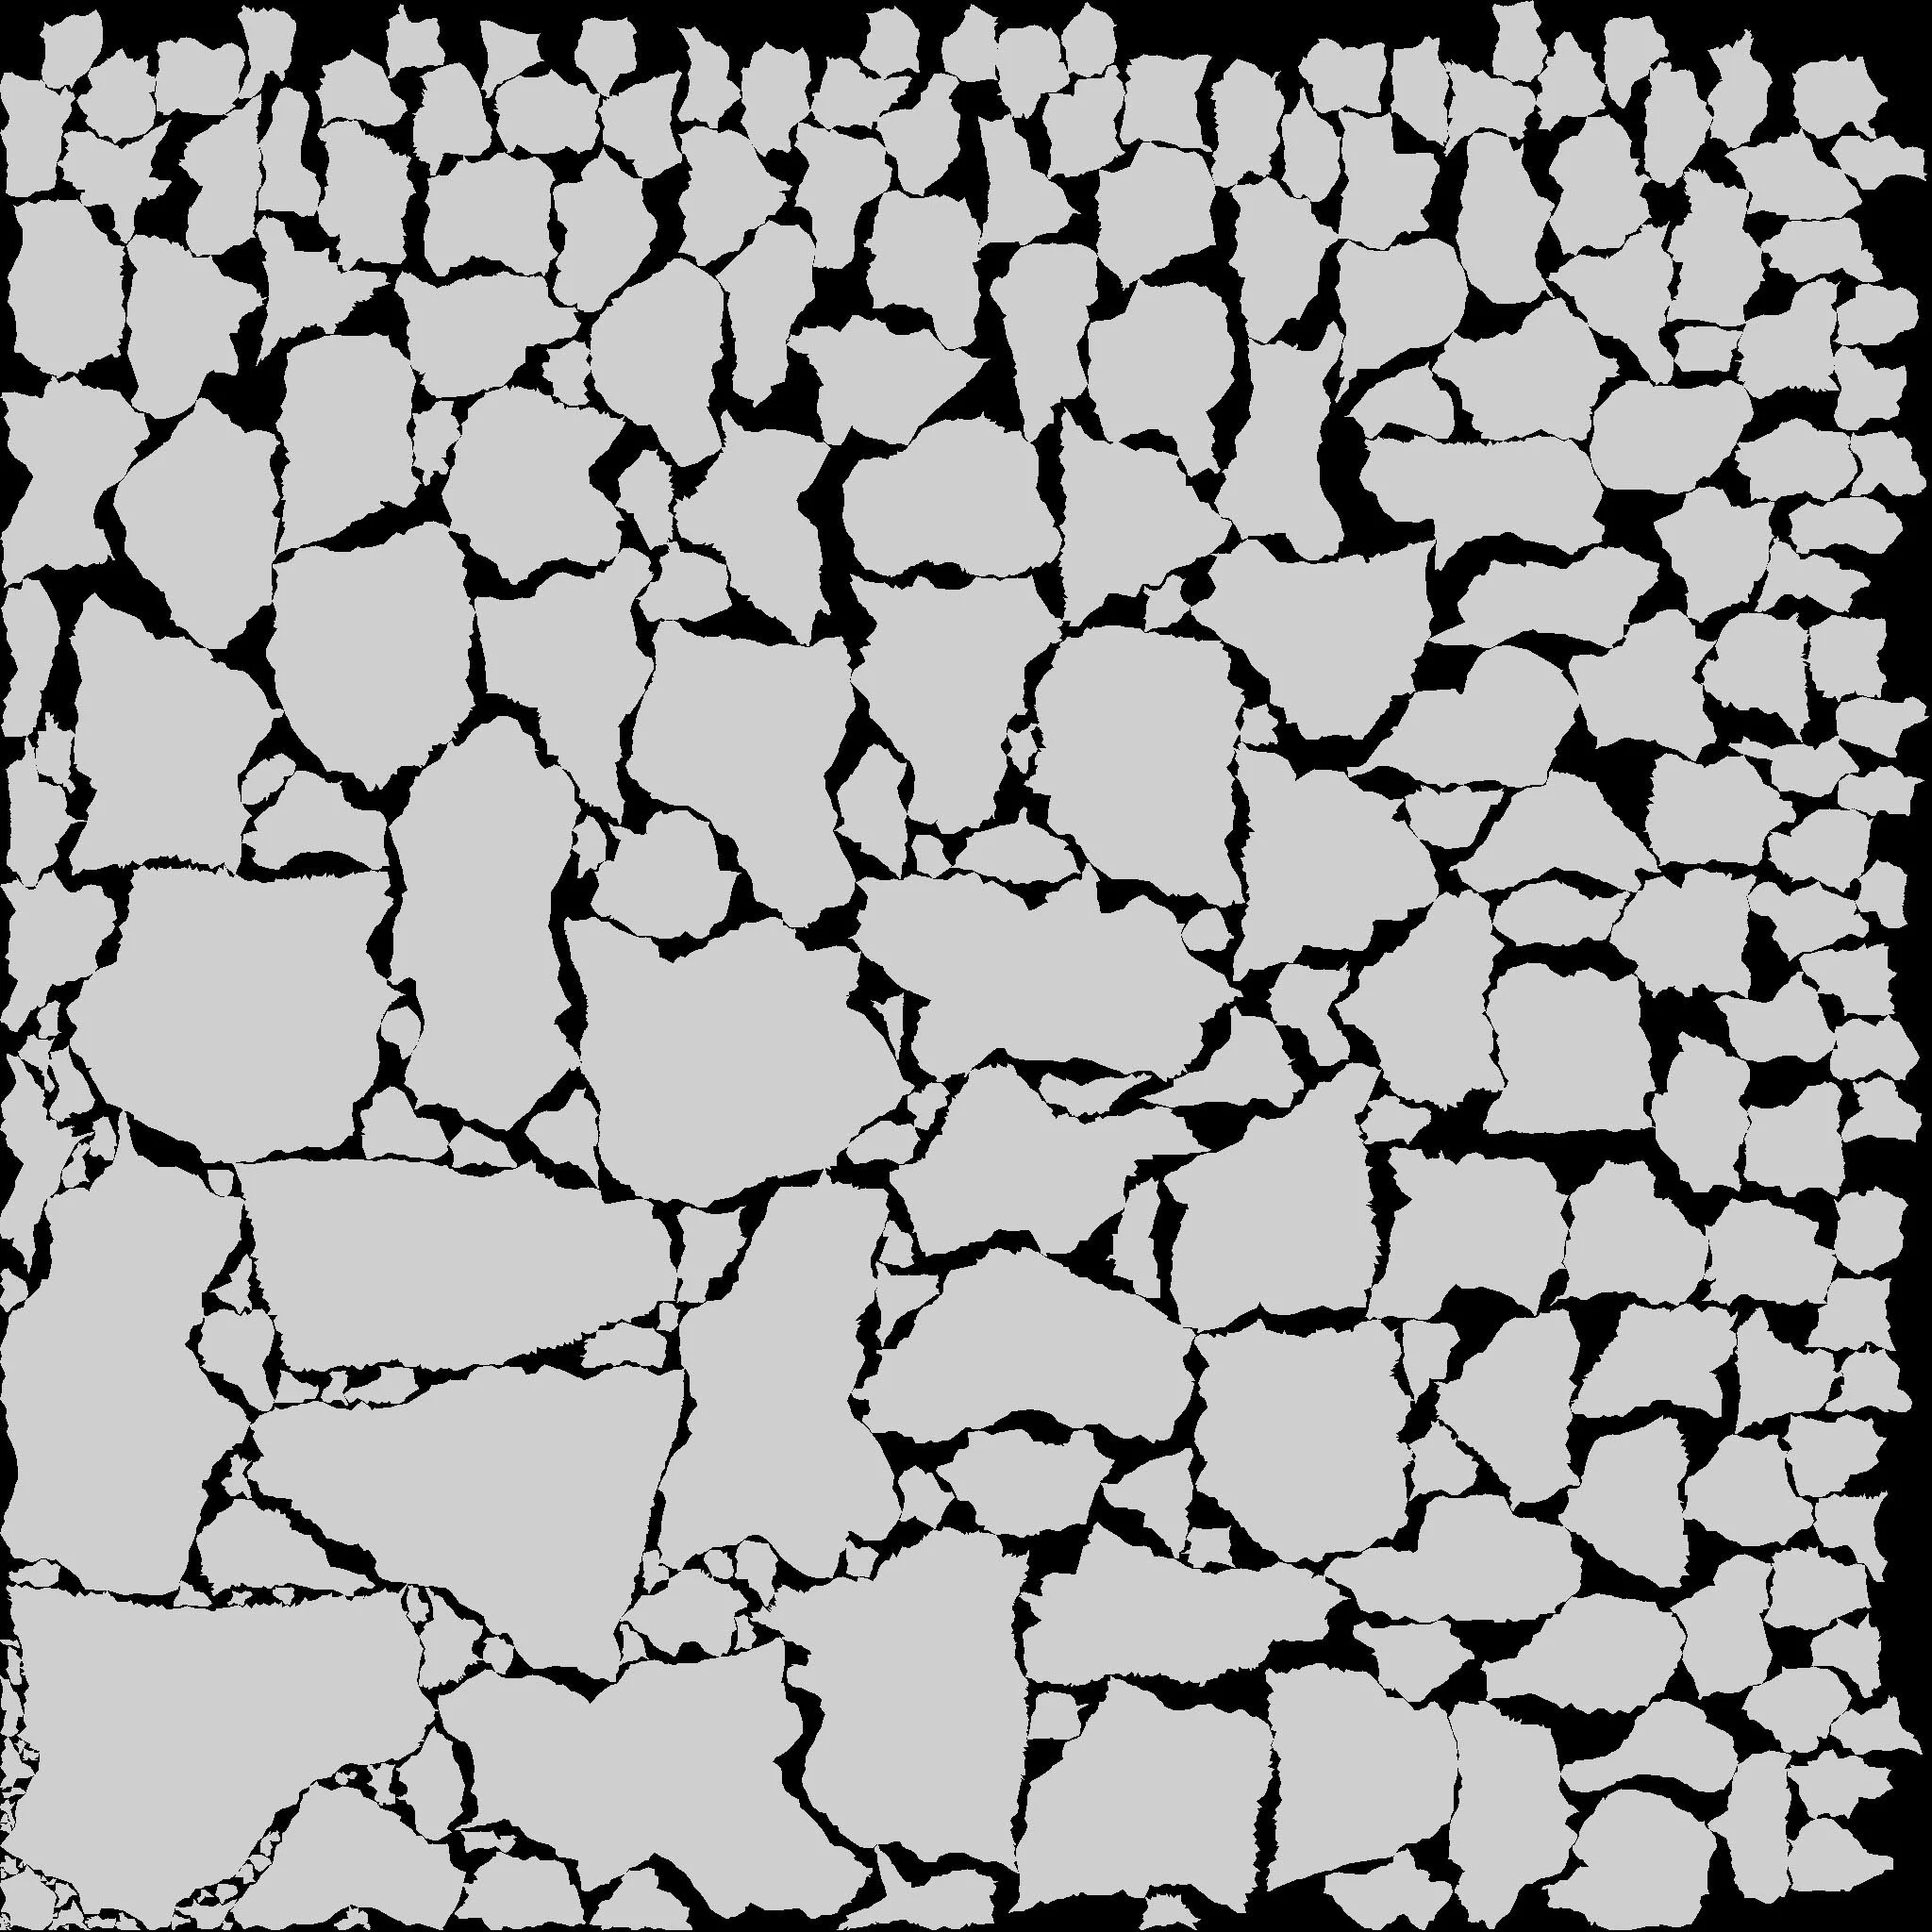
It serves as an easy mask to know where we have to fill texture.
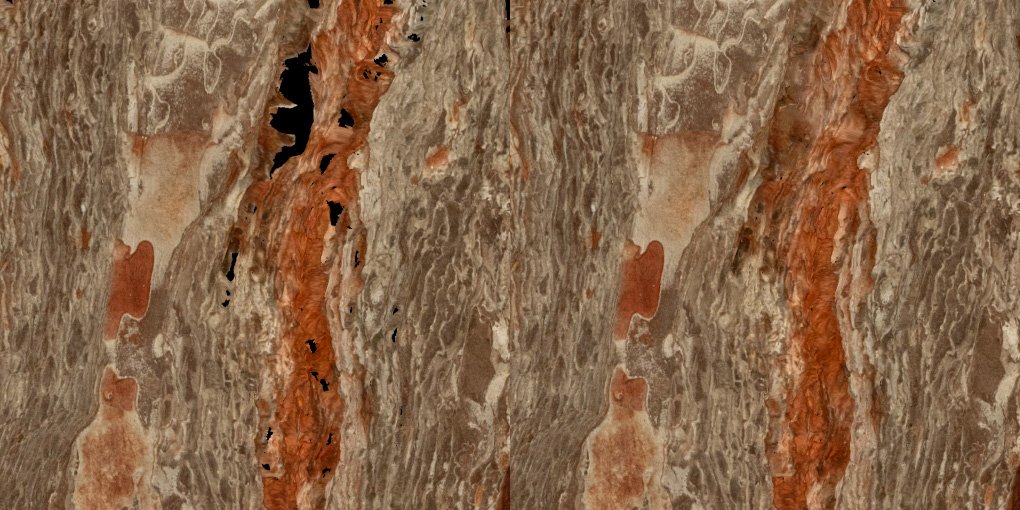
Before/After texture fill
Select all images → Tools → Calibrate Colors
Small holes are often hard to detect, while larger holes can happen in hidden areas. Closing holes right after generating your lowpoly is the best and easiest way of dealing with it.
Tools → Model → Close holes
Best to keep the level below 50% to avoid capping things you shouldn’t.
After the holes are capped, it will automatically select the newly created geometry. We like to do a selective smoothing operation on the selection, as this helps blend it into the surrounding geometry instead of creating a perfectly flat surface.
Auto UV algorithms tend to create cuts where it detects peaks & valleys. Smoothing helps counter-act this with little to no side-effect.
Hidden clean up feature
There exists a rather hidden mesh clean-up feature in Metashape.
It will not retopologize the mesh, only fix any mesh issues it can find as per the list. If the option is grayed out (which it will be at times), it means there is nothing that can be fixed.
Smoothing
Doing a very mild smoothing process on your lowpoly will help the unwrapping algorithm create less cuts and unkink any overlapping edges.
Be careful not to overdo it and end up with a soft mesh.
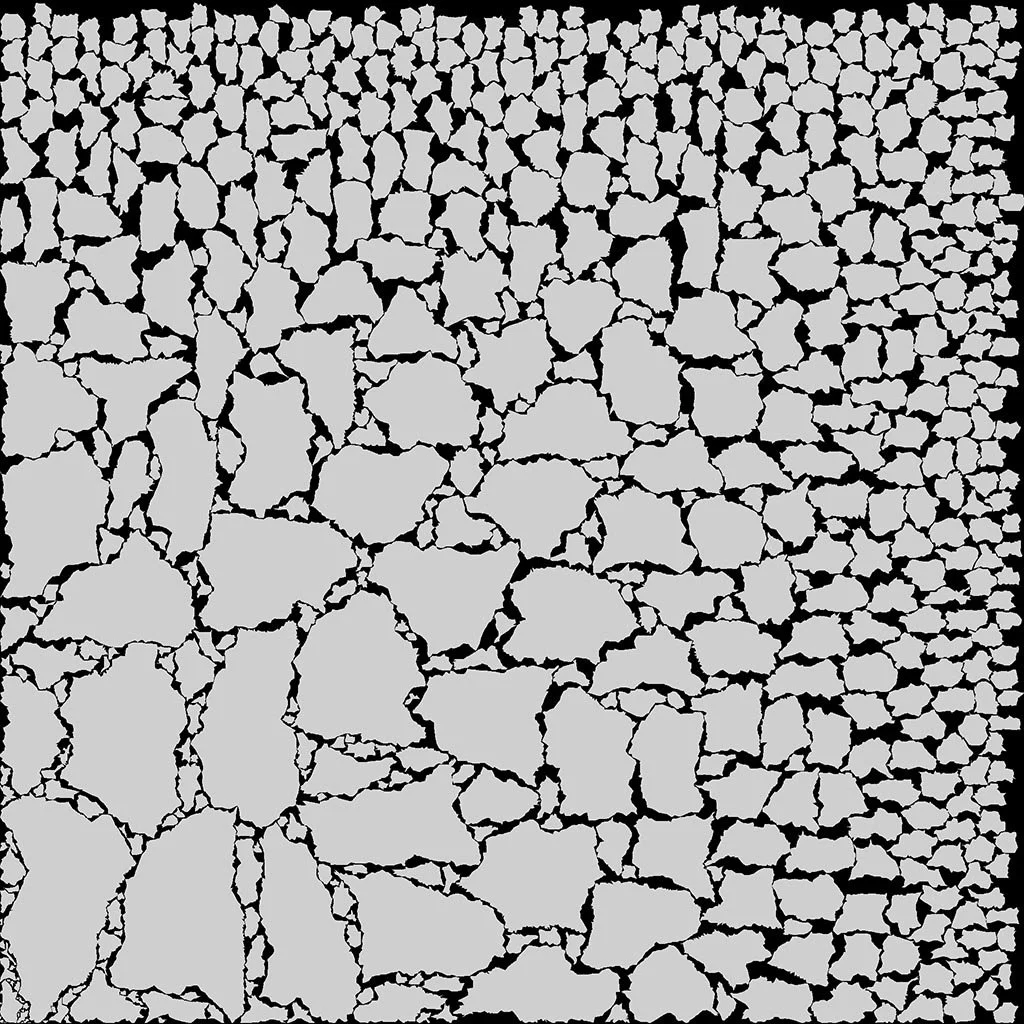
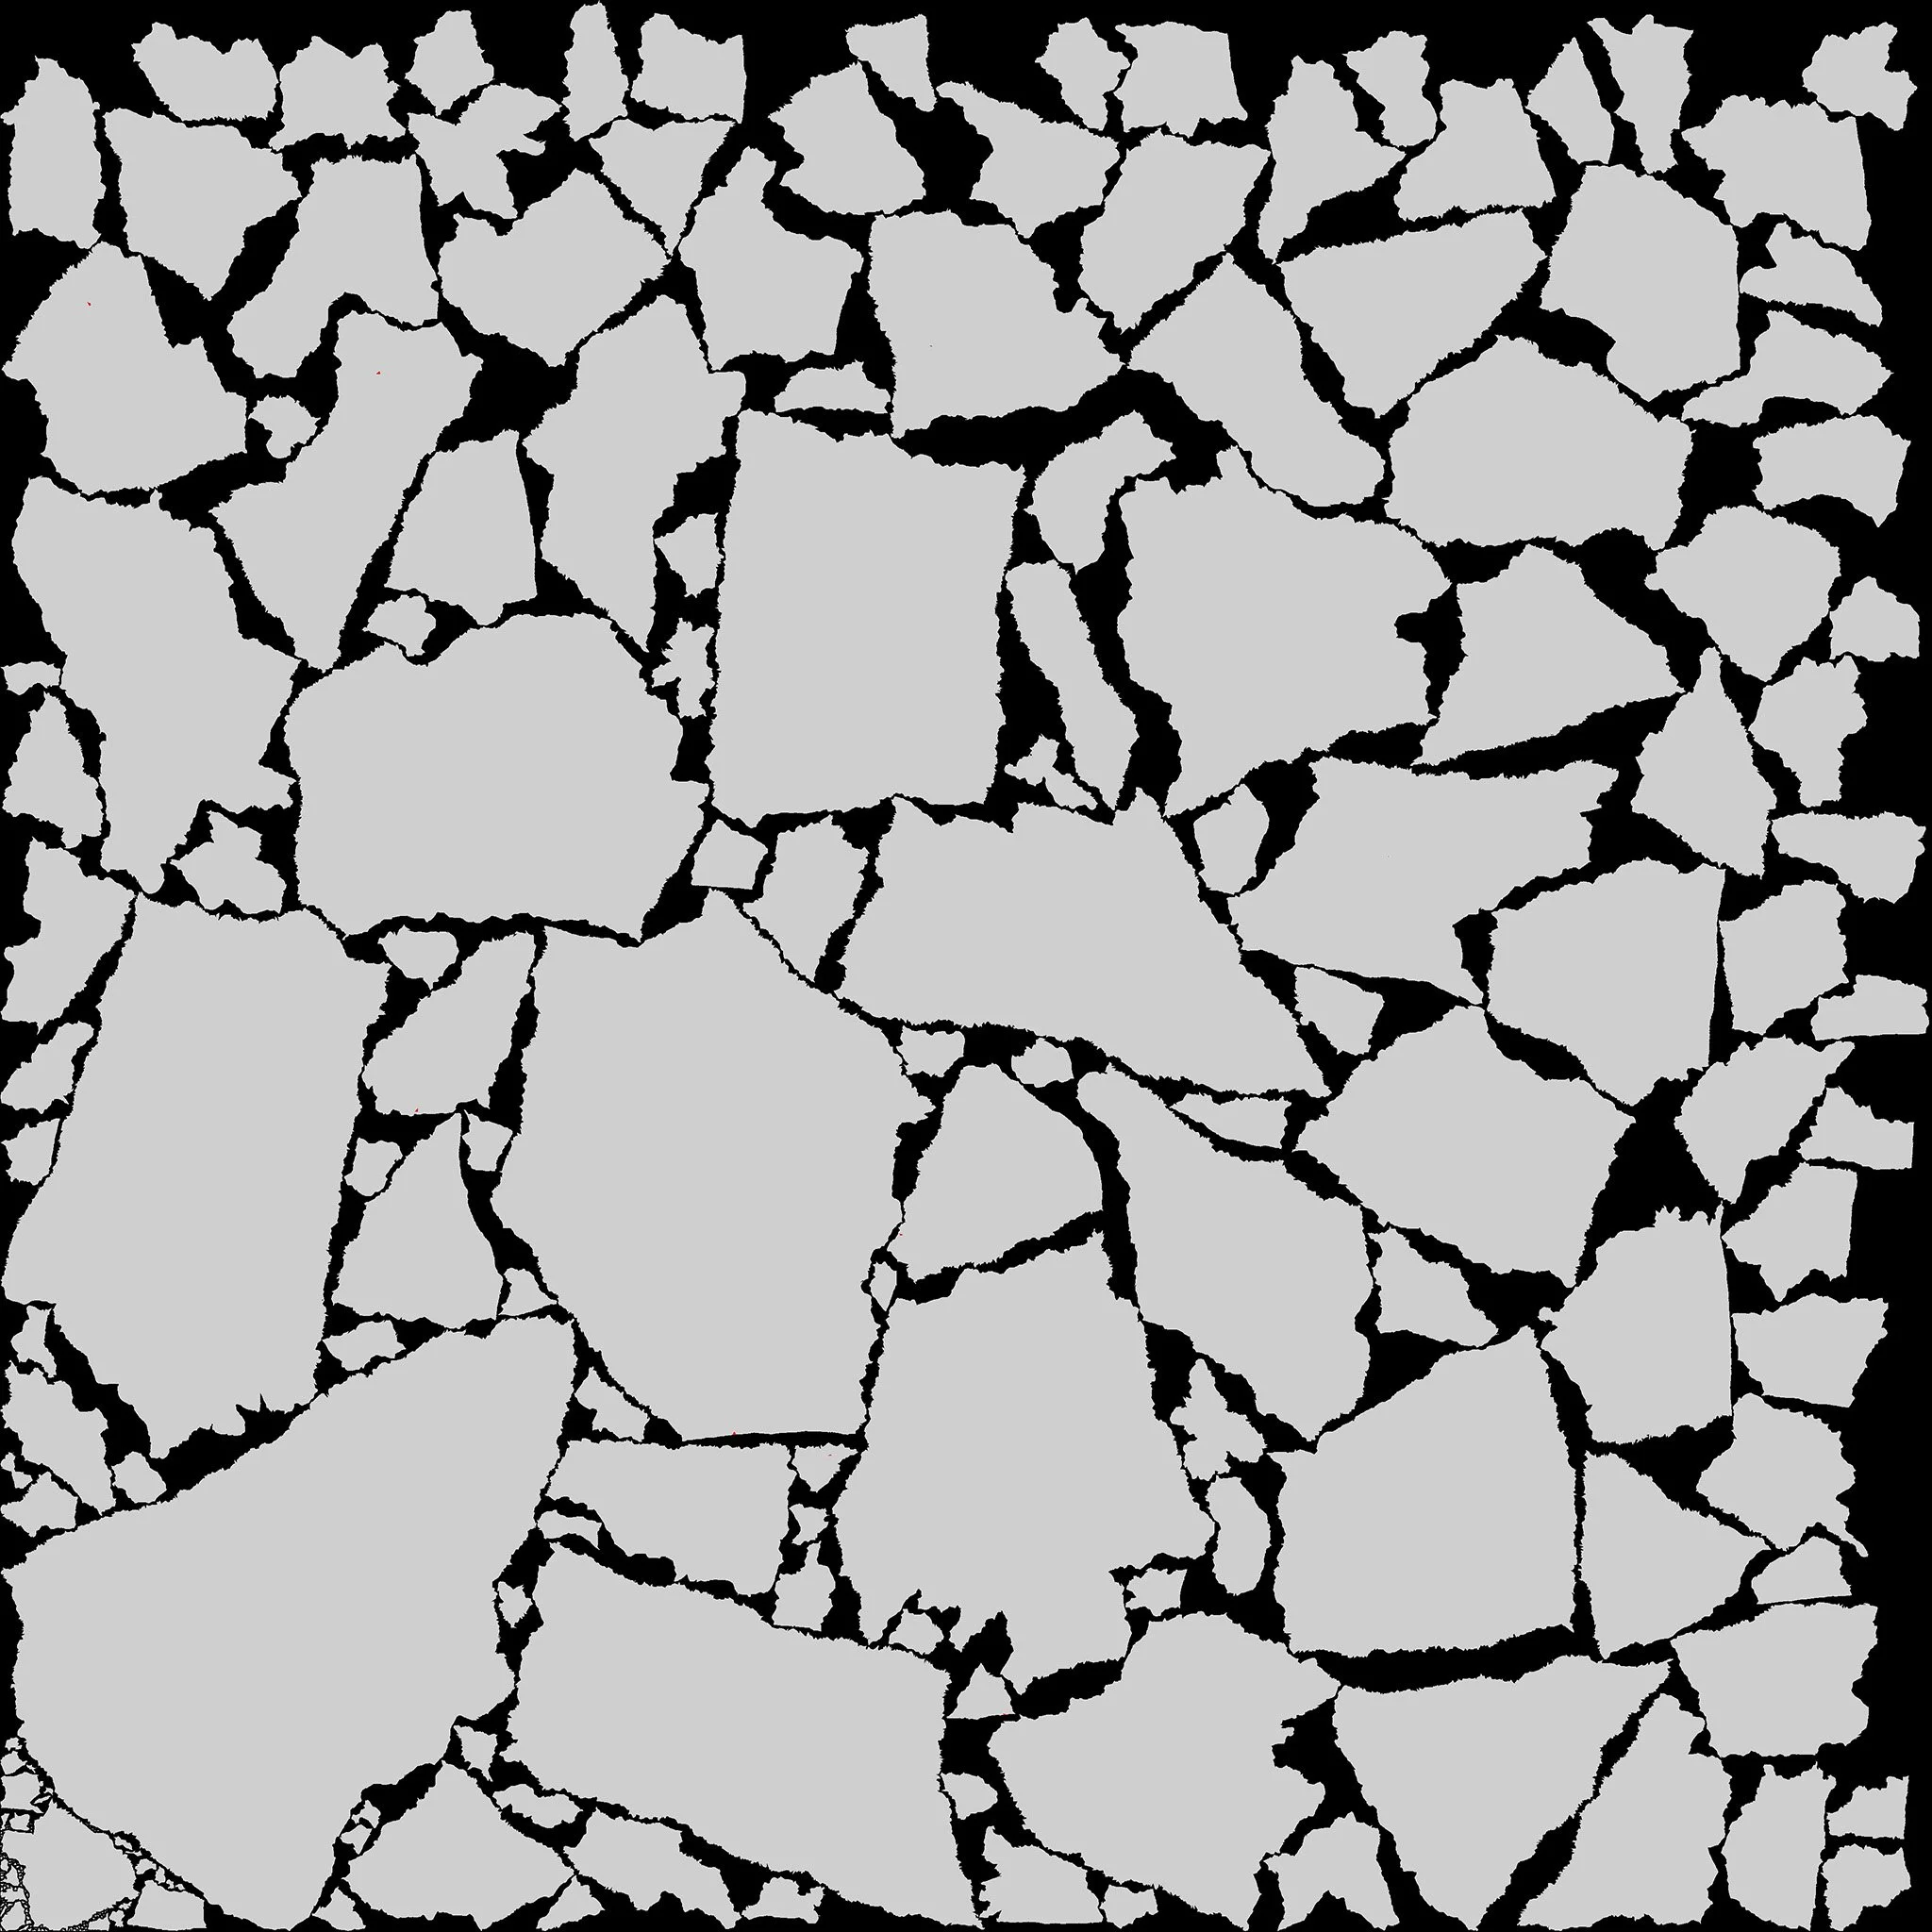
Default mesh: 625 islands
Despite doing our best mitigating this through good on-location practices, sometimes things just don’t work as expected.
There are a few tricks we can employ to try and save it.
Optimizing cameras is unlikely to help
This may be a hot take, but we never found camera/point cloud optimization helpful from the POV of fixing serious alignment issues, and we tried a lot of them.
We’re not saying it can’t help fix minor issues, but if your scan has serious issues, there is a good chance you won’t be able to fix it (though we still try and sometimes succeed!)
You generally shouldn’t be using highest quality for aligning because it upscales the images. It can in fact produce worse results.
If you are having minor alignment issues, or some of your images won’t align, lowering the alignment quality to medium or even low can help, though we keep it on high unless there is a serious issue.
Increase key/tie point limits
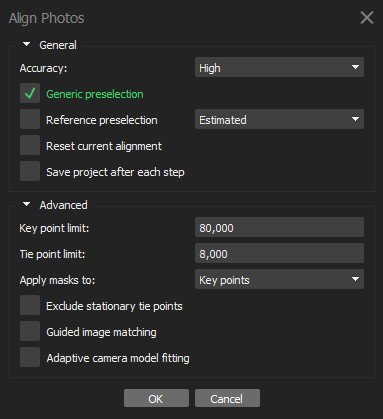
Increasing the key point limit increases the potential amount of features detected per image, while tie point is the amount of features used for alignment.
For complex, high resolution scans—or scans struggling to align—increasing these limits past the default value can help create a tighter point cloud.
We have found these settings to be a good middle ground:
Key point limit: 80000
Tie point limit: 5-10000
Keep in mind that increasing this will increase time and resources required for alignment.
Lower depth maps quality
Object masking
The higher detail settings you use to build your model, the more you expose alignment issues.
If your model has major alignment issues, lowering the depth maps quality downscales your image resolution creating a smoothing effect which helps hide surface reconstruction errors.
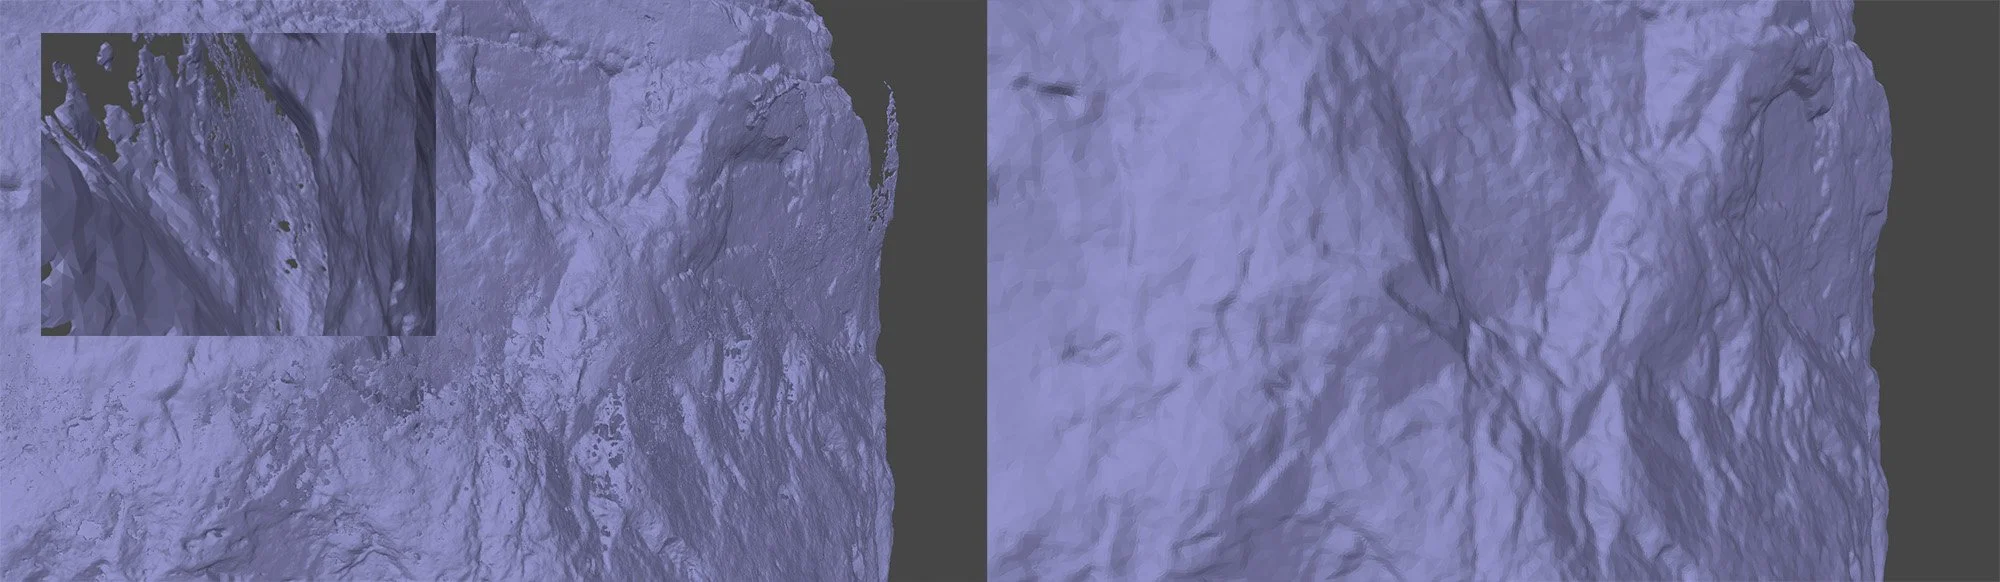
Ultra High → Low
We will make a separate post looking into this exact asset as we also know the reason behind the poor alignment
A lot depends on the exact alignment issue. Small surface defects can be fixed by processing on high, while serious issues as above may need medium/low.
As for the errors, given you always want your source Normal/Height to be baked from ultra, the question becomes:
How visible are the errors
Is it worth the extra time spent fixing
We will speak on this separately.
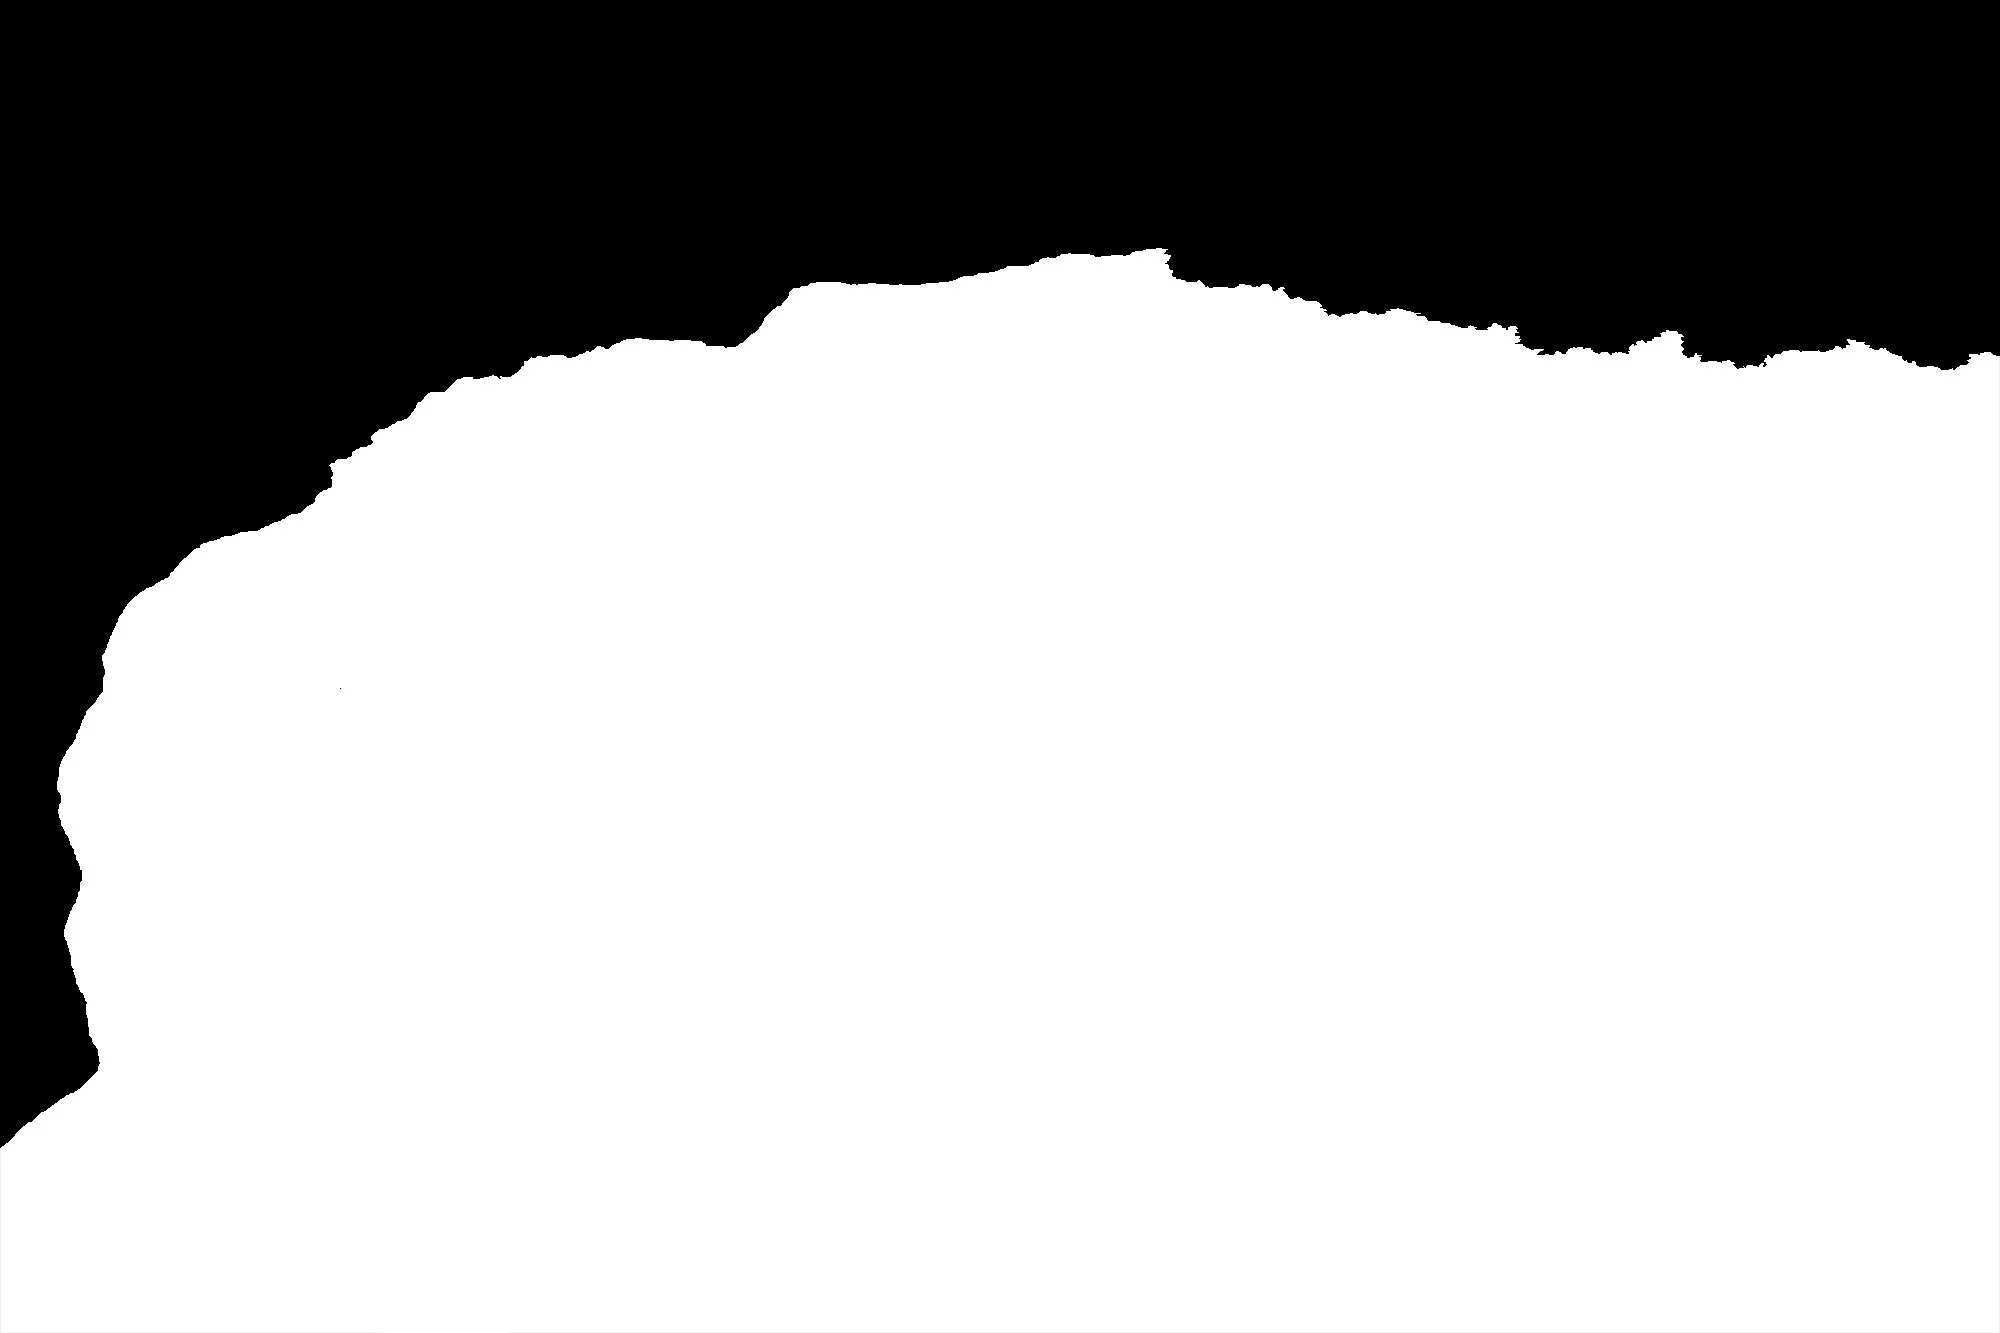
This method creates a mask for your source images of the exact subject you are scanning, and may help creating tighter alignment. We have saved a few scans using this technique, so it’s worth trying, but it doesn’t always help.
It involves a few potential approaches, either:
Build a mesh on a lower quality and automatically create the masks in Metashape
Import custom masks
Generate image masks using AI in Metashape
Works well for things with a solid background, ie. turntable scanning. Far too unreliable to use for outdoor scans
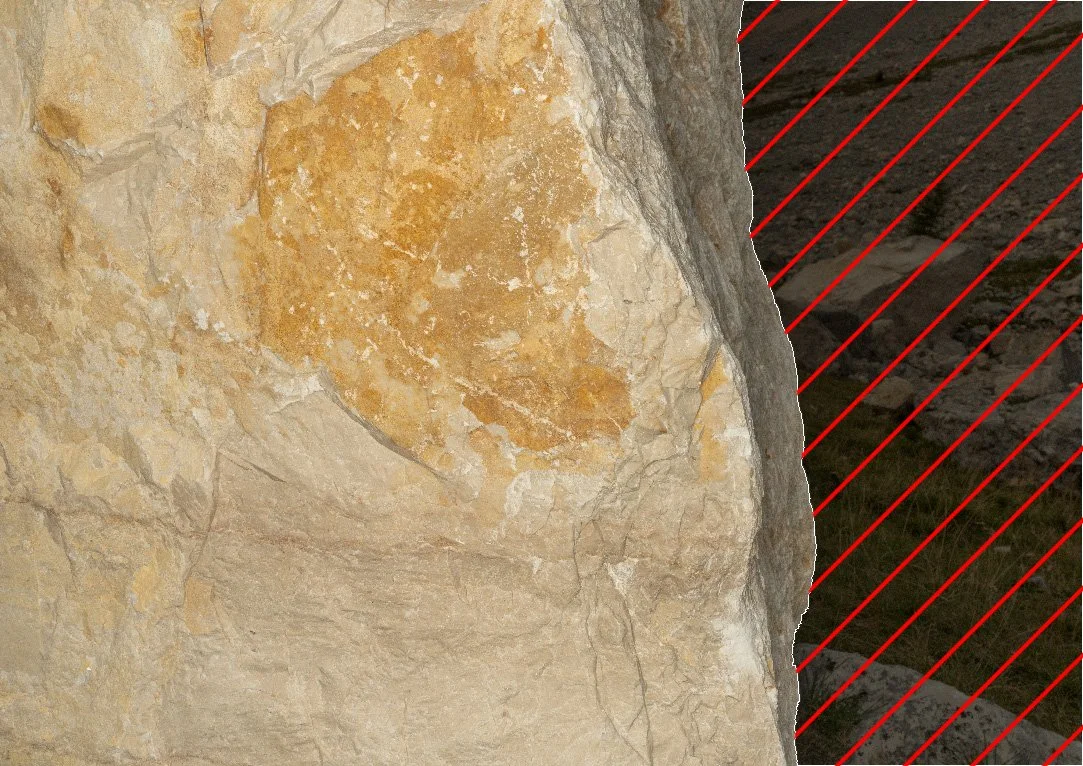
In Metashape
Importing custom masks
Smoothed at 0.5: 285 islands
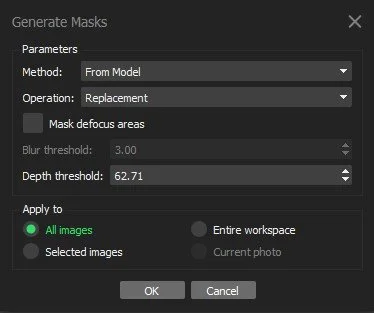
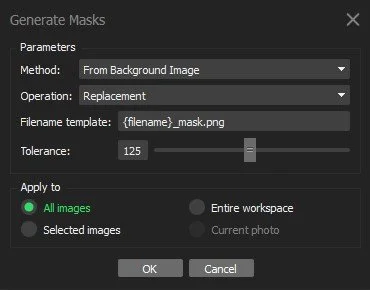
Right click on any image ➔ Masks ➔ Generate Masks
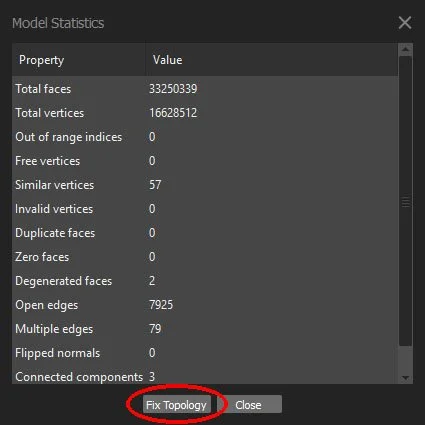
Tools ➔ Model ➔ View Model Statistics
Auto UV algorithms tend to create cuts where it detects peaks & valleys. Smoothing helps counter-act this with little to no side-effect
Automatic UV generation becomes a necessary part of the pipeline as complexity scales.
Right click on chunk ➔ Import ➔ Import Masks
When naming your masks, make sure it is identical to the source image.
If your image is named img1, your mask should also be named img1. You can add extensions such as _mask, just as long as the filename template is updated accordingly and the file format corresponds.
Metashape default (75% usage)
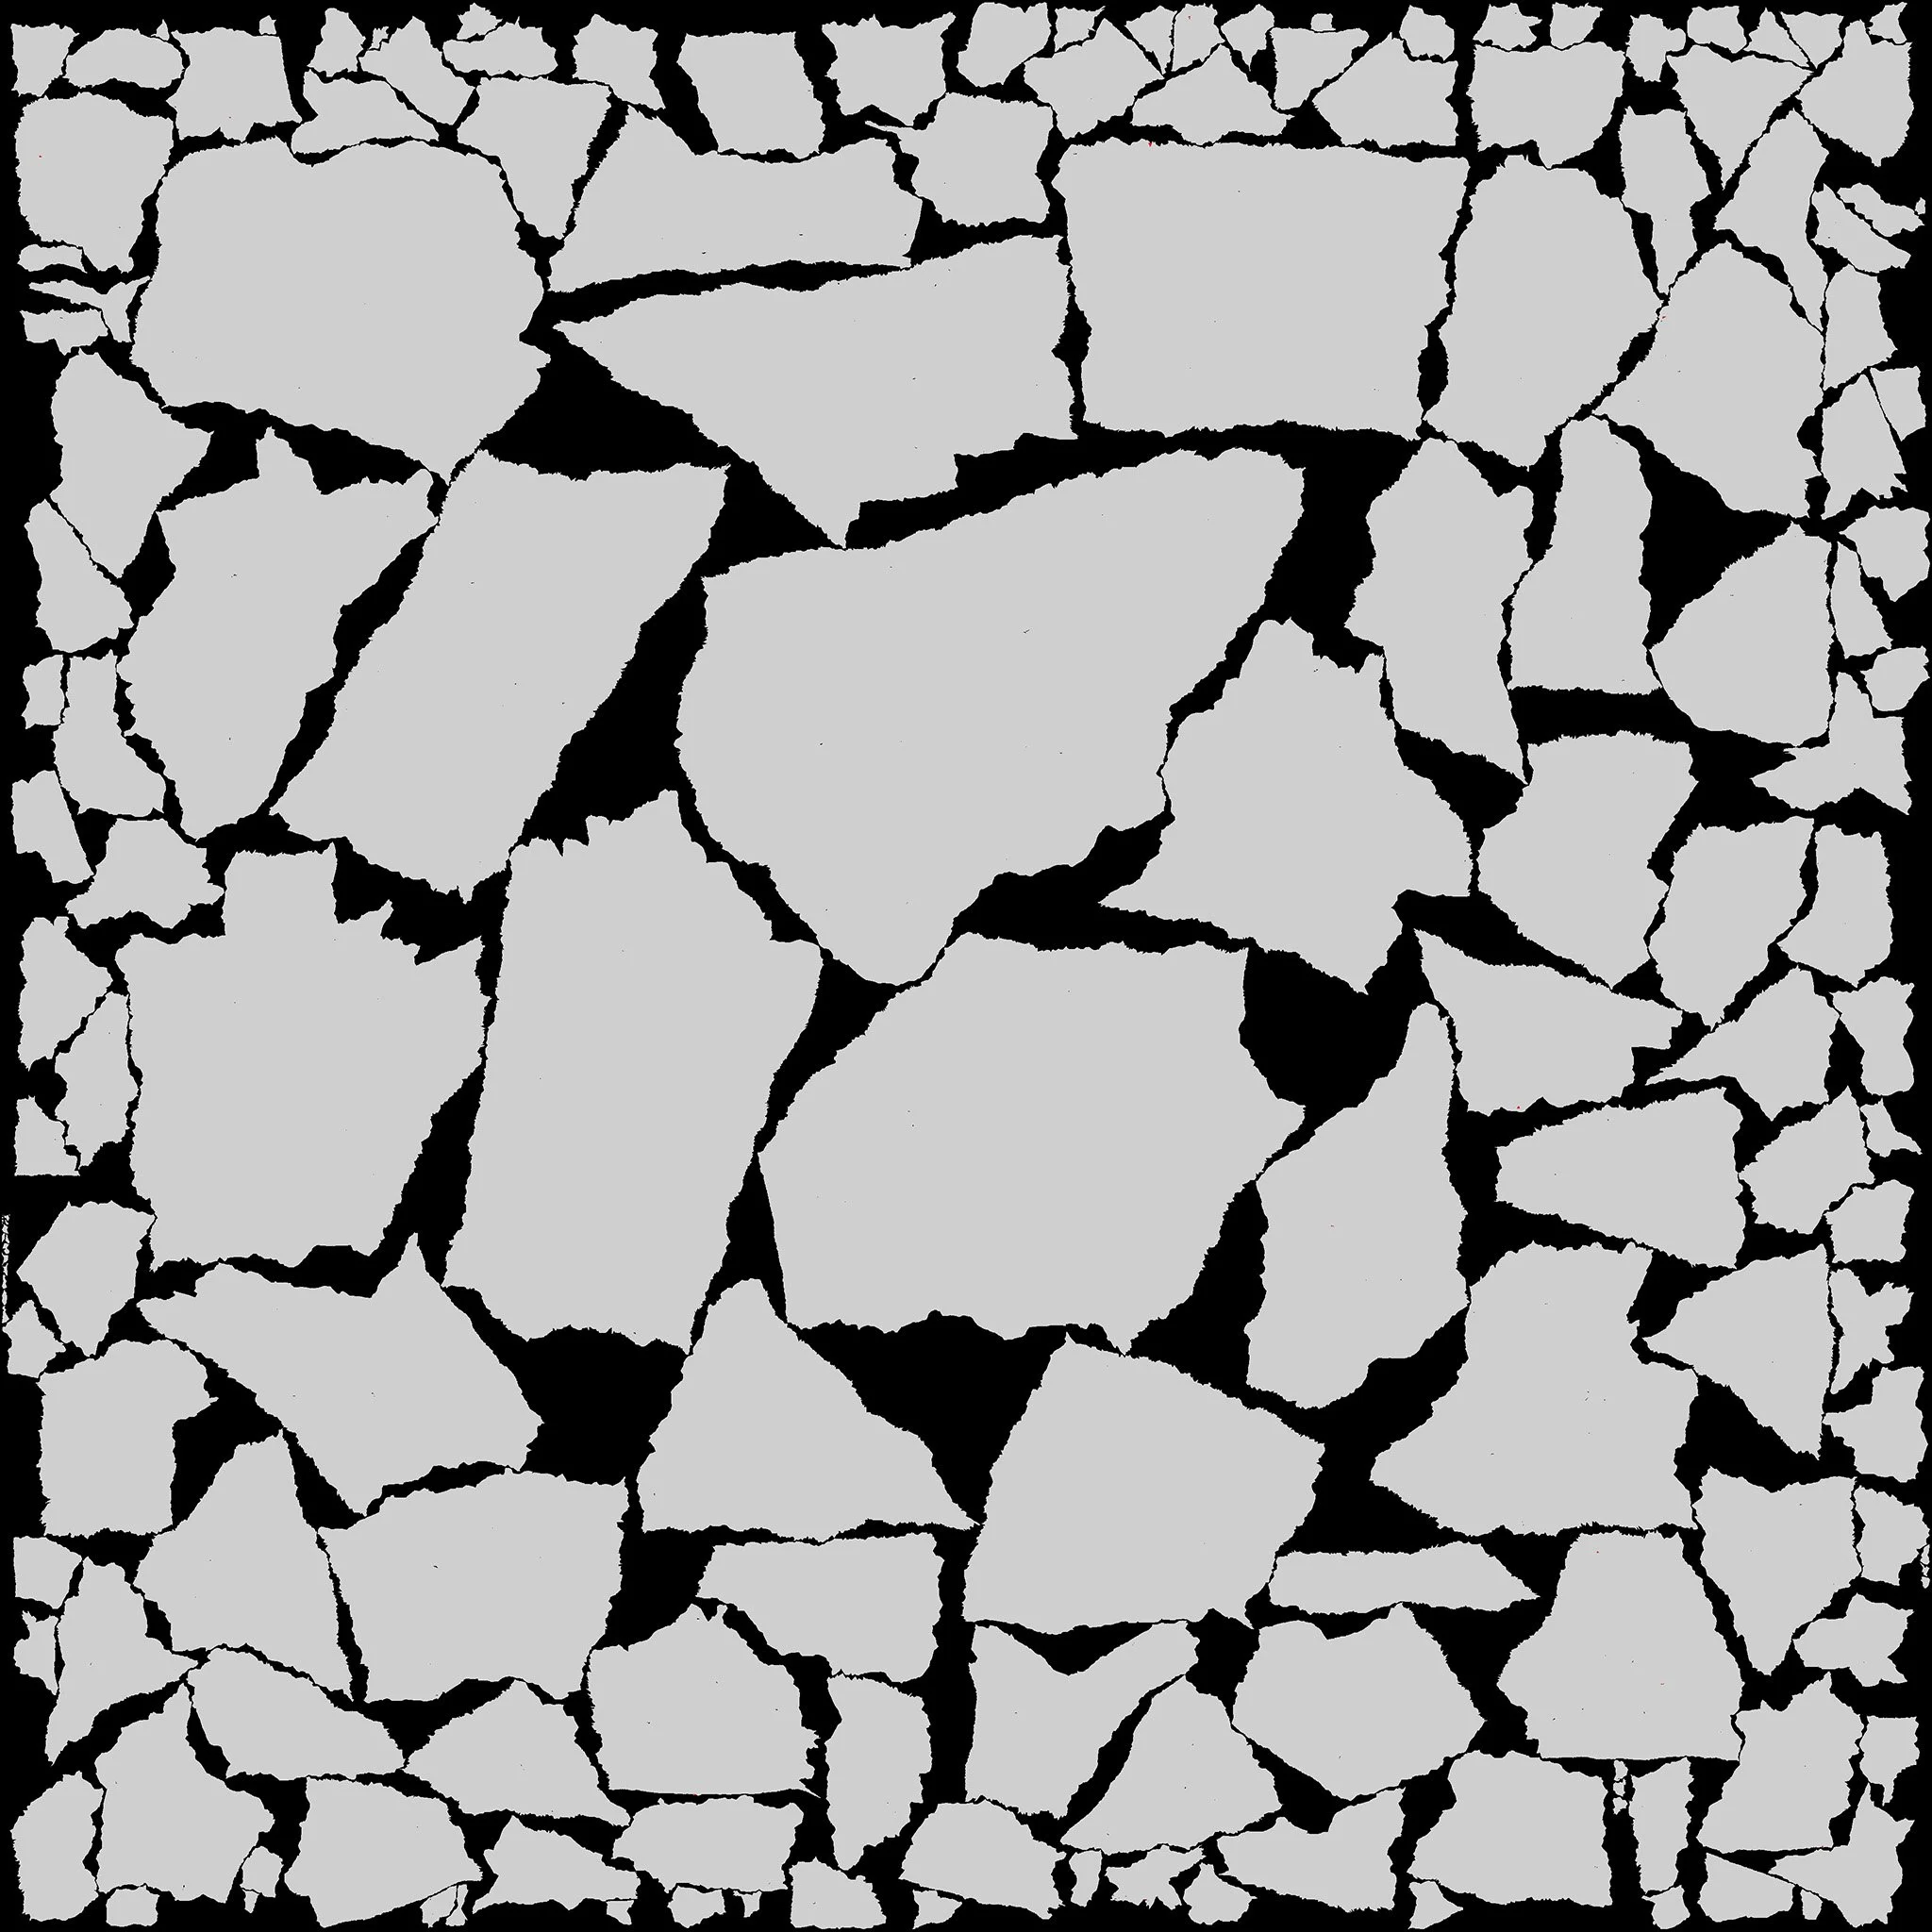
RizomUV (79% usage)
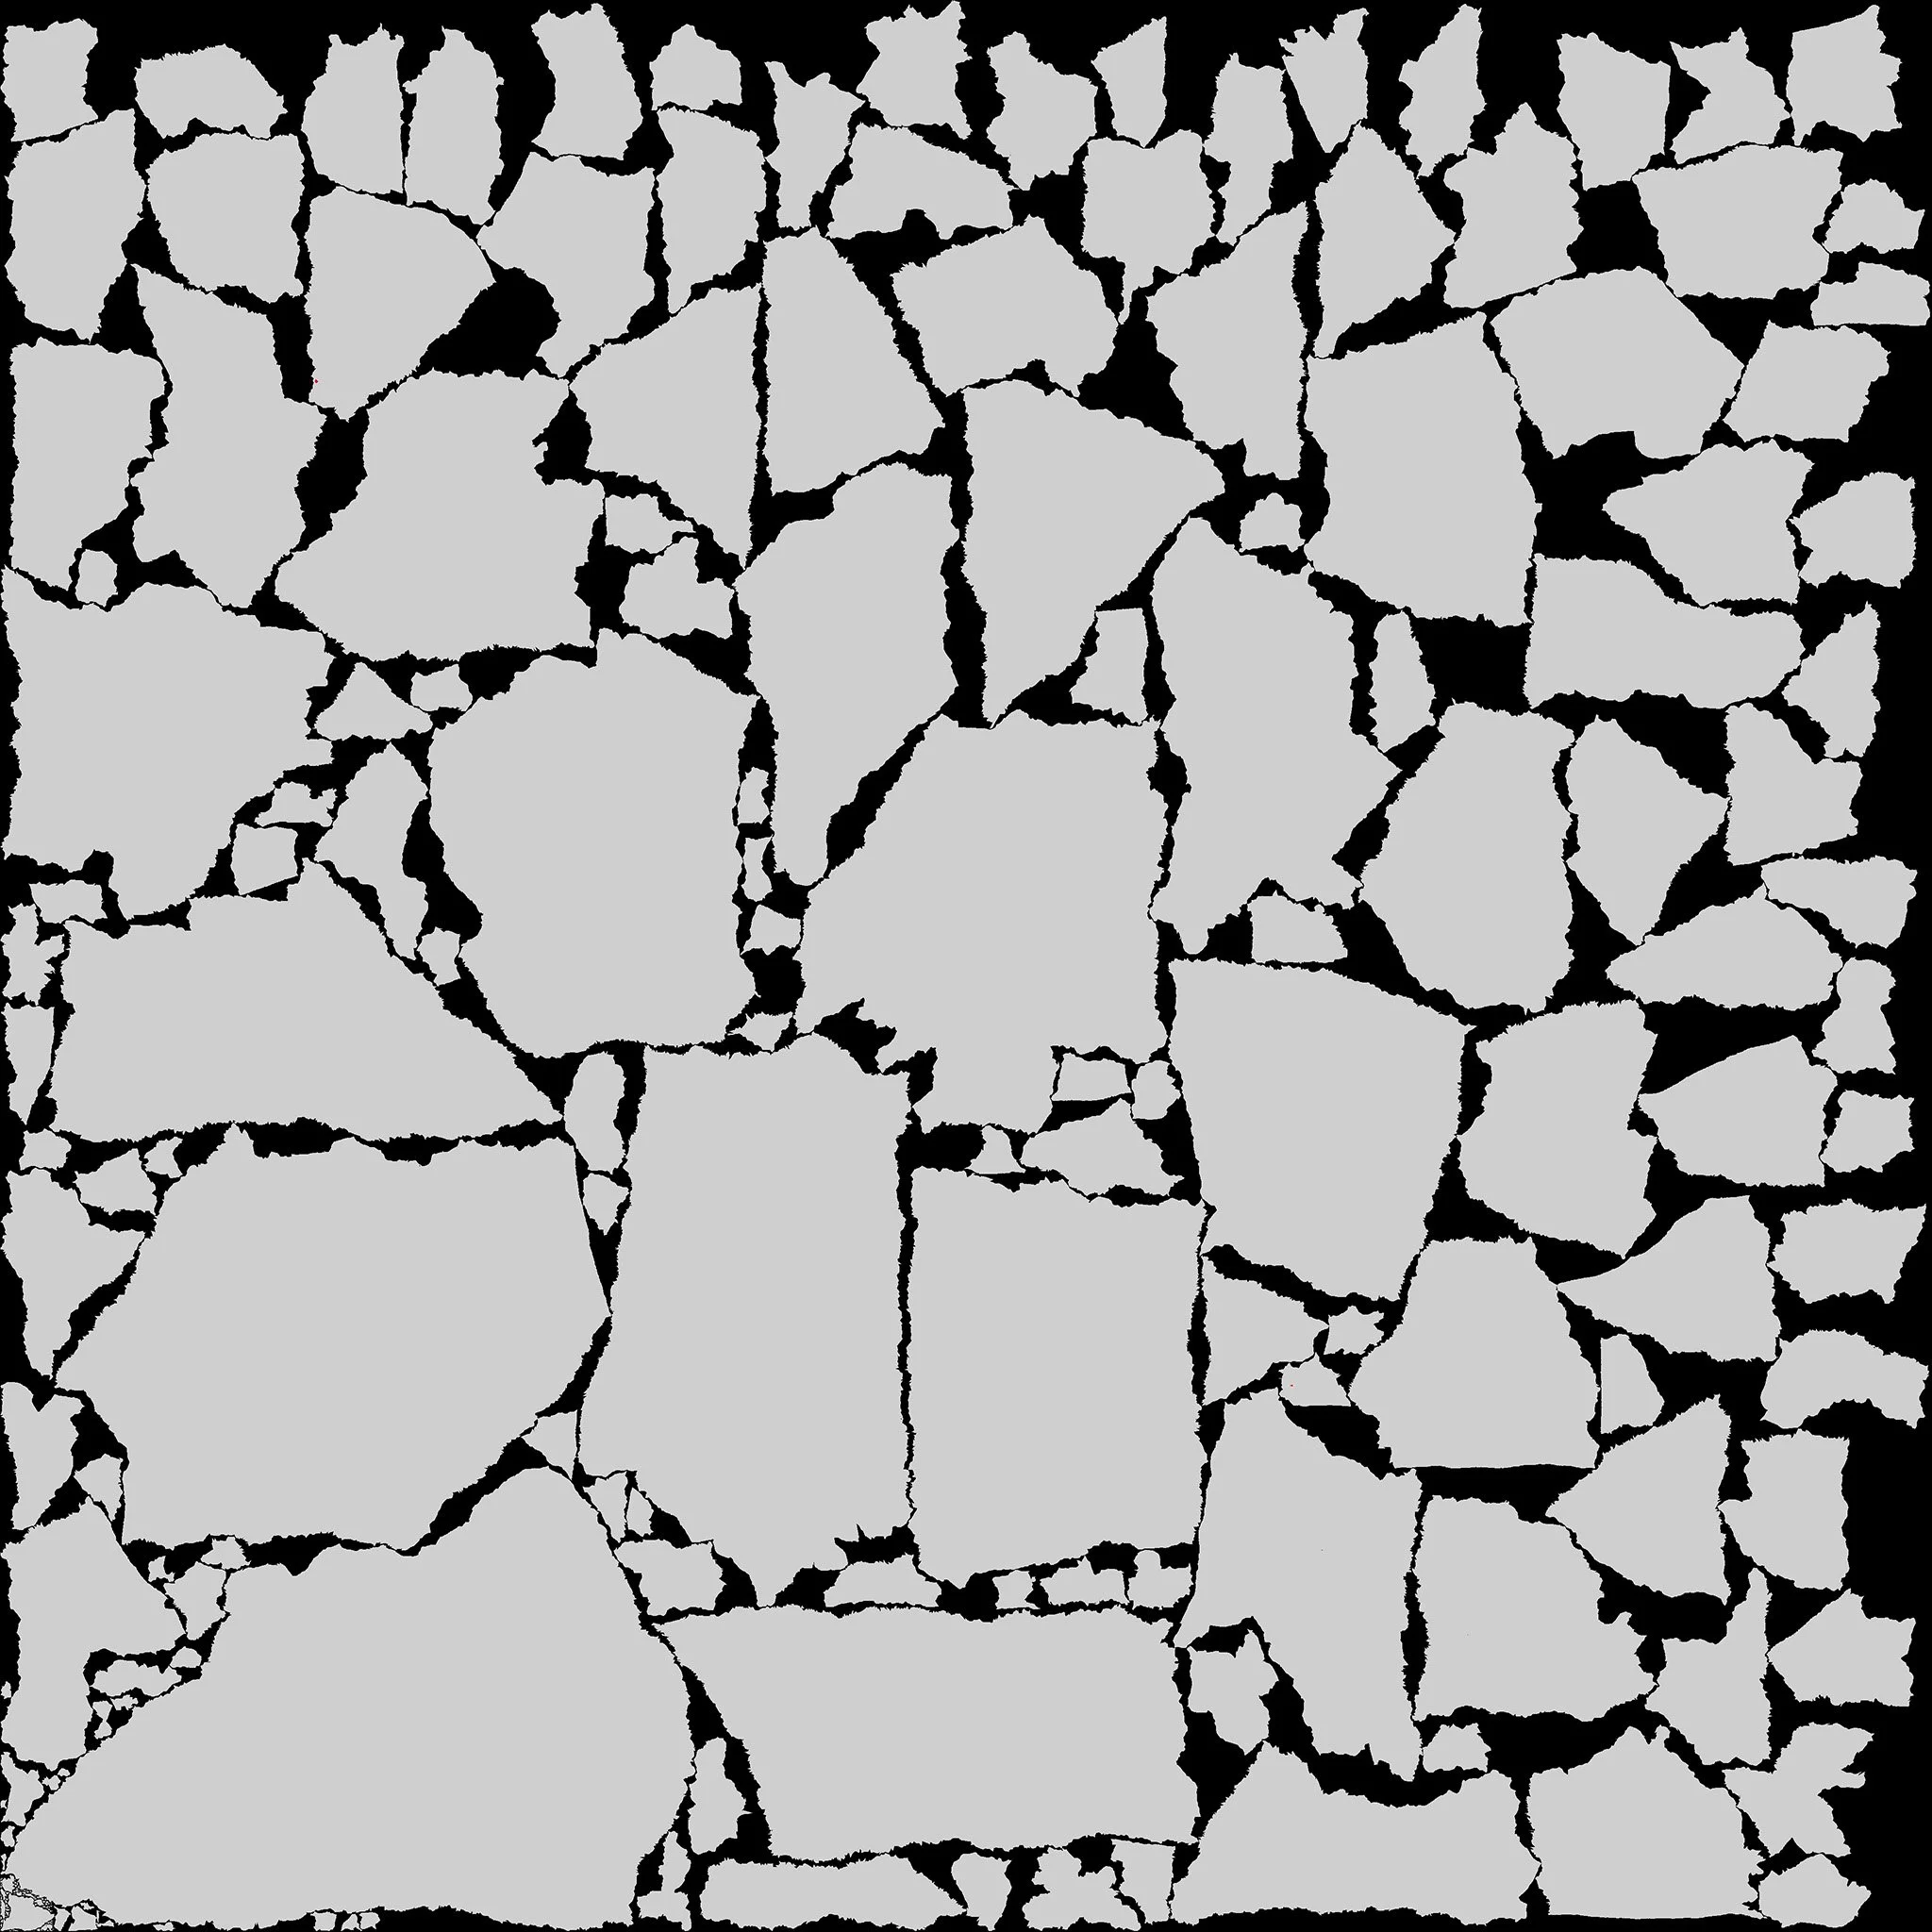
RizomUV (world-aligned, 76% usage)
Defaulting to world-aligned may just be worth it.
03
Notice the localized distortion when using Natural
Unwrapping
Metashape’s unwrapping algorithm is surprisingly robust, but lacks any controls. It will generate reasonable cuts with relatively low distortion, but it leaves several things on the table:
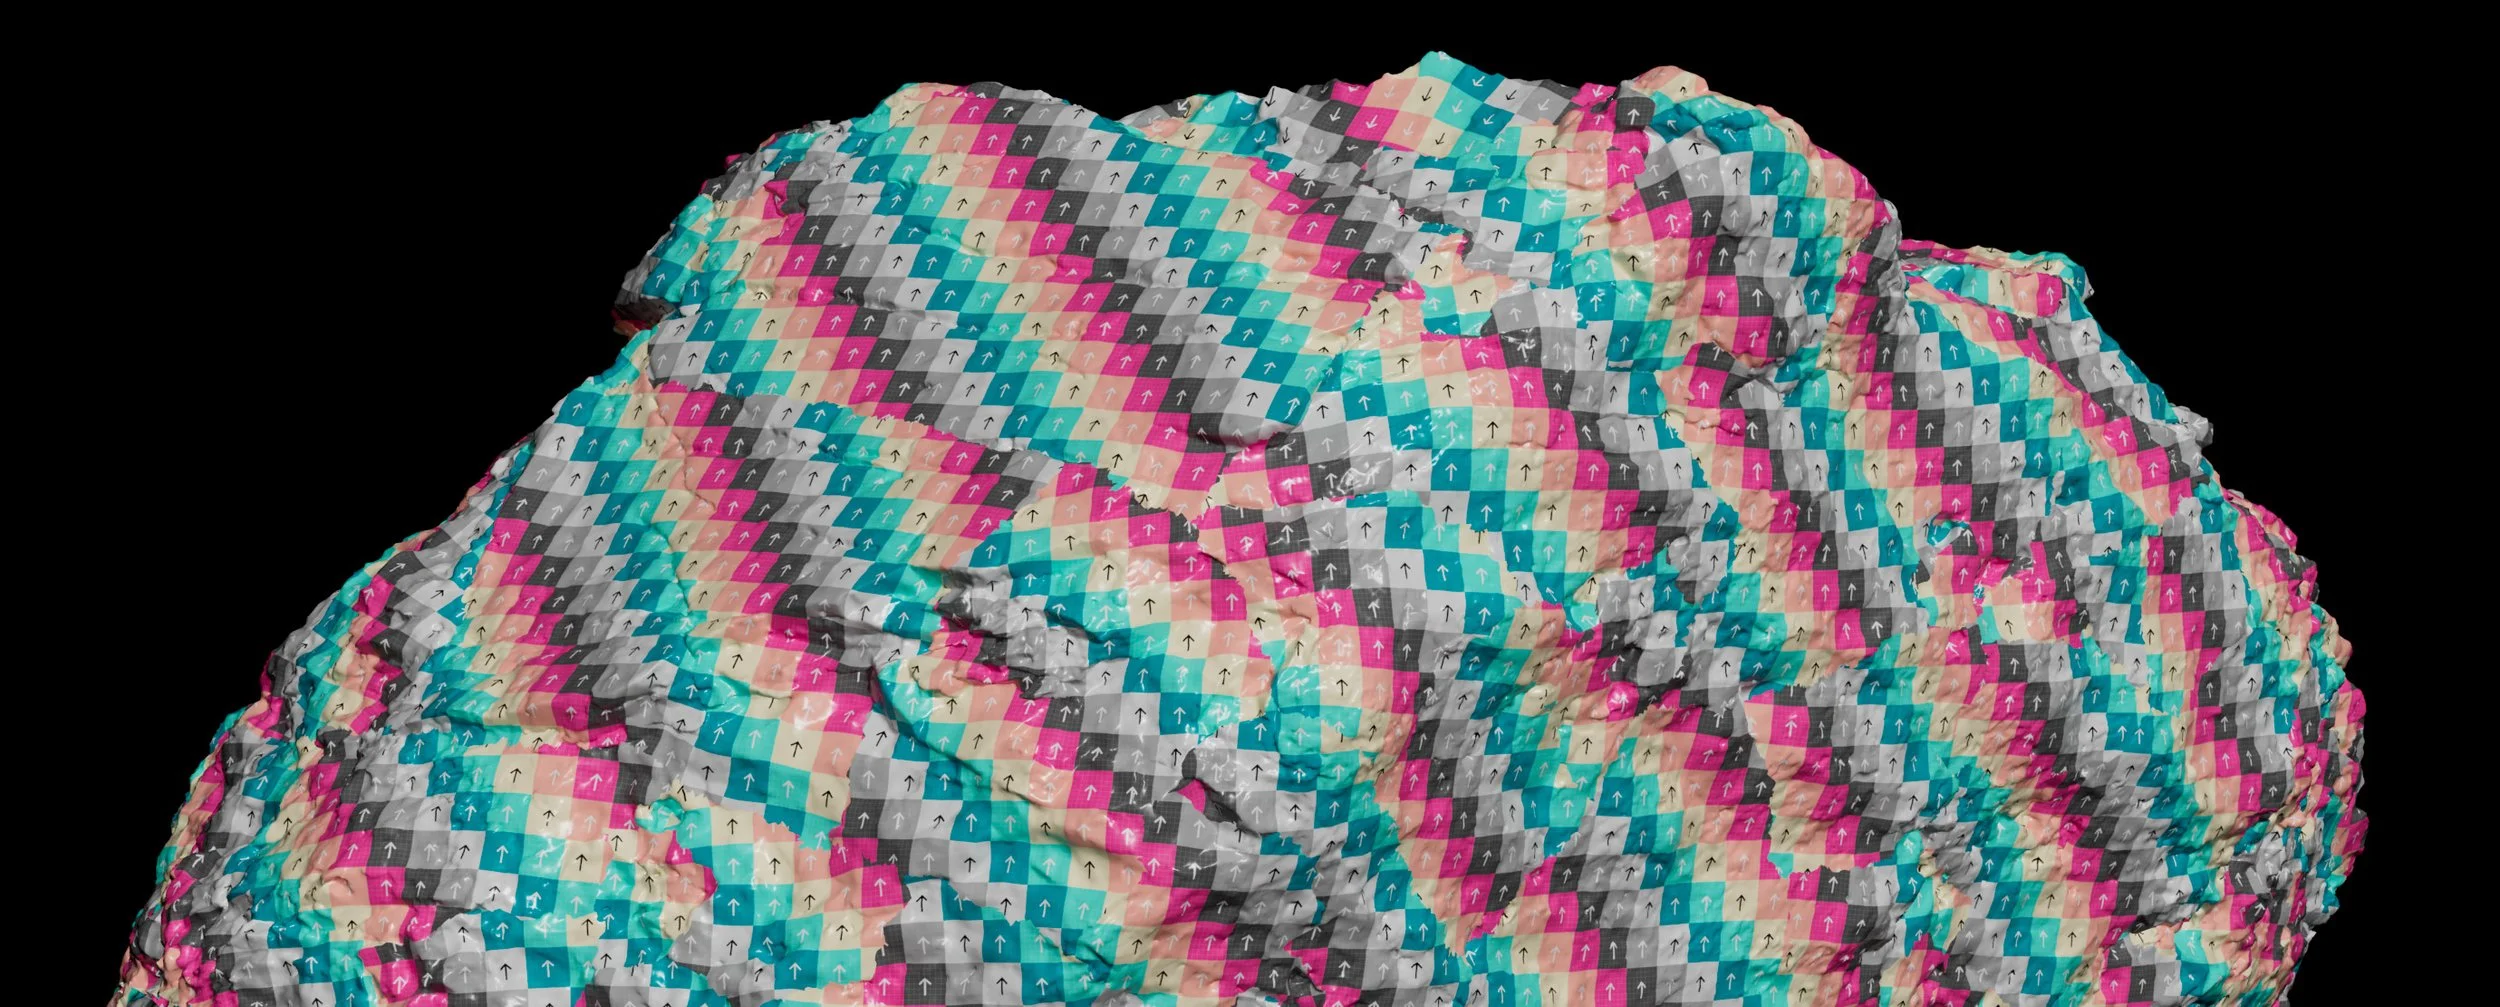
World-aligned UV island rotation
Seam placement control
Packing efficiency can be improved by ~5-10%
RizomUV and UVPackmaster are great options
This becomes a concern if you want to overlay repeating textures such as detail maps, especially if they represent directional features.
While a world-aligned shader can get around this problem, deliberate UVs can project a certain texture flow on the object, helping them feel more integrated on the surface.
Auto UV
Regarding generating new UVs, we would argue that auto UV solutions are still not that strong.
Though in this case, do we have much of a choice? Methodically unwrapping a complex, million+ triangle object is a slow process, and the benefits are not always evident.
In case you feel like being more strict about hiding your seams, generating in Metashape and manually stitching islands together might overall be the best approach.
Calibrate in RealityCapture?
We know there is a feature for this, but haven’t tested it.
Planning a project involving foliage? Let's have a chat!
+357 996 25 761 — 09-21 | GMT+2