
BUILDING REAL-TIME NATURAL ENVIRONMENTS — PART 03
Scan image-processing and
alignment troubleshooting
Preparing imperfect field captures for reconstruction.
IMAGE-PROCESSING
With a proper cross-polarized camera setup and good, consistent shot-taking, there is generally little that needs to be done to the RAW images.
However, because it is always better to do adjustments in RAW, some common tweaks include:
ColorChecker calibration — good practice to keep the albedo’ consistent as lighting changes throughout the day
Vignette — if you use a singular ring flash, the edges of the images tend to be consistently darker than the centre. A simple reverse vignette can fix this
Exposure/Highlights — sometimes lighting changes and you forget to calibrate the camera. Adjust overly dark/bright images for better texture reconstruction
Vignette removal, before/after.
Things you shouldn’t do:
Use any lens-distortion correction
AI upscale/denoise—all can compromise alignment accuracy
Anything that moves pixels or invents detail can compromise the alignment process.
Brightness variance
It can be hard to avoid some exposure variation throughout a large, complex scan. There are ways to get around this properly, but it involves engineering, making it out of reach for most.
Major offenders that require you to adjust exposure by one or more stops are better off done manually on the raw image, as the only thing we can realistically get from automatic approaches is an improvement in the average image consistency.
Calibrate in Metashape
Metashape can attempt to auto-calibrate the white balance. It equalizes your images to some extent, but it won’t fix any major differences.
We found the best results using Tie points as source data, as using the model tended created dark gradients and at times completely broke some images.
Try both and see how it works for you.
Select all images → Tools → Calibrate Colors
SOFTWARE
Metashape
Our primary photogrammetry engine has been Metashape for quite some time.
Why we rely on it:
It’s straight forward
Handles the variance of imperfect, real-world datasets exceptionally well
Helped reduce throwaway scans to nearly zero
Includes rolling-shutter compensation, which can be a literal scan-saver when capturing with drones in rough conditions
Trade-offs:
It is not a one-click solution
Processing times are higher and includes some tedious clean-up tasks
More automation options would significantly reduce the time spent
Reliability, predictability and consistency is king for any production pipeline.
IDENTIFYING PROBLEMS
Confidence
Confidence view practically tells you how clean your scan is. It’s the first one to check after generating your model as some alignment issues are hard to spot without close inspection.
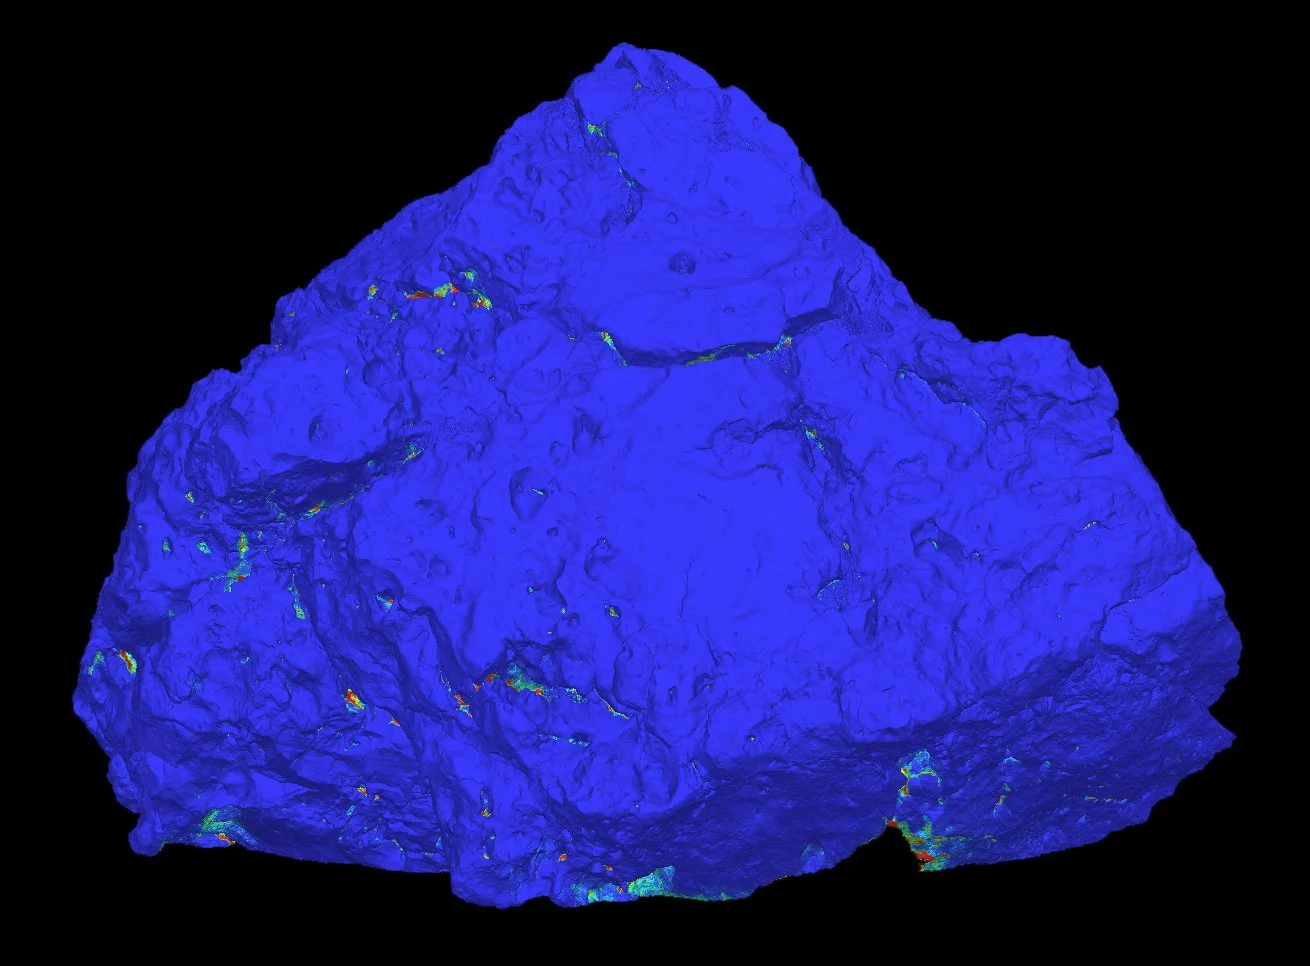
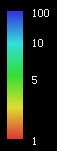
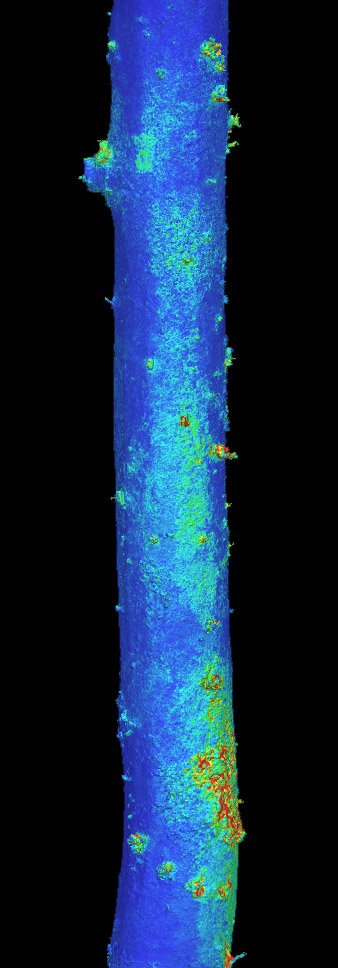
Usually things work out, but sometimes they don’t..
Optimizing cameras won’t fix poor alignment
We never found point cloud optimization helpful in fixing major alignment errors.
We’re not saying it can’t help fix minor issues, but if your scan has serious issues, optimizing cameras almost certainly won’t help.
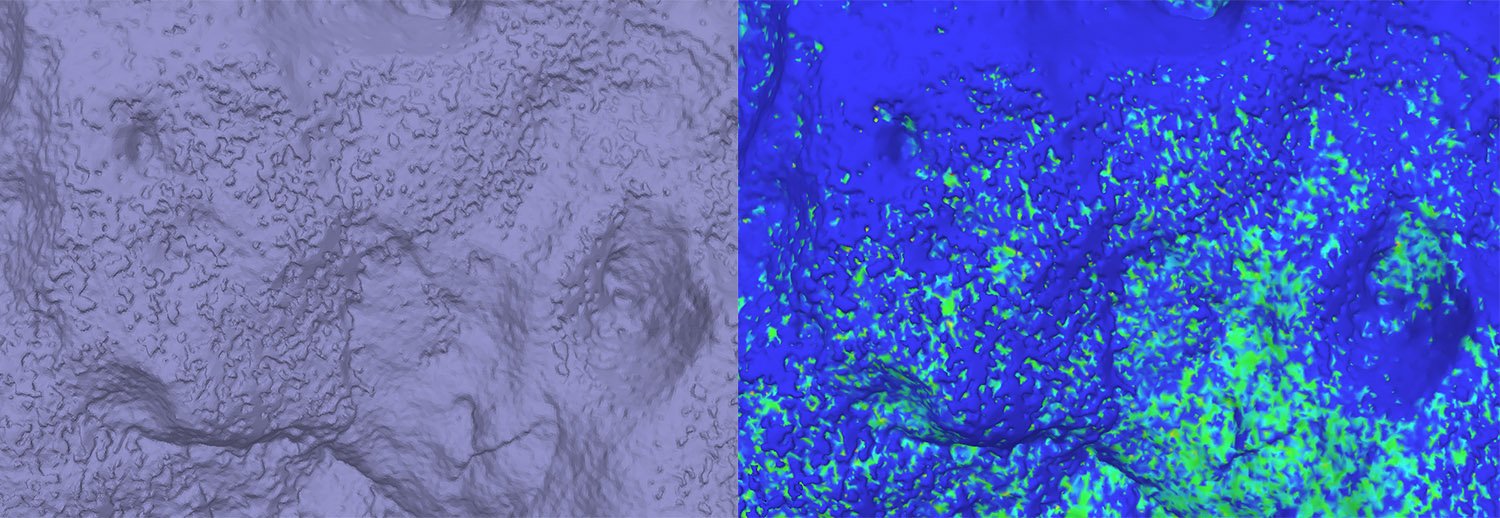
Minor alignment issues as above may benefit from point cloud optimization, but it won't fix serious misalignments
IDENTIFYING THE CAUSE
Blurry images
Images with motion blur can cause alignment to trip up. Metashape has a feature called Estimate Image Quality which can be useful to help guide you. The results can be inconsistent however, so double check low scoring images before disabling.
If you are shooting using a shutter-speed of less than 1/160 we would advise to increase it, even if that potentially means more noise.
Using 1/250 to 1/320 has practically eliminated motion blur for us.
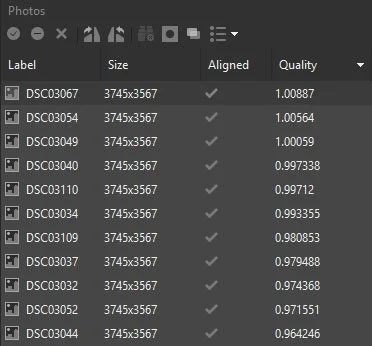
Sort by lowest to highest and manually inspect the standouts
Poor overlap/missing coverage
Making sure to do consistent passes is fundamental to photogrammetry. That doesn’t mean you will always do a perfect job, and sometimes slip-ups happen.
This is one of the reasons we always bring a few laptops on-location to verify our coverage, especially for complex scans with thousands of images.
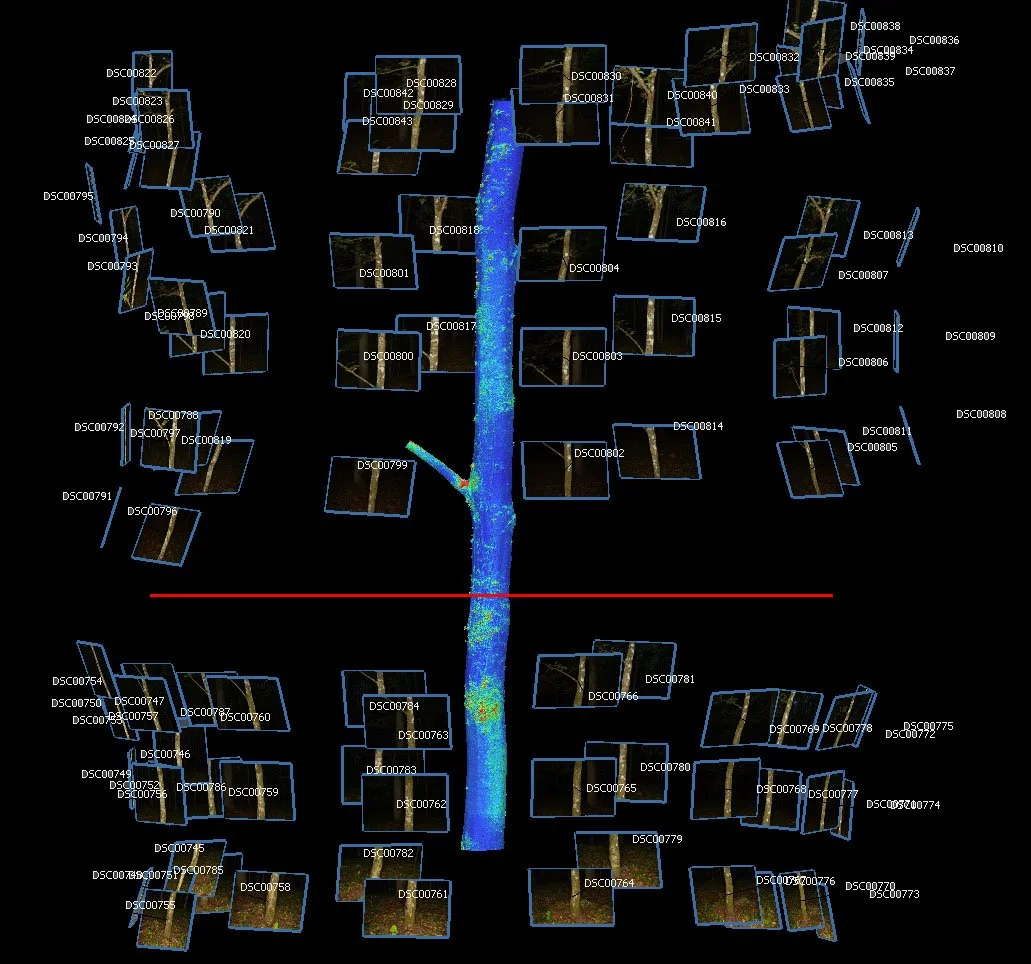
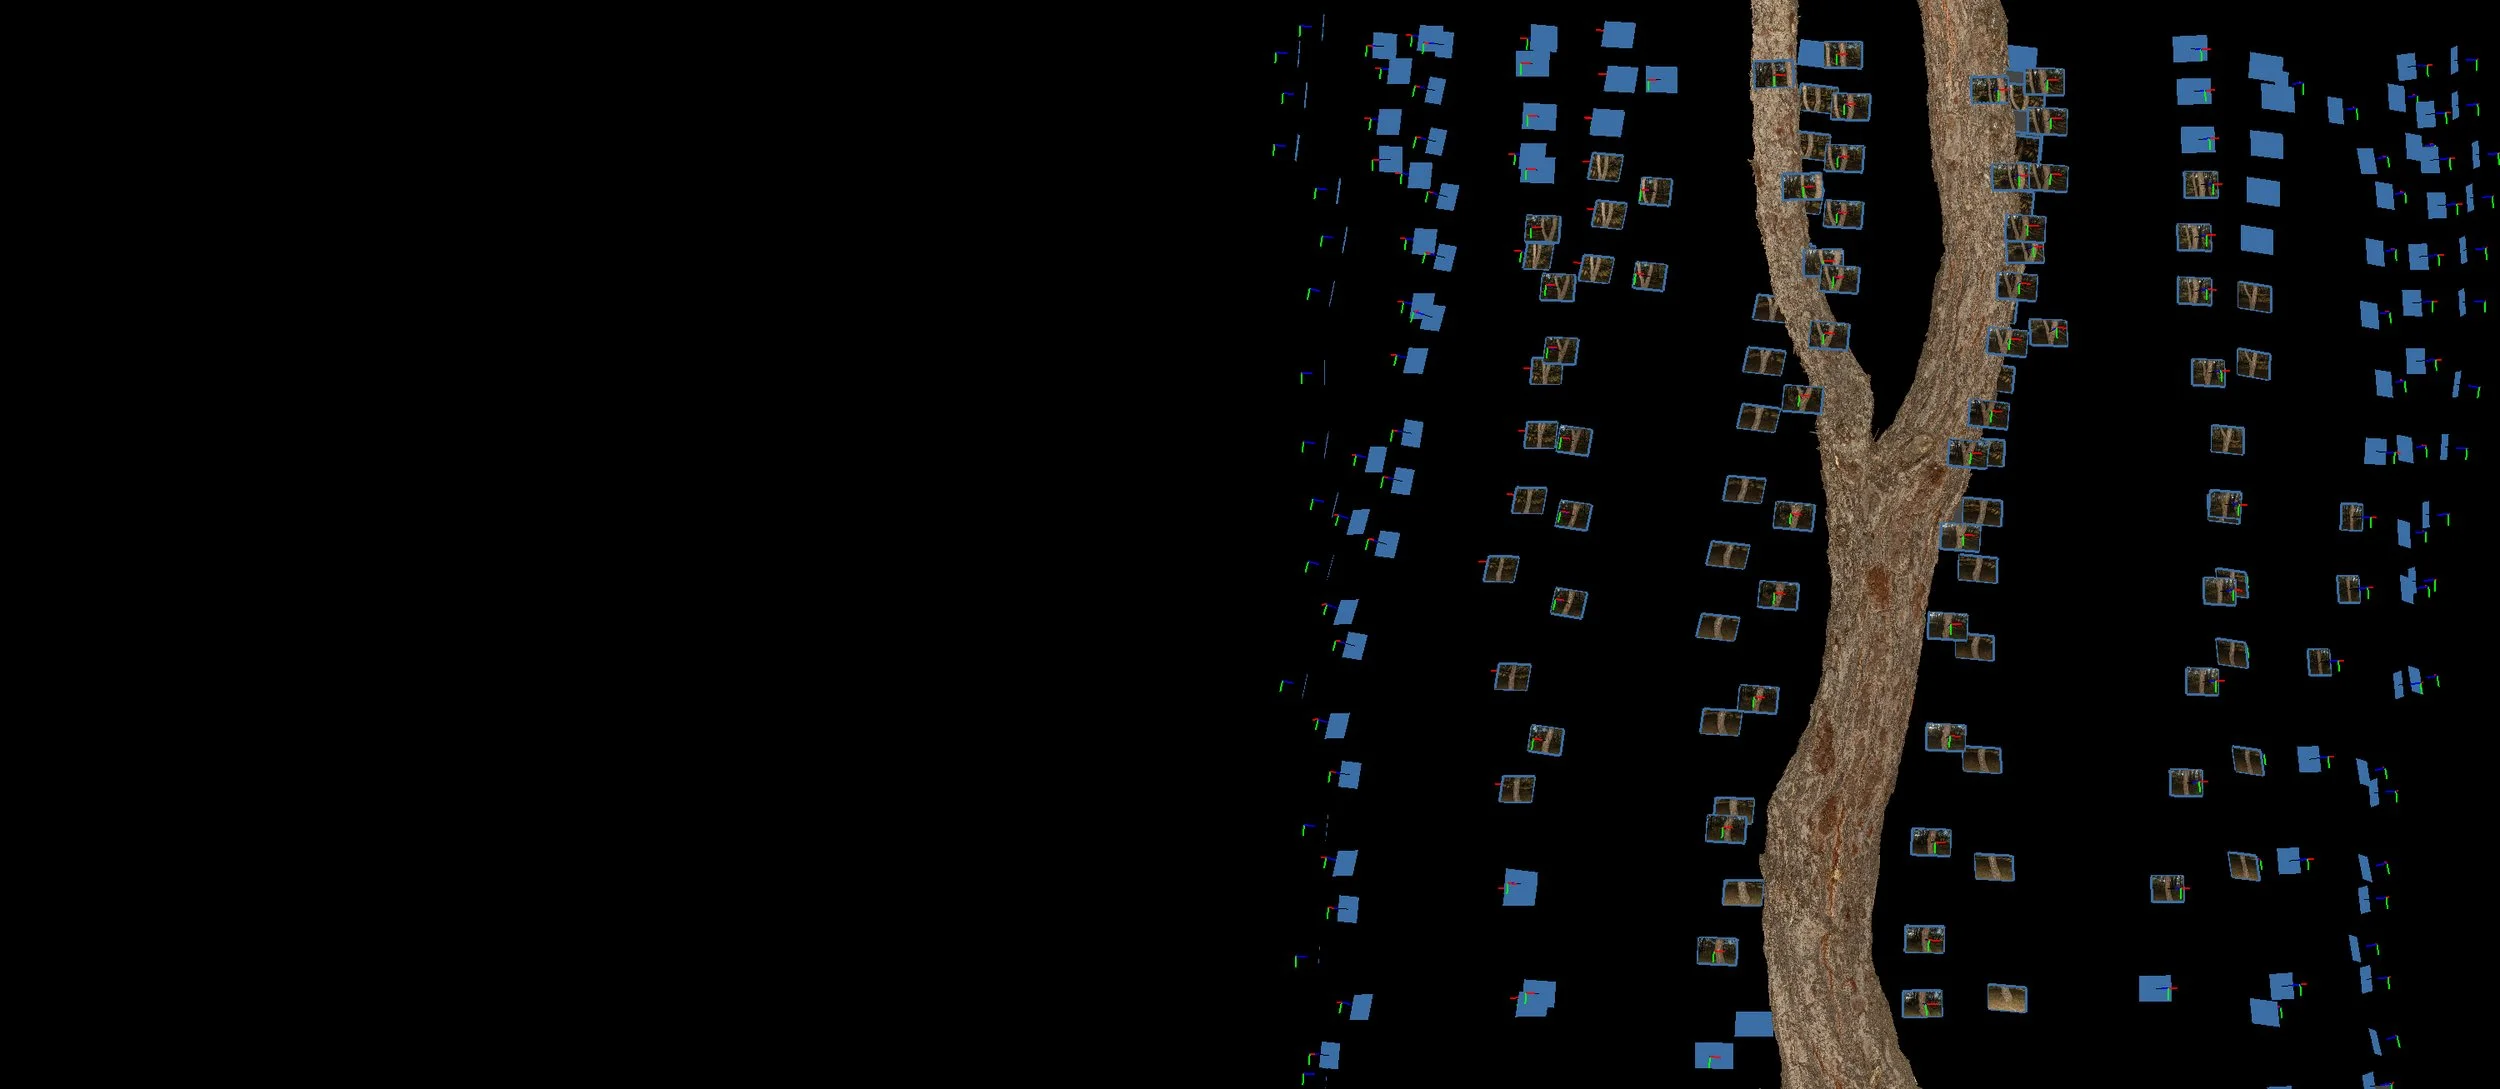
As shown above, insufficient horizontal overlap and a gap between vertical passes can lead to serious reconstruction issues.
A systematic approach helps avoid these gaps. Choose a recognizable starting point, move around the subject in a consistent direction, and complete each static pass before moving.
Following a repeatable route makes it easier to keep track of what you’ve covered, identify missing angles, and pick up where you left off after an interruption.
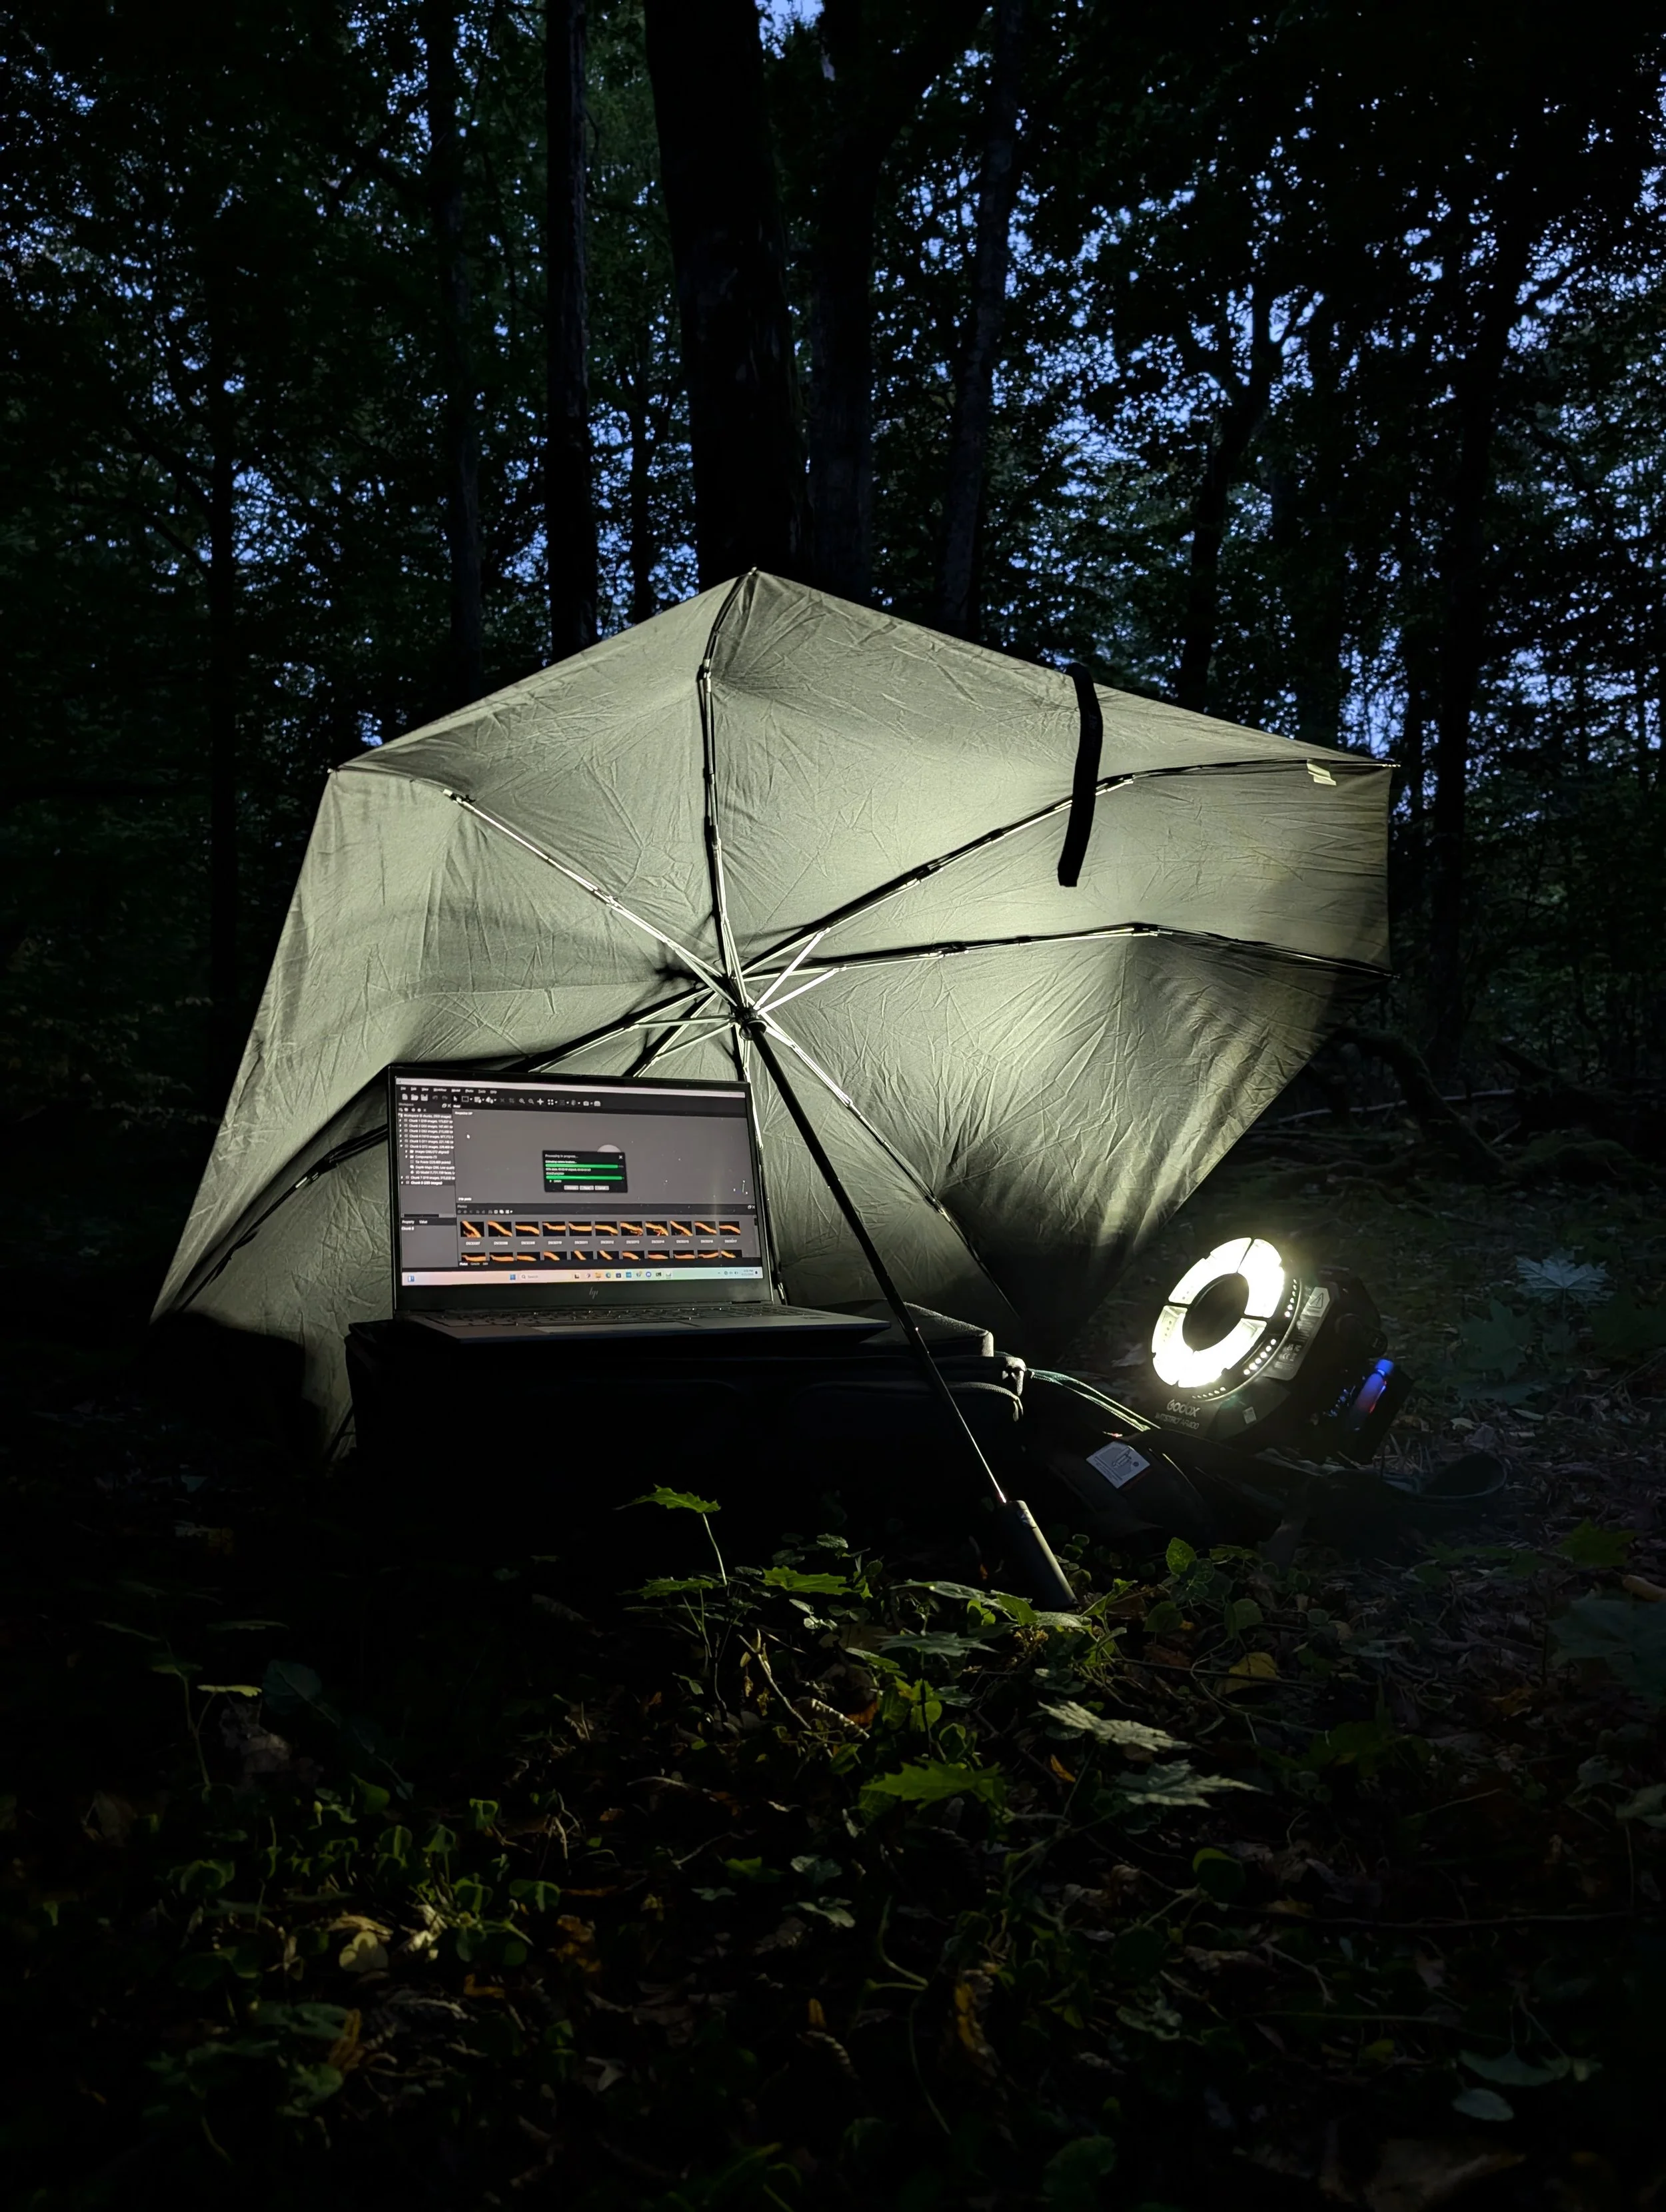
Some quick checks on location can save a return trip—or an unusable scan.
IMPROVING ALIGNMENT
Despite doing our best mitigating this through good on-location practices, sometimes things just don’t work as expected.
There are a few tricks we can employ to try and save it.
Lower alignment quality
Using the “Highest” accuracy for aligning can produce worse results as the image is 2x upscaled, while High uses native resolution.
If you are having minor alignment issues, or some of your images won’t align, lowering the alignment quality to medium or even low can help, though we keep it on high unless there is a serious issue.
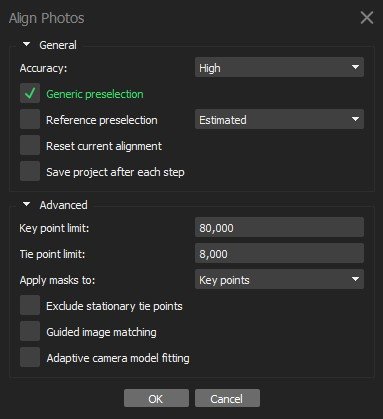
Increase key/tie point limits
Increasing the key point limit increases the potential amount of features detected per image, while tie point is the amount of features used for alignment.
For complex, high resolution scans—or scans struggling to align—increasing these limits past the default value can help create a tighter point cloud.
We have found these settings to be a good middle ground:
Key point limit: 80000
Tie point limit: 5-10000
Keep in mind that increasing this will increase time and resources required for alignment.
Object masking
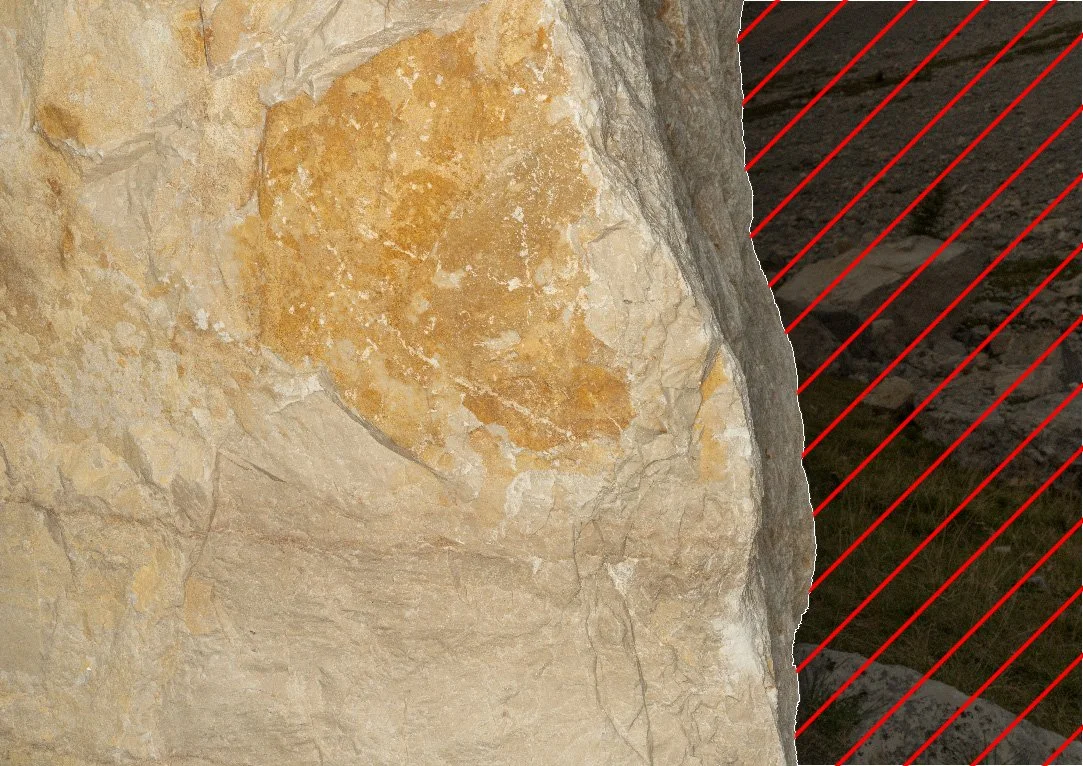
This method creates a mask for your source images of the exact subject you are scanning, and may help creating tighter alignment. We have saved a few scans using this technique, so it’s worth trying, but it doesn’t always help.
It involves a few potential approaches, either:
Build a mesh on a lower quality and automatically create the masks in Metashape
Import custom masks
Generate image masks using AI in Metashape
Works well for things with a solid background, ie. turntable scanning. Far too unreliable to use for outdoor scans
In Metashape
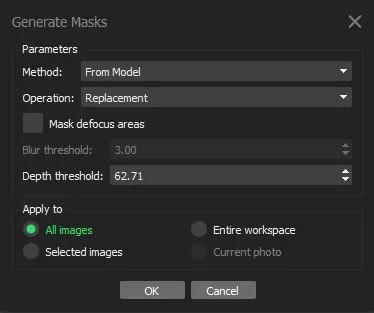
Right click on any image ➔ Masks ➔ Generate Masks
IMPROVING RECONSTRUCTION
If you find yourself in a position where alignment can’t improve, the only real option becomes to lower the overall quality of the model.
Lowering depth-maps quality
The higher detail settings you use to build your model, the more you expose alignment issues.
If your model has major alignment issues, lowering the depth maps quality downscales your image resolution creating a smoothing effect which helps hide surface reconstruction errors.
Ultra High → Low
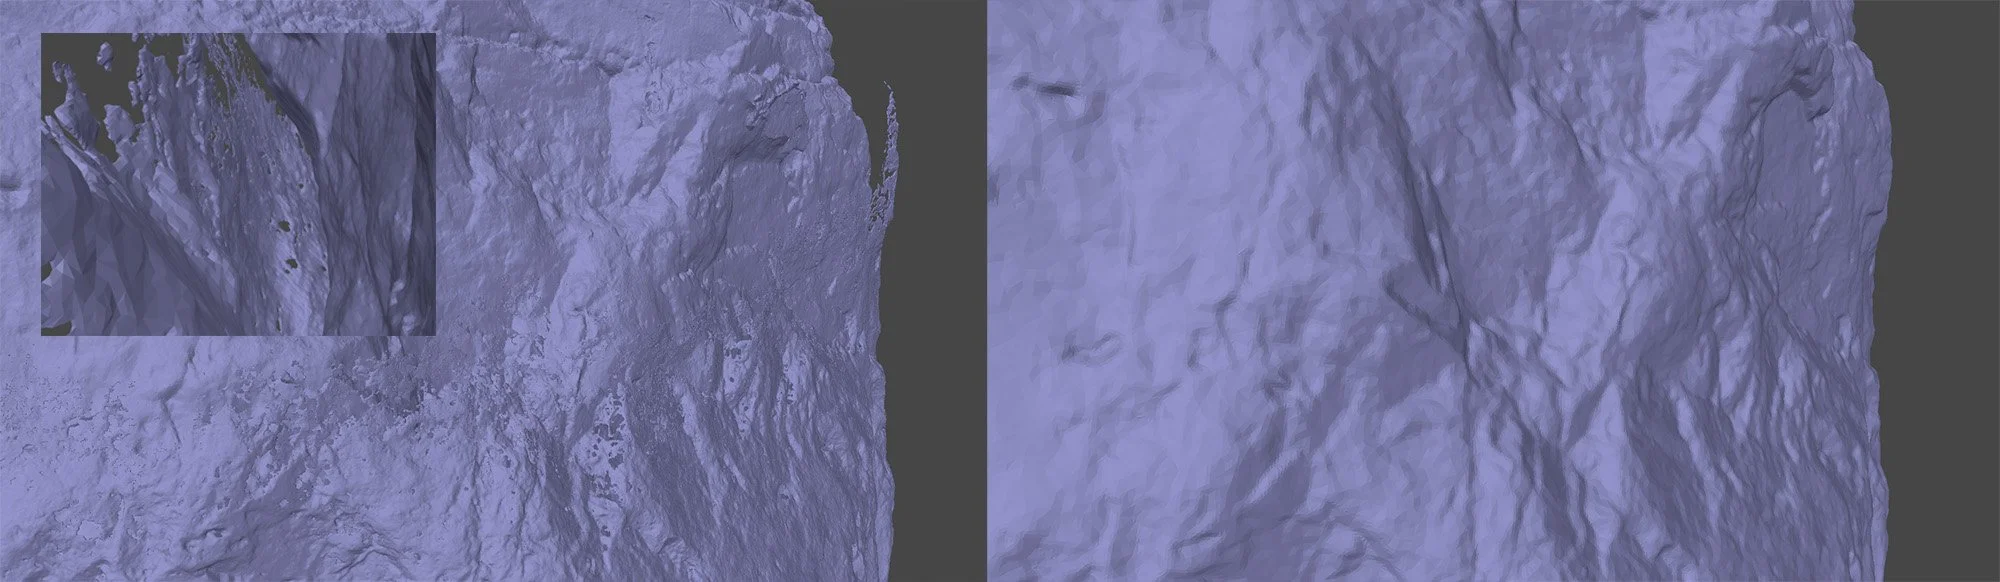
We will make a separate post looking into this exact asset as we also know the reason behind the poor alignment
A lot will depend on the exact alignment issue. Small surface defects can be fixed by processing on High, while serious issues as above may need Medium/Low.
As for the errors, given you always want your source Normal/Height to be baked from Ultra, the question becomes:
How visible are the errors
Is it worth the extra time spent fixing
Assuming the alignment errors on Ultra are only in certain areas, a method we have used is to:
Use a lower quality model to generate our lowpoly from
Bake both texture maps using both Ultra and a lower quality model without the errors
Blend both textures sets together, replacing the errors with lower quality texture data
Blend in/overlay additional data to sharpen up the lower quality areas
Final thoughts
Good capture remains the most reliable form of troubleshooting.
Consistent exposure, sufficient overlap and sharp, well-lit images will do more for alignment than any setting adjusted later. Image pre-processing should therefore be limited: correct what is necessary, but avoid anything that moves pixels or invents detail.
When a dataset does struggle, understanding why is only part of the job. Knowing what can be repaired, worked around or accepted becomes critical in production.
We can improve an imperfect capture, but we cannot replace reliable source data.
SERVICES
Let’s discuss Your Production
-
We develop complete natural environments around your art direction and production requirements.
From field-capture and asset creation to scene assembly and lighting, we bring the individual elements together into a cohesive environment, with detail and performance tailored to how it will be used.
-
We create trees and foliage with close attention to branching structure, silhouette, scale and the character of each species.
Our foliage is developed around your art direction and technical requirements, balancing the detail needed on camera with the performance demands of your project.
-
We capture natural assets and surfaces at a range of scales using:
Handheld photogrammetry
Drone photogrammetry
Photometric stereo capture
We process the captured data into usable geometry and textures, with clean-up, detail levels and output formats tailored to your production requirements.
-
We optimize assets and environments around your target hardware, frame-rate goals and memory budgets.
Complexity is adjusted to balance performance with the visual detail needed for your production.
-
We help integrate our assets and environments into your existing project, working with your team’s requirements for asset organization, engine compatibility and delivery formats.
This reduces the additional preparation needed after handover and helps your team put the content to work.
Whether you need a hero location, a complete environment,
or production support, we'd love to discuss your project.
Whether you need hero assets, a complete environment, or production support, we'd love to discuss your project.
Start a conversation
Tell us what you’re building and where you need support—from individual assets to a complete natural environment.
Prefer email? — services@apexnature.studio