
BUILDING REAL-TIME NATURAL ENVIRONMENTS — PART 05
Building better scan textures
Preserving captured detail while reducing processing time.
BLENDING METHOD
Mosaic vs Natural
There is a new texture blending method called Natural which aims to preserve more detail resulting in a sharper albedo.
It has some issues:
It’s incredibly slow compared to Mosaic
It creates badly distorted texture data at certain angles
The sharpening, while nice in some places is overdone in others
The out-of-focus feature rarely seems to make a difference
For most intents and purposes, Mosaic blending will work just fine.
Notice the localized distortion when using Natural
While Natural is sharper, this sharpness can be achieved—with more control—using external upscaling tools such as Topaz Gigapixel.
Maximizing source resolution
When building your Albedo (Diffuse map) on your source scan, pay attention to the resolution you are building at and the amount of pages. At this stage, the goal is to achieve max resolution, as this will be reprojected onto your lowpoly later.
We tend to bake Albedo at 16K using 1-4 pages, then bake it down to a single 16k on the final asset. While 16K is overkill for many use cases, it can be useful for hero assets, and lowering the resolution as always an option.
More pages = more textures = more potential resolution
A note regarding downscaling
With such a high base resolution, if you think you may have to do 2-4x (+) downscaling, pay attention to the padding you use when packing your UVs. If you pack them too tightly you will introduce seams at the UV boundaries upon significant downscaling.
Speeding up texture building
The texture blending stage relies on GPU to resolve quickly, and can require a lot of VRAM. If it runs out, it will switch to using CPU to complete the blending process, taking ~10x longer.
On a 4090 with 24gb, the limit is about 100mil tris. Knowing this, we can simply create a decimated version of the highpoly and bake the albedo with it as source.
Be careful not to decimate so much that you start messing with the shapes. You still have to bake the other texture maps using the original highpoly and too much of a difference could introduce texture alignment inaccuracies.
Some more concrete time comparisons can be found here.
Save hours in processing time by using a lighter mesh to bake Albedo. Ultra high detail mostly benefits Normal/Height.
Focus masks
Depth of field can be an issue for texturing building, and is practically impossible to avoid in some shots, no matter how high you crank up your aperture.
Usually, this is not a major issue, but in some cases—especially when maxing out the potential resolution of a scan—it can be noticeable.
A focus mask aims to exclude the out-of-focus parts of an image during texture building.
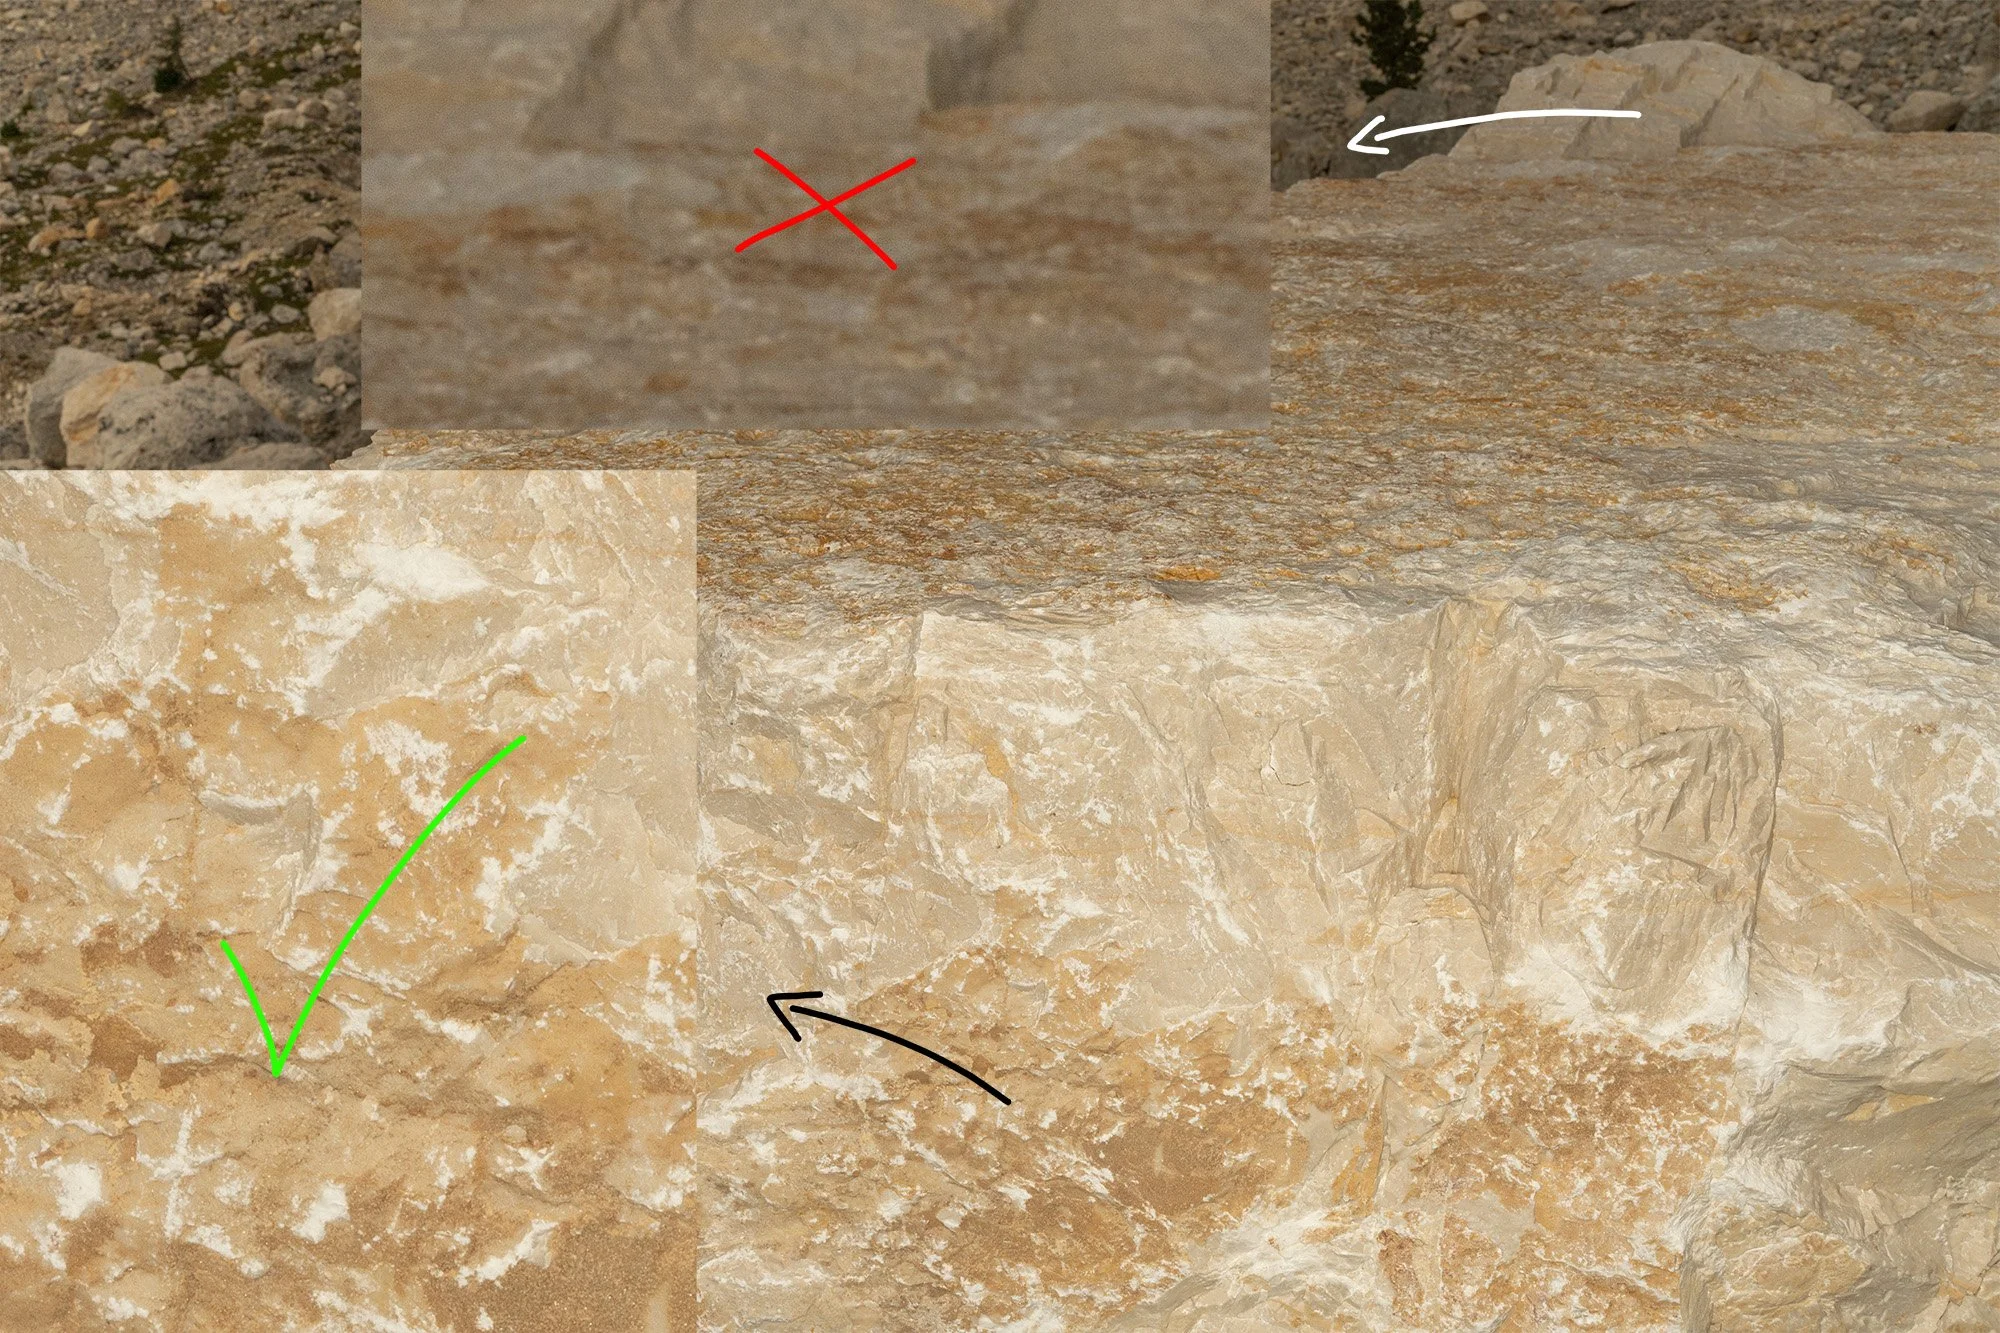

This process can be automated, for example using “Focus Area” feature in Photoshop combined with actions, however the results can sometimes be a bit hit and miss, especially as it can flag areas that are sharp but low on features.
Ultimately, the success of using the focus mask approach will depend on the accuracy of your masks as if done improperly it can outright make things worse.
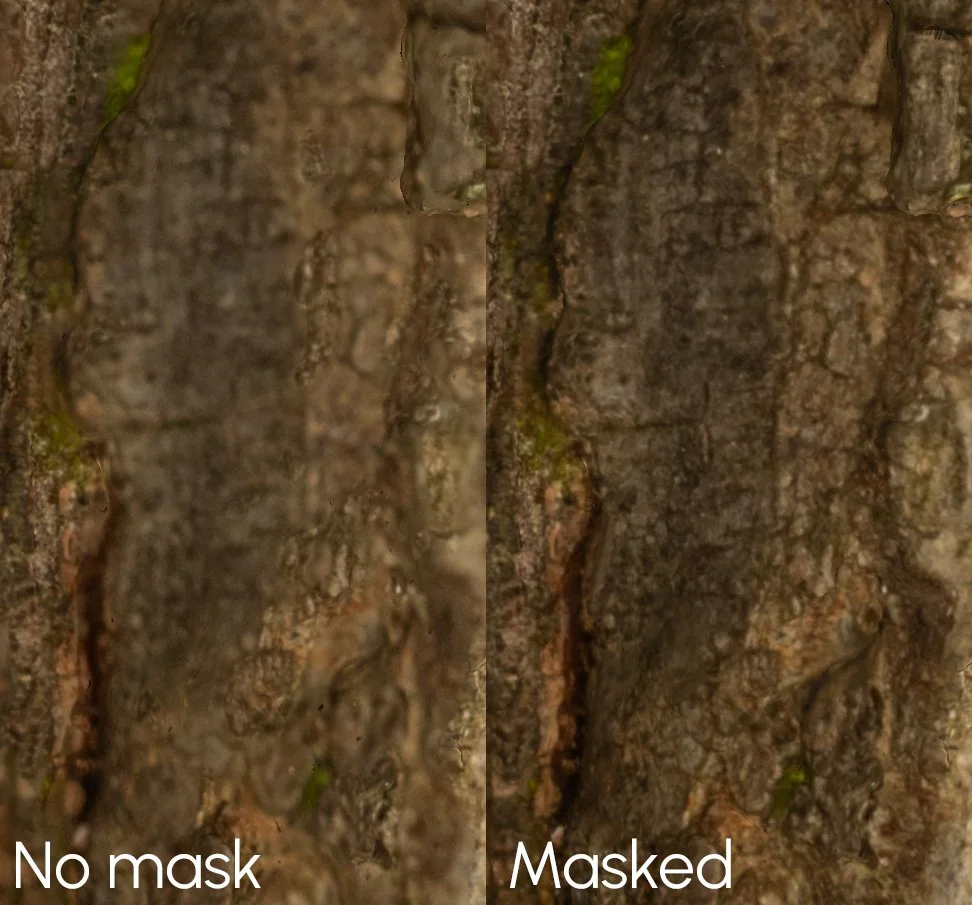
Importing custom masks
When naming your masks, make sure it is identical to the source image.
If your image is named img1, your mask should also be named img1. You can add extensions such as _mask, just as long as the filename template is updated accordingly and the file format corresponds.
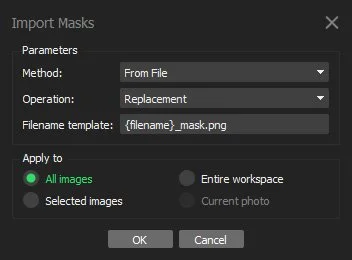
Right click on chunk ➔ Import ➔ Import Masks
Keeping missing textures visible
Avoid using any feature that fills/pads areas with missing textures as it’s practically only soft color gradients. There are far better ways to fill missing areas with matching texture data.
The missing areas serve as an easy mask to know where we have to fill texture.
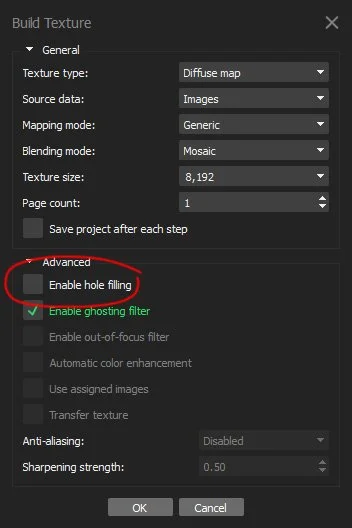
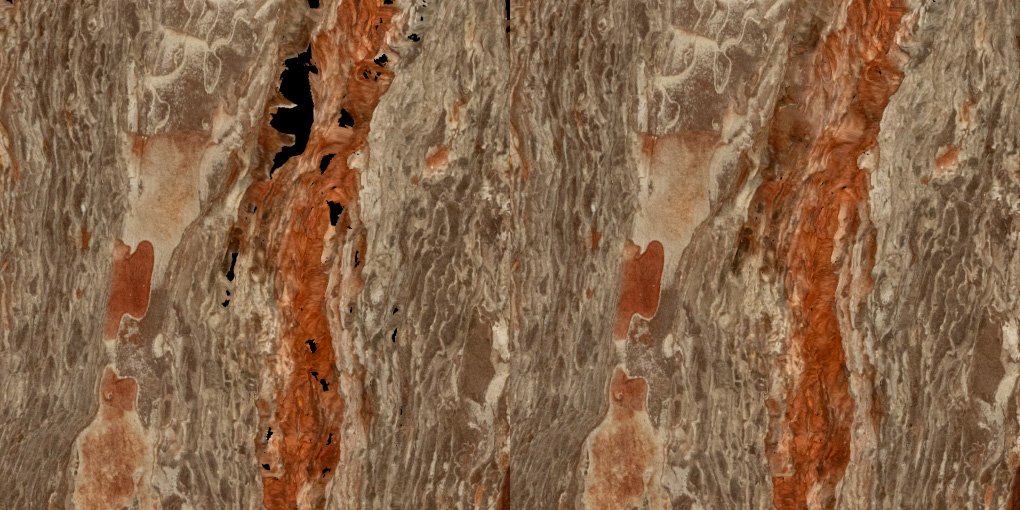
Before/After texture fill
More on texturing
We have shared some more insight relating to texturing in our Aerial Photogrammetry study, and suggest checking it out if you haven’t already.
Final thoughts
At this stage, our goal is to carry the useful detail from the capture into a clean, high-resolution texture source. This gives us flexibility when baking the final asset, whether it needs to hold up in a close shot or use smaller textures to meet a tighter memory budget.
Achieving this consistently means balancing source resolution, processing time and targeted clean-up. Keeping the workflow efficient leaves more time to inspect and refine the result. Across an entire environment, those savings add up—and make it more practical to maintain a consistent level of quality across the assets.
Preserve detail in the source, then tailor the final textures to the production.
SERVICES
Let’s discuss Your Production
-
We develop complete natural environments around your art direction and production requirements.
From field-capture and asset creation to scene assembly and lighting, we bring the individual elements together into a cohesive environment, with detail and performance tailored to how it will be used.
-
We create trees and foliage with close attention to branching structure, silhouette, scale and the character of each species.
Our foliage is developed around your art direction and technical requirements, balancing the detail needed on camera with the performance demands of your project.
-
We capture natural assets and surfaces at a range of scales using:
Handheld photogrammetry
Drone photogrammetry
Photometric stereo capture
We process the captured data into usable geometry and textures, with clean-up, detail levels and output formats tailored to your production requirements.
-
We optimize assets and environments around your target hardware, frame-rate goals and memory budgets.
Complexity is adjusted to balance performance with the visual detail needed for your production.
-
We help integrate our assets and environments into your existing project, working with your team’s requirements for asset organization, engine compatibility and delivery formats.
This reduces the additional preparation needed after handover and helps your team put the content to work.
Whether you need a hero location, a complete environment,
or production support, we'd love to discuss your project.
Whether you need hero assets, a complete environment, or production support, we'd love to discuss your project.
Start a conversation
Tell us what you’re building and where you need support—from individual assets to a complete natural environment.
Prefer email? — services@apexnature.studio